Balances
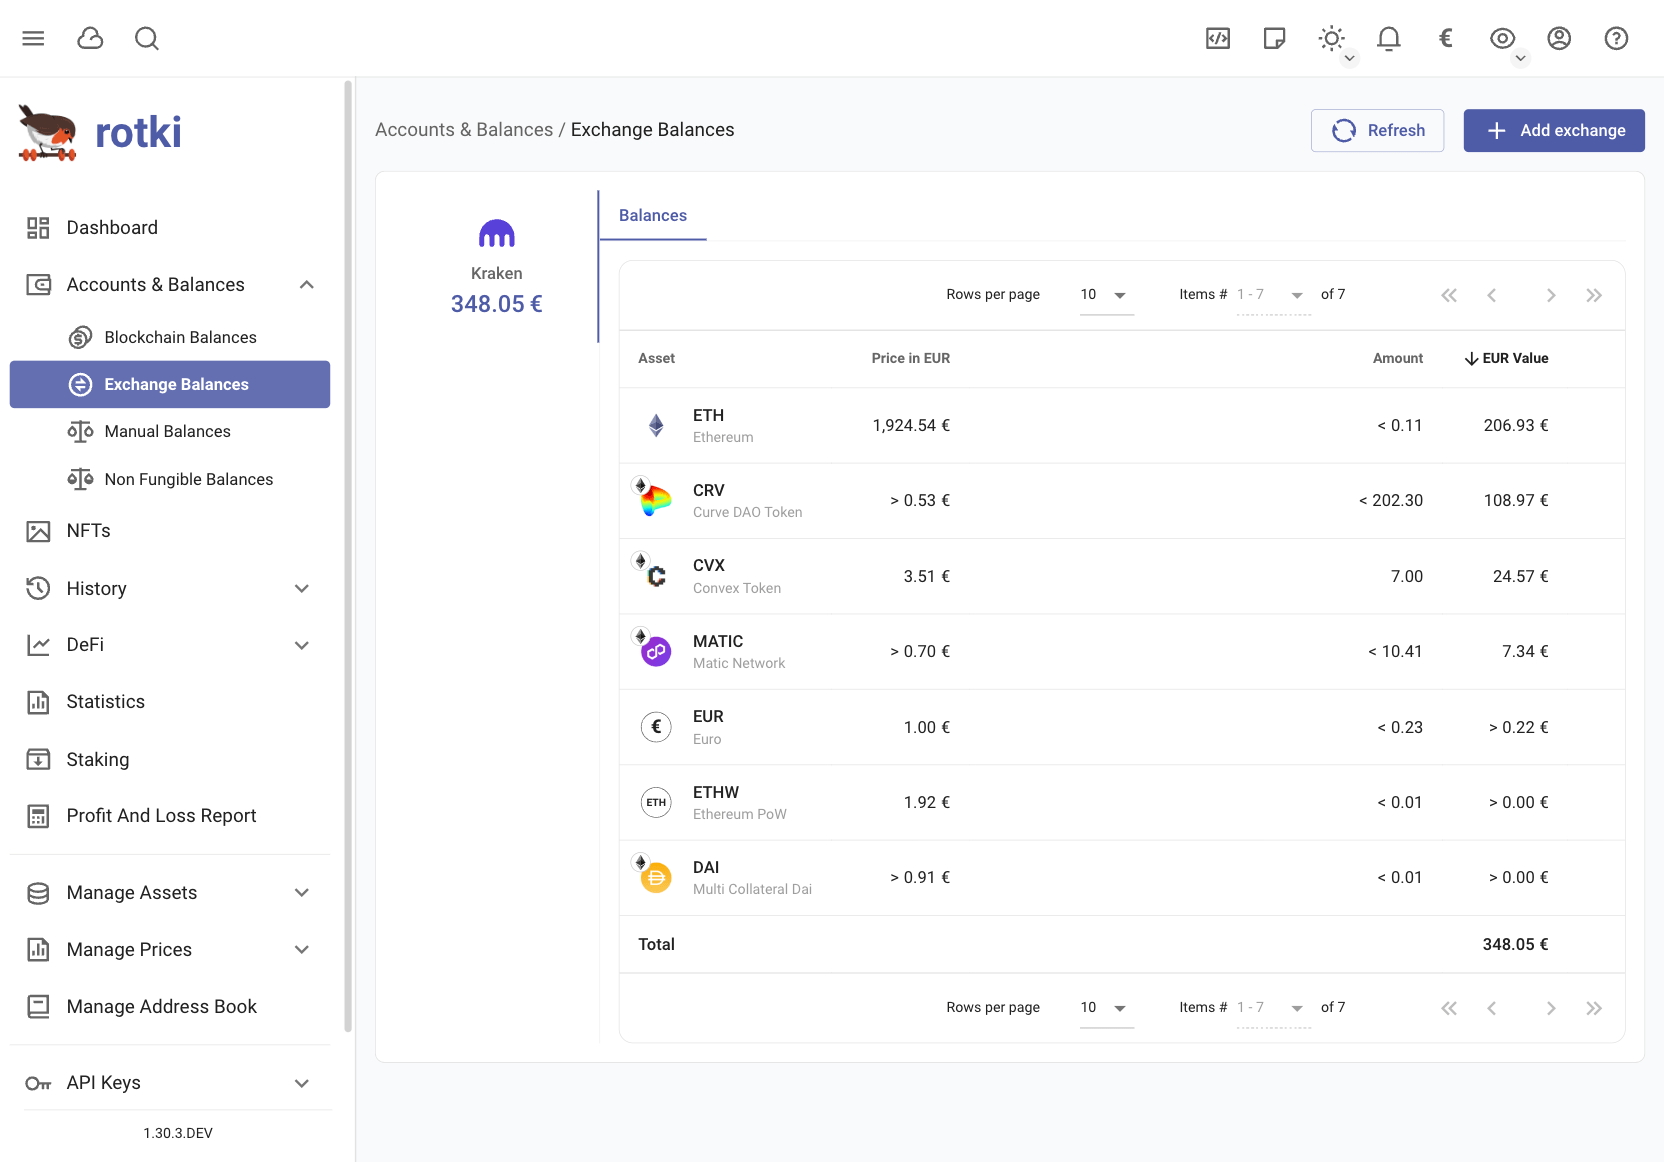
Exchange Balances
You can check all of the asset balances that you have in each connected exchange in the Exchange Balances sub-page. Clicking the Add exchange button takes you to the API Keys page where you can manage your exchange connections (see Exchanges API Keys).
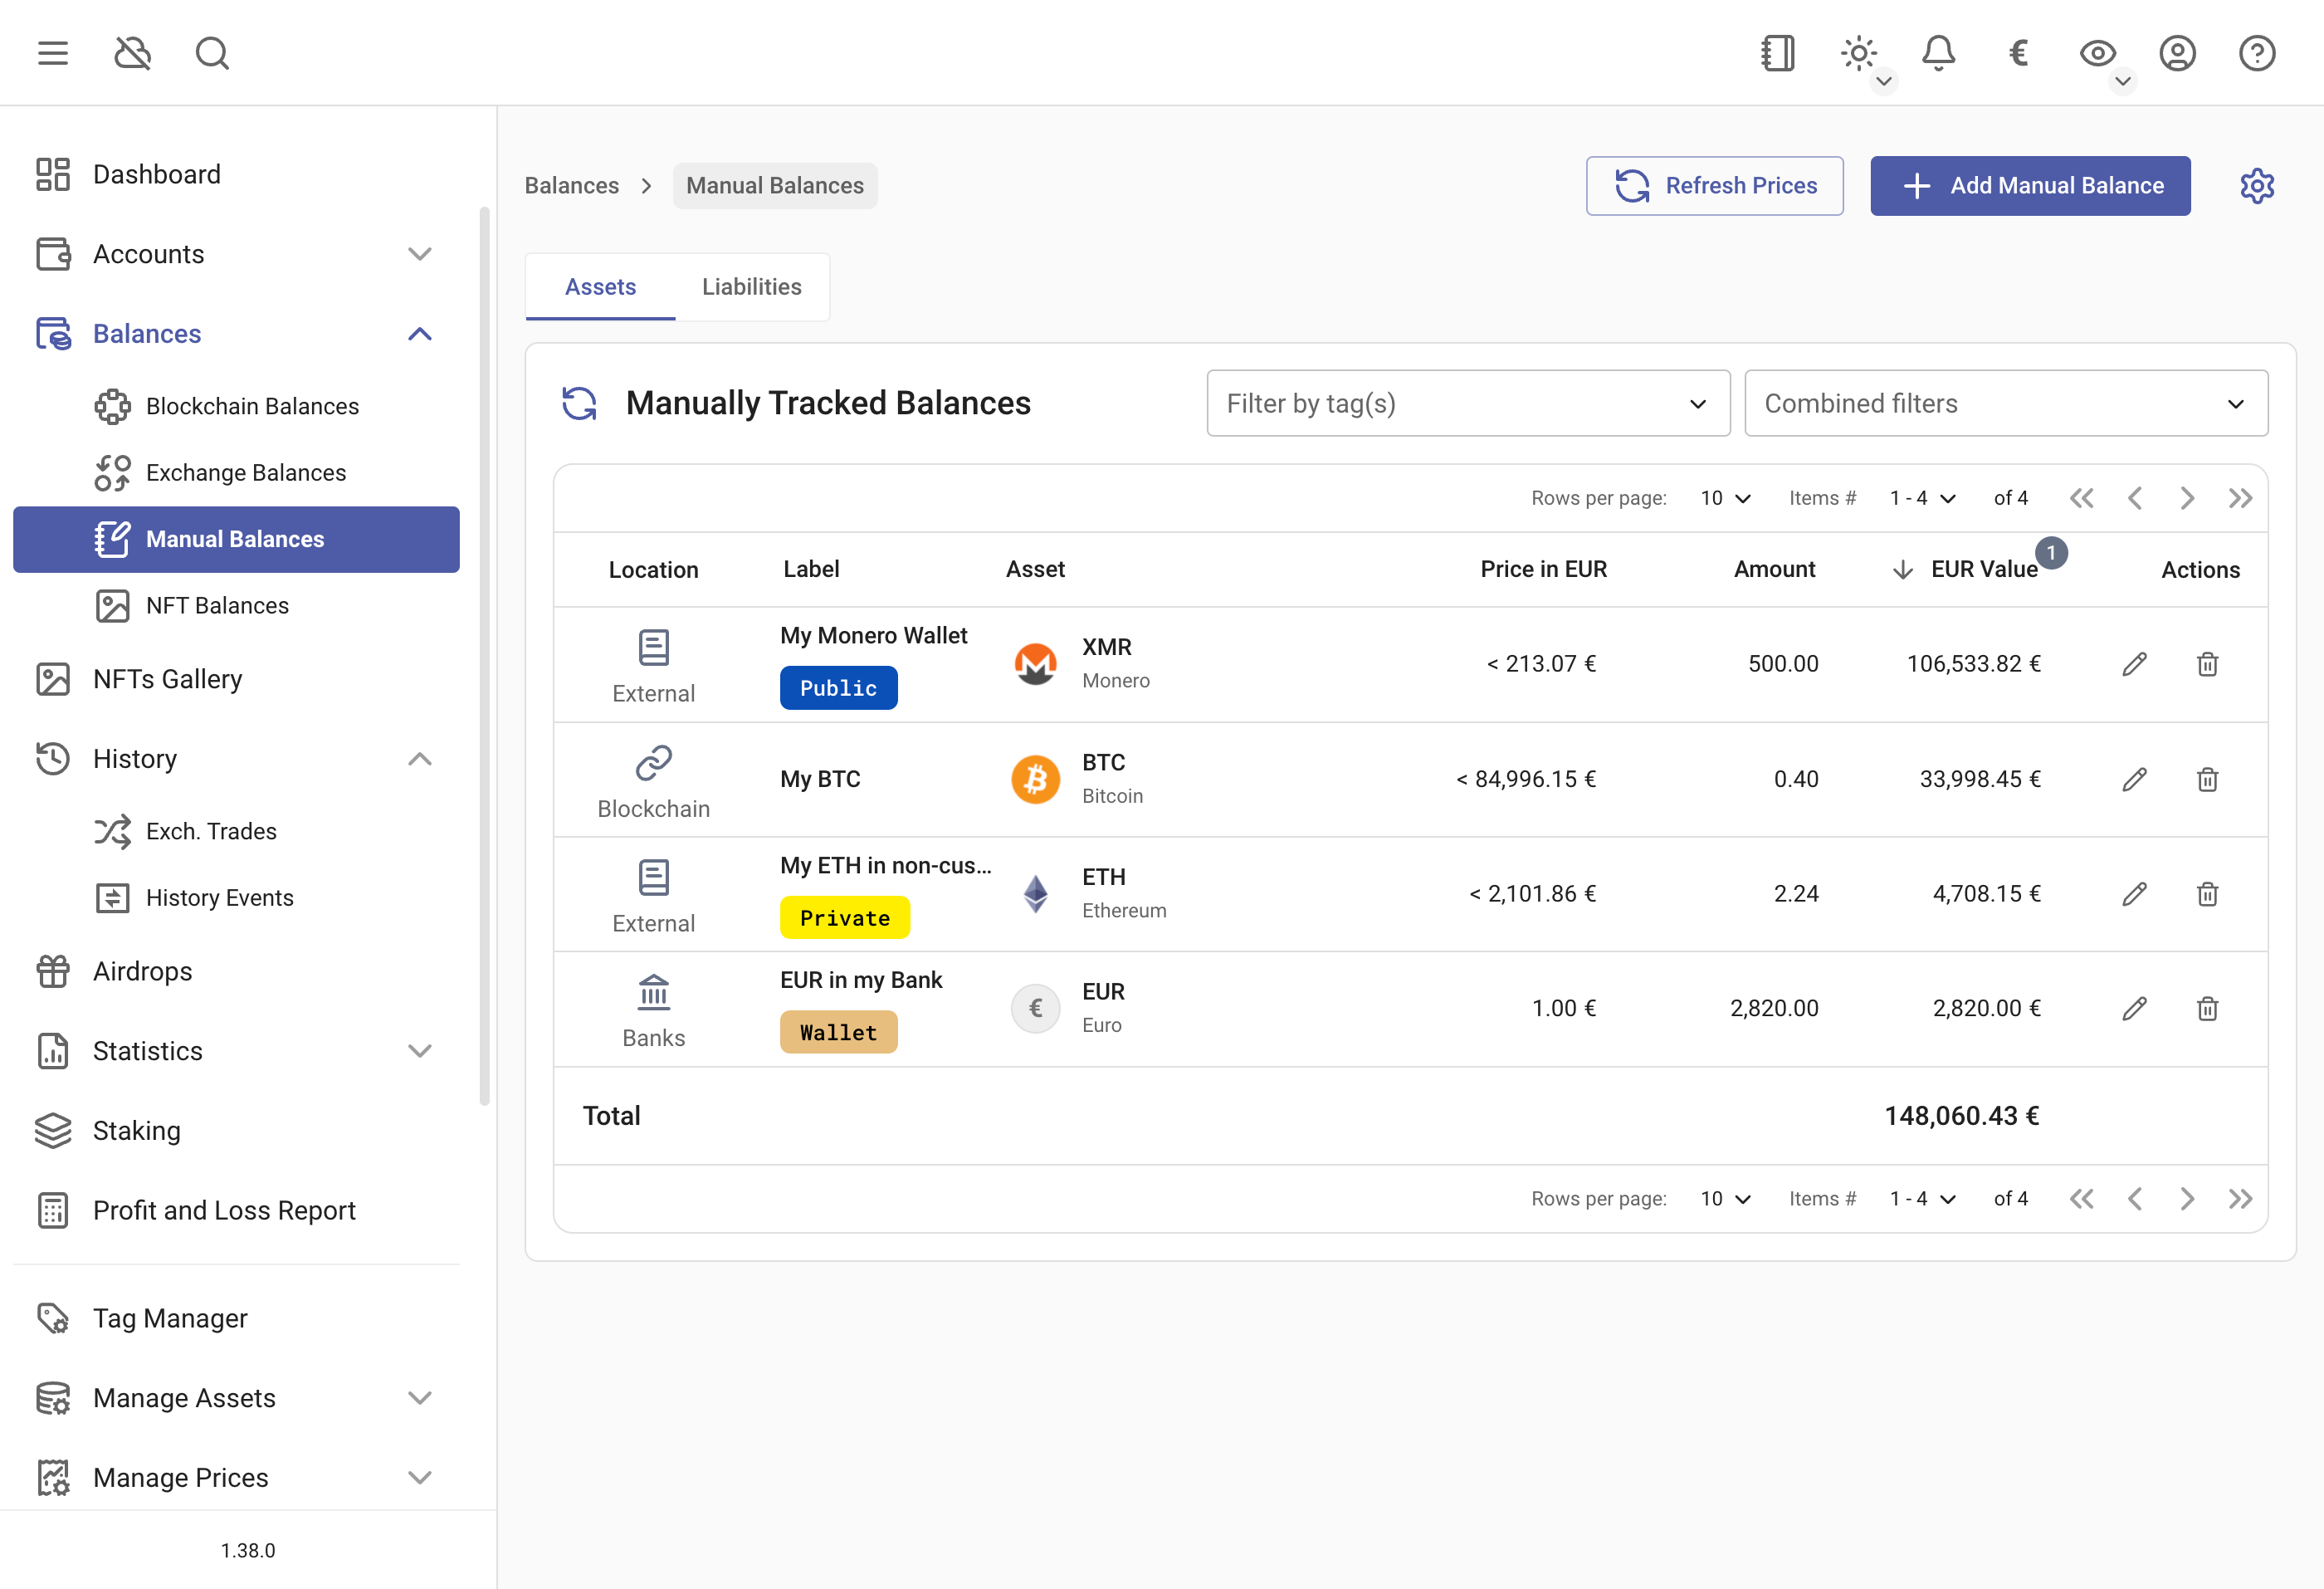
Manual Balances
You can add any type of asset to rotki, that may not officially supported yet. This includes things like:
- Real estate
- Stocks
- Assets from unsupported blockchains or exchanges
To add or edit a manual balance:
- Go to the Manual Balances page
- Click
Add Manual Balance(top right) - Add a unique label
- Select your asset from the dropdown
- Add any tags you want
- Enter the amount and location
You can also filter the manual balances by location, name or asset.
By pressing the edit button for the account you can also add tags to the blockchain account. If you want to create a new tag or edit an existing one you can open the tag manager and choose the name, description and colors of the tag.
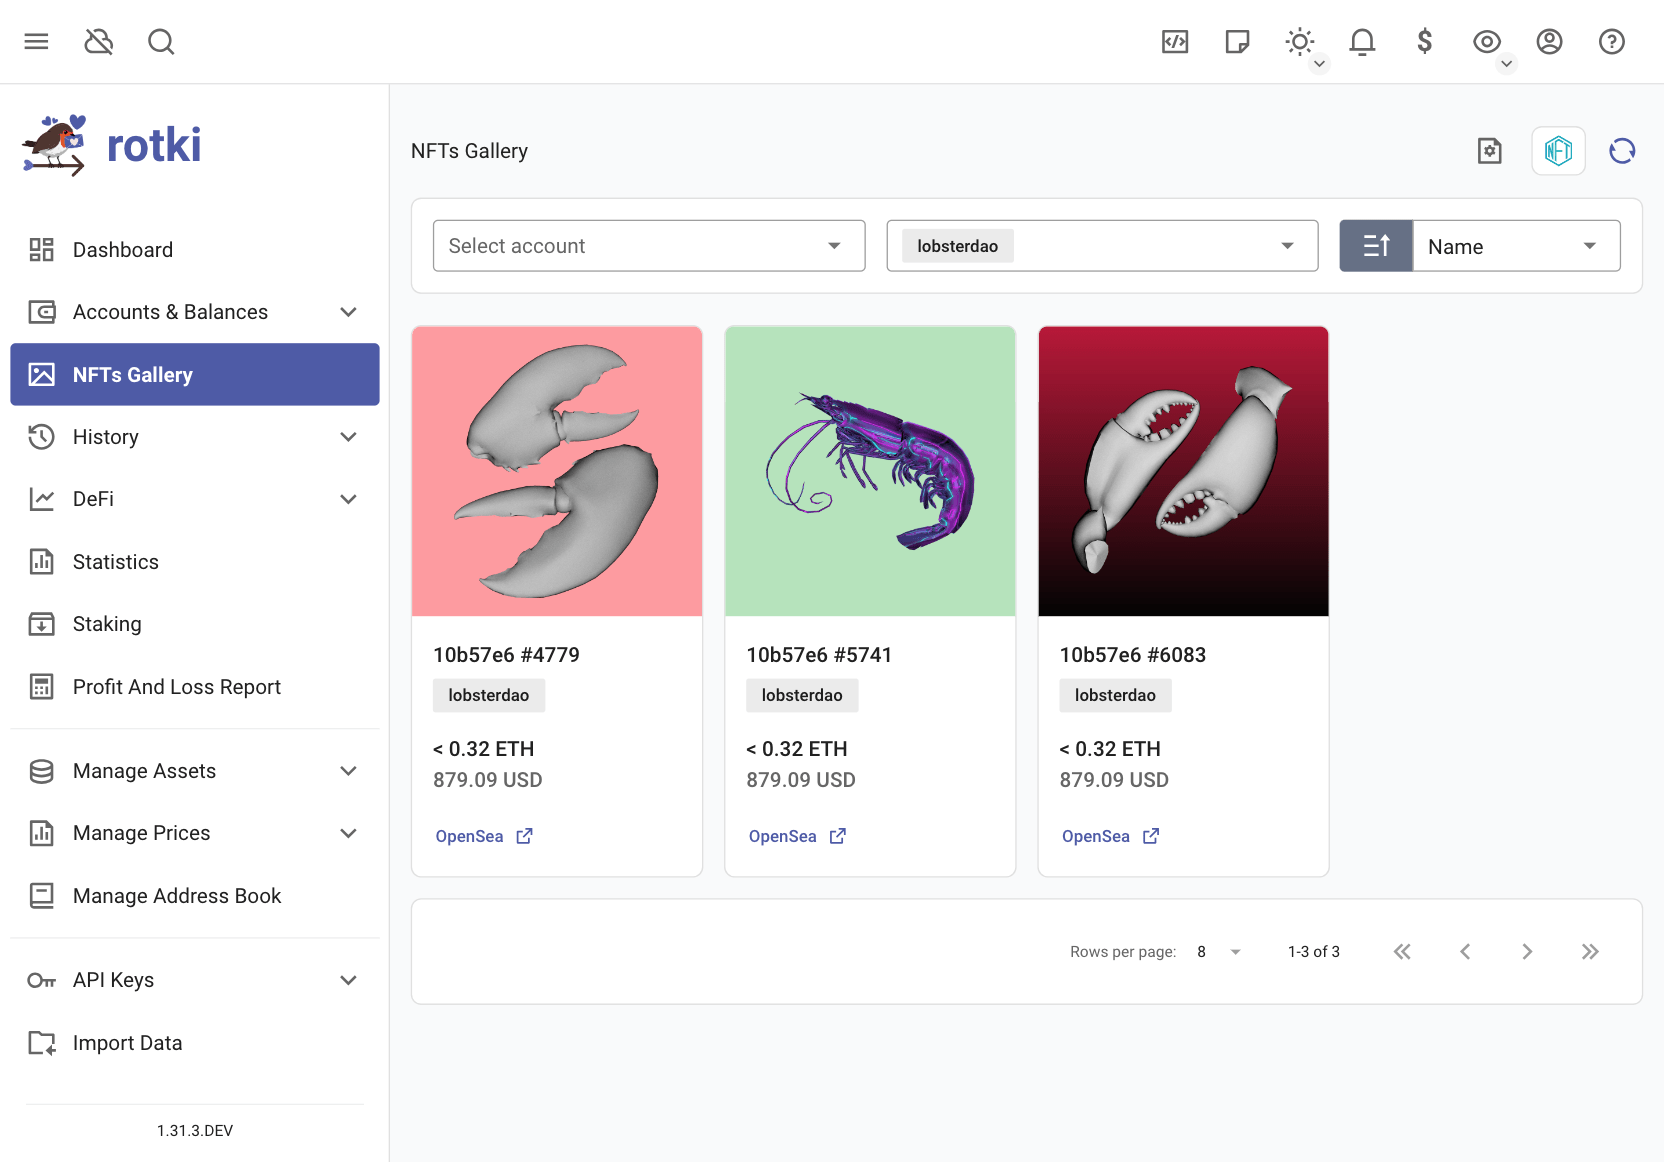
NFTs
rotki provides an NFT gallery where you can view the NFTs owned by your accounts.
You have an overview of the total value of your NFTs in the application dashboard, on the NFTs table.
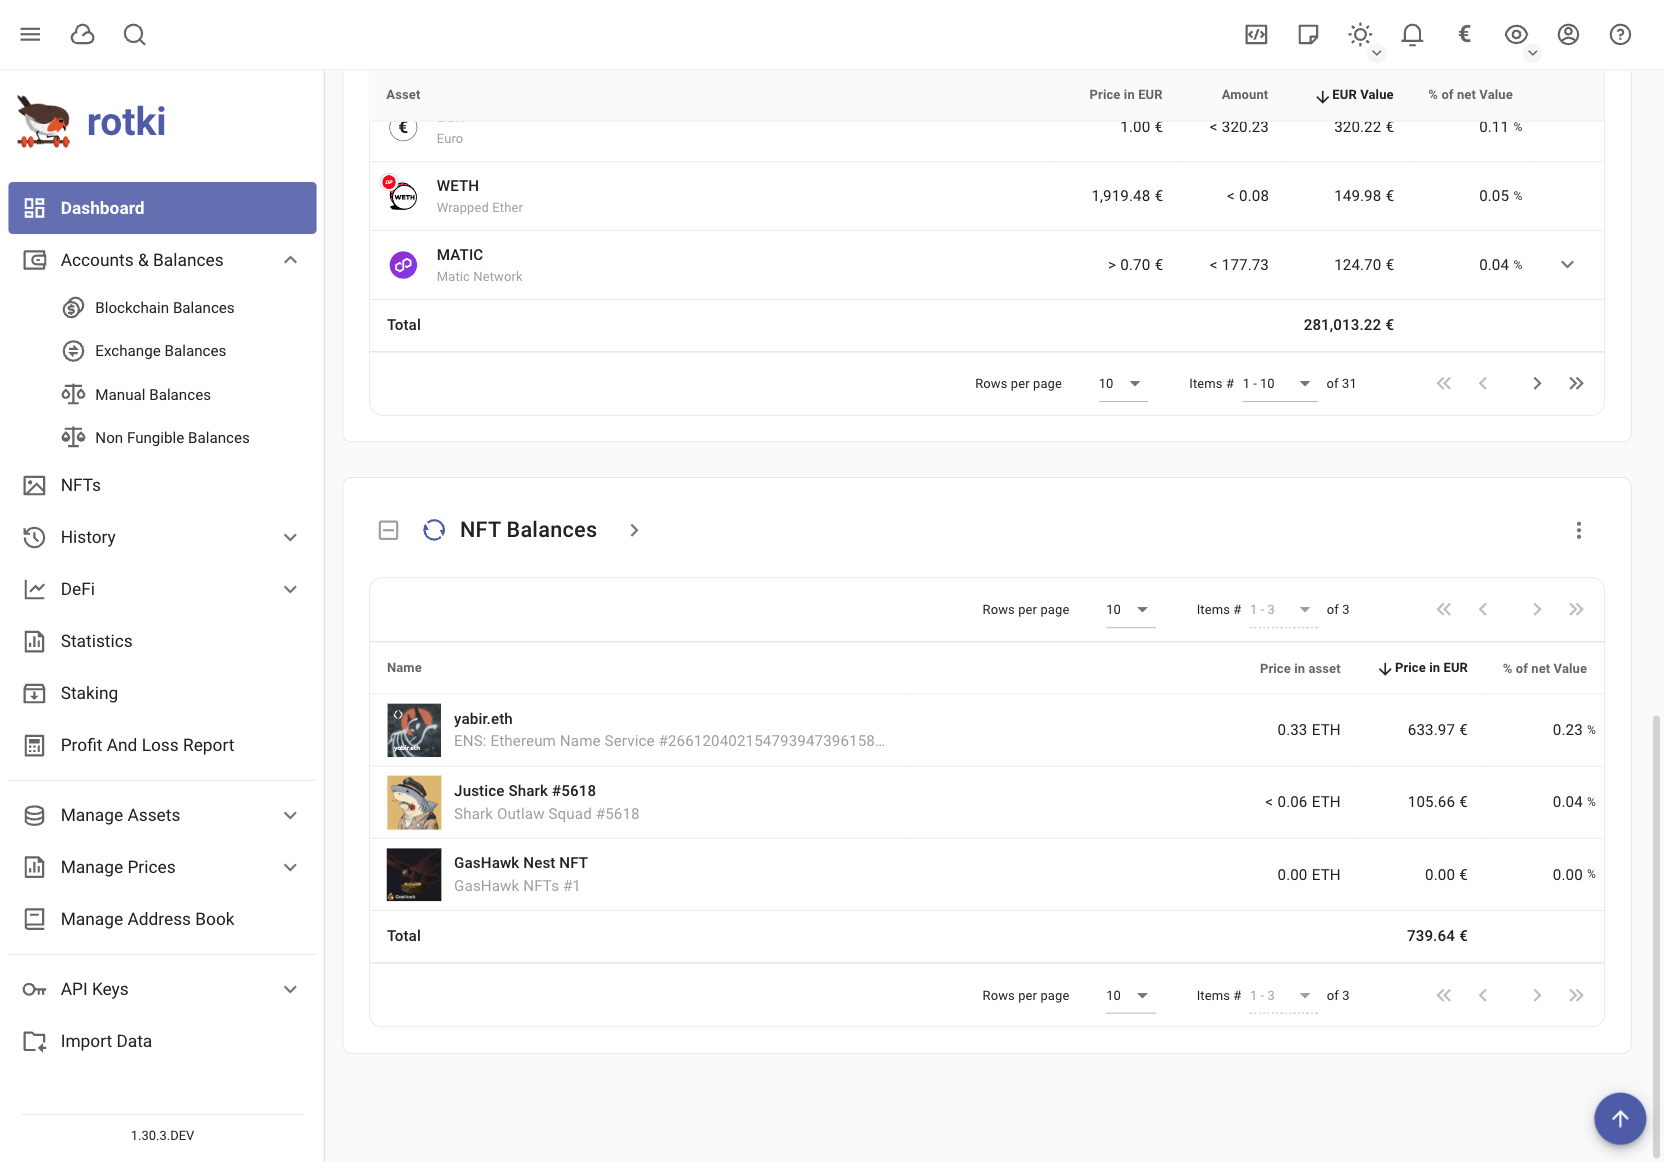
An estimation of the value of the NFTs you own is counted into your total net worth. The estimation strategy is currently the maximum of either the floor price of the collection or the last sale of the NFT. If a manual price has been given this is always preferred.
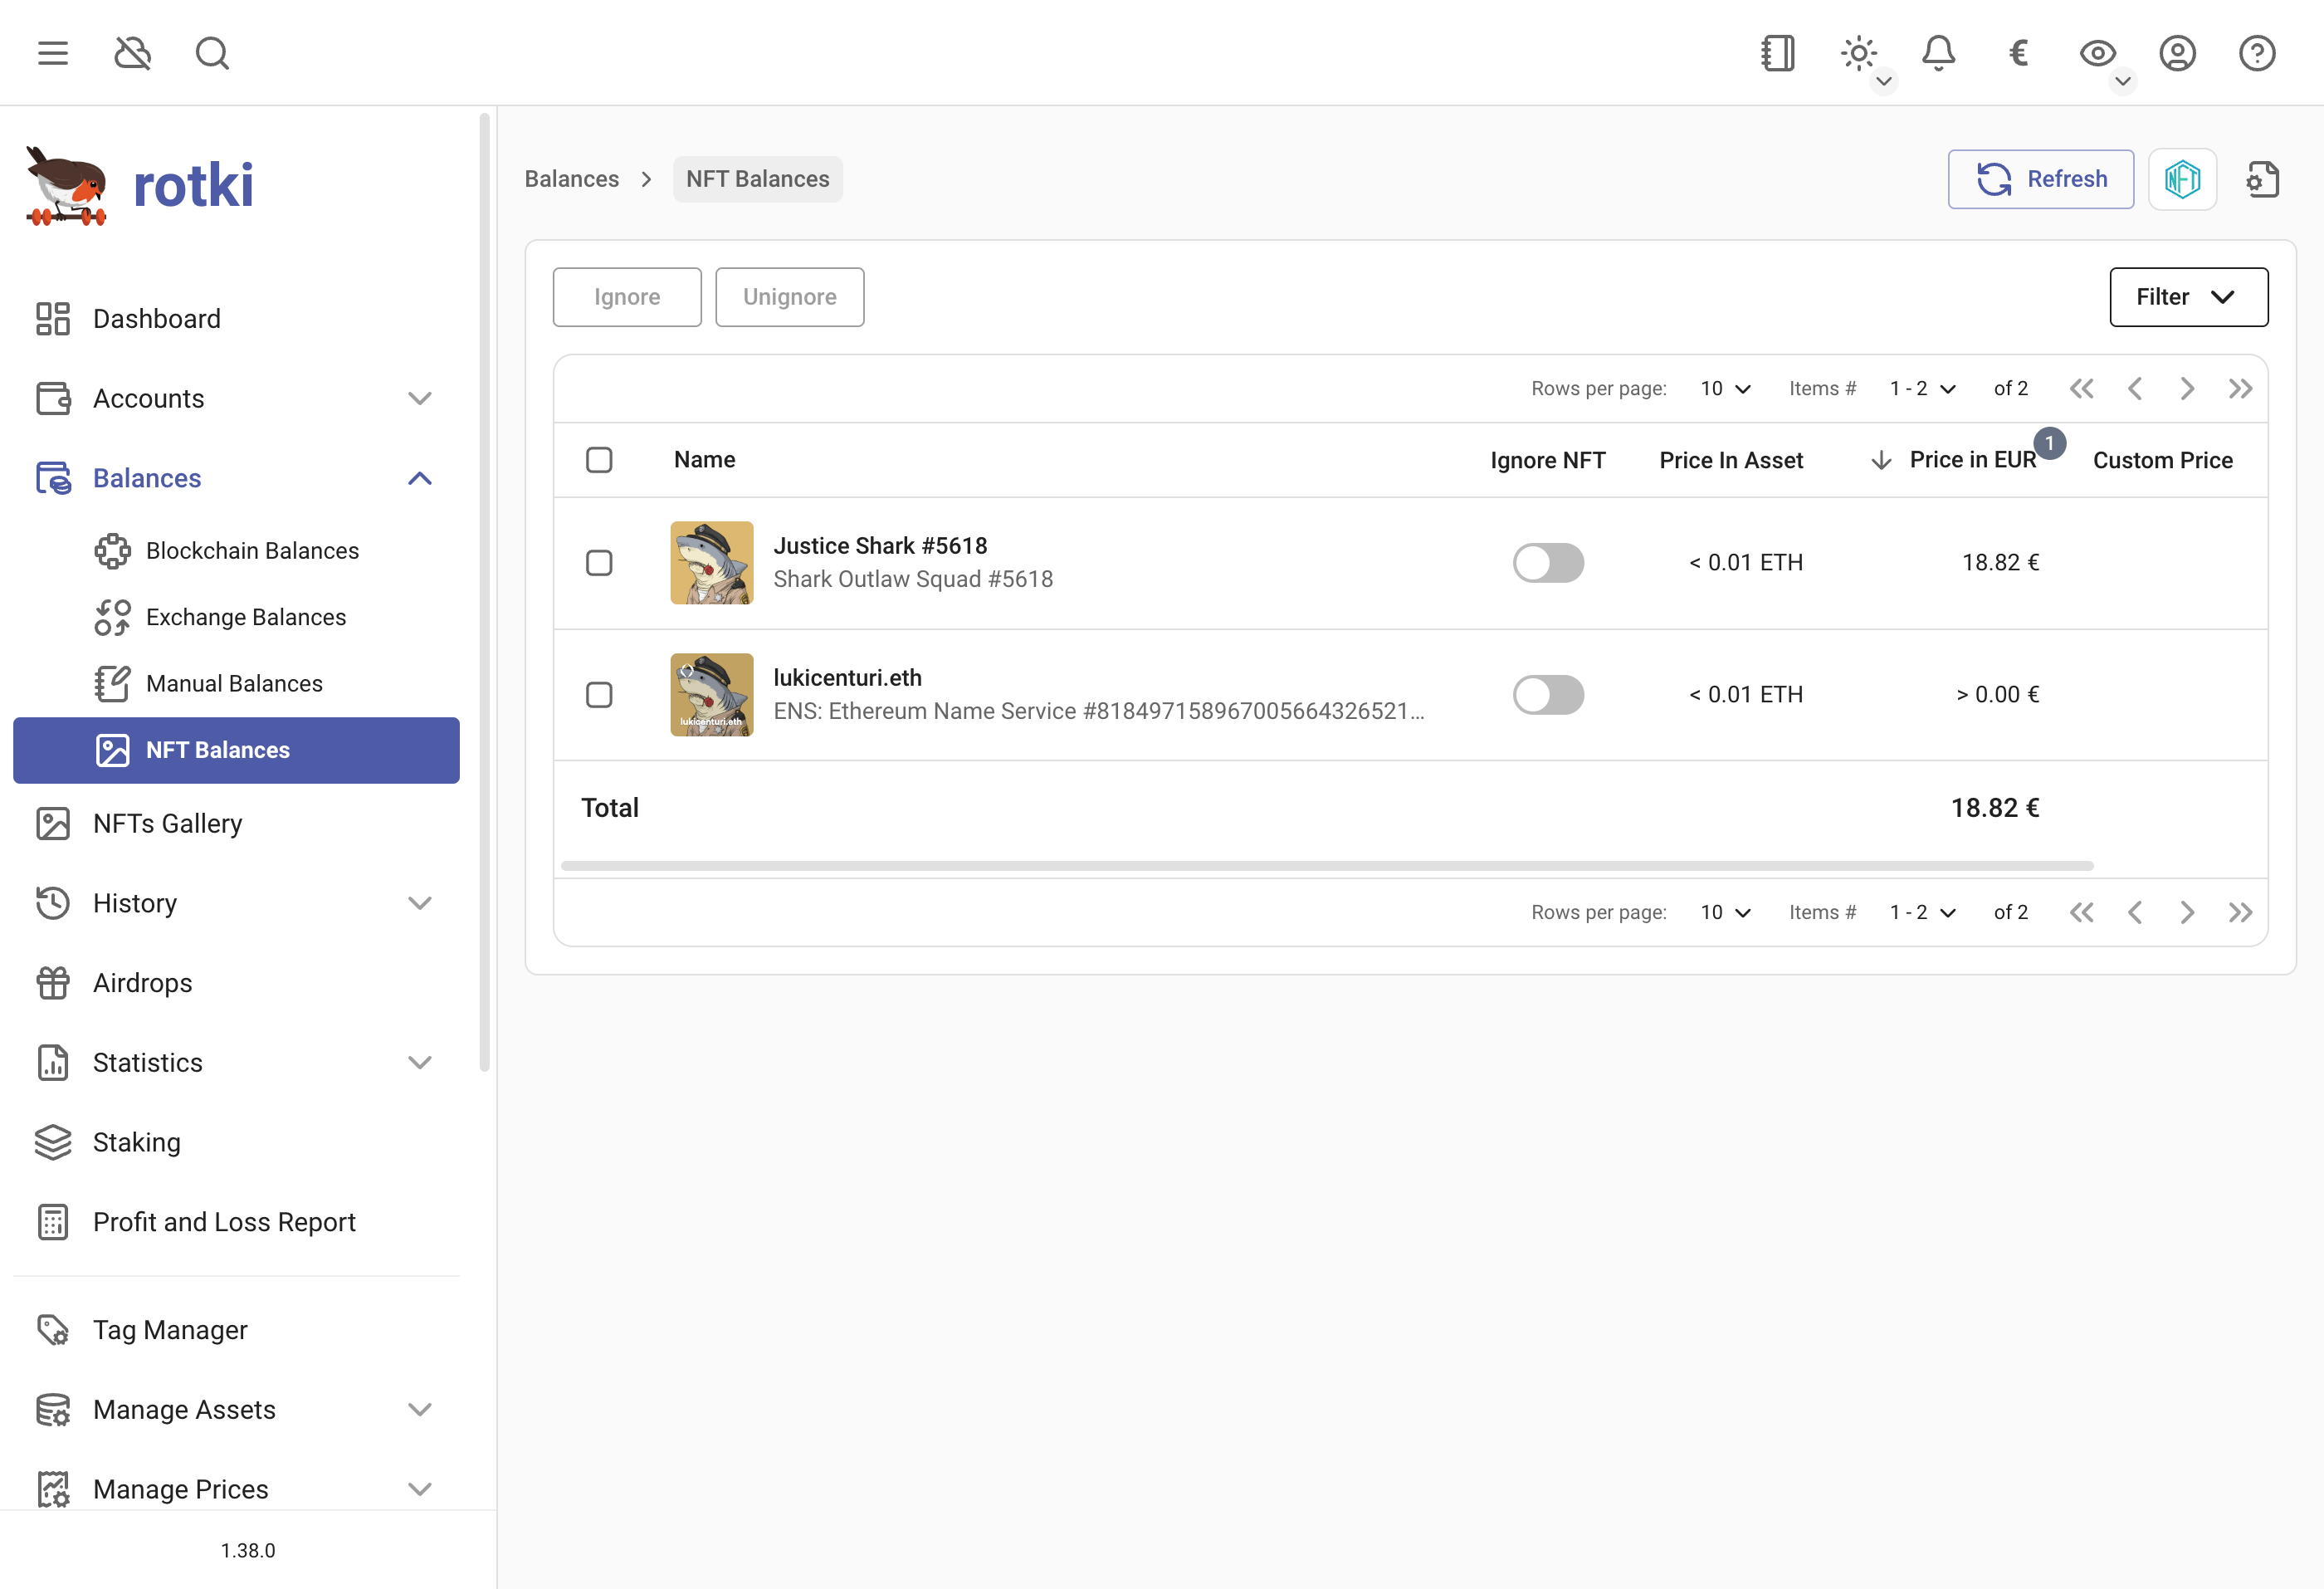
If a price cannot be found for an NFT asset or if you want to change the calculated price estimate you can easily set the price for an NFT asset manually. You can do this by either clicking on the > button in the NFTs table in the dashboard or by going to Blockchains & Accounts → NFT Balances. And then click on the pen icon for the NFT you are interested in.
For privacy concerns, it is possible to allow all or only a certain list of domains for images rendered, this can be done here by clicking on the icon highlighted below.
More details here Critical Privacy Vulnerability: Getting Exposed by MetaMask
The configuration menu:
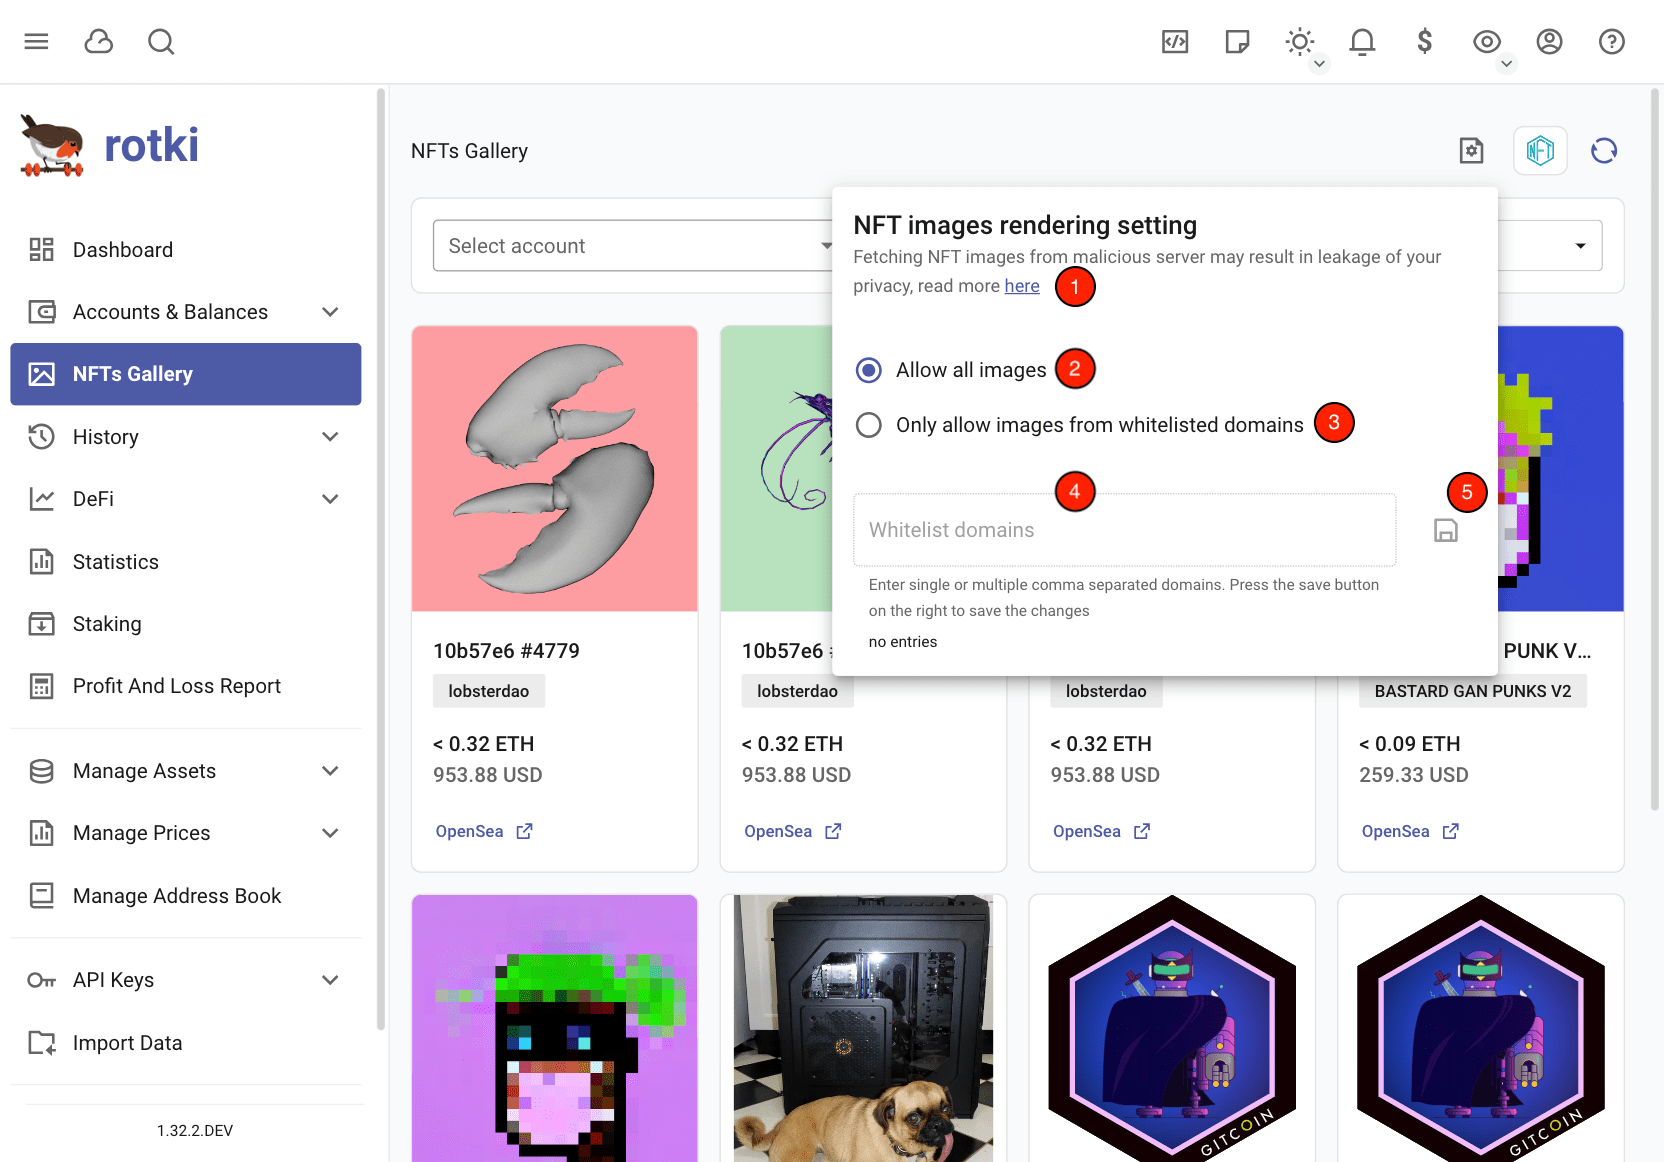
Highlight details:
- Link to blog post about image rendering and privacy.
- Option to allow all NFT images to be rendered.
- Option to allow only whitelisted domains.
- If only whitelist, input list of allowed domains.
- Save button.
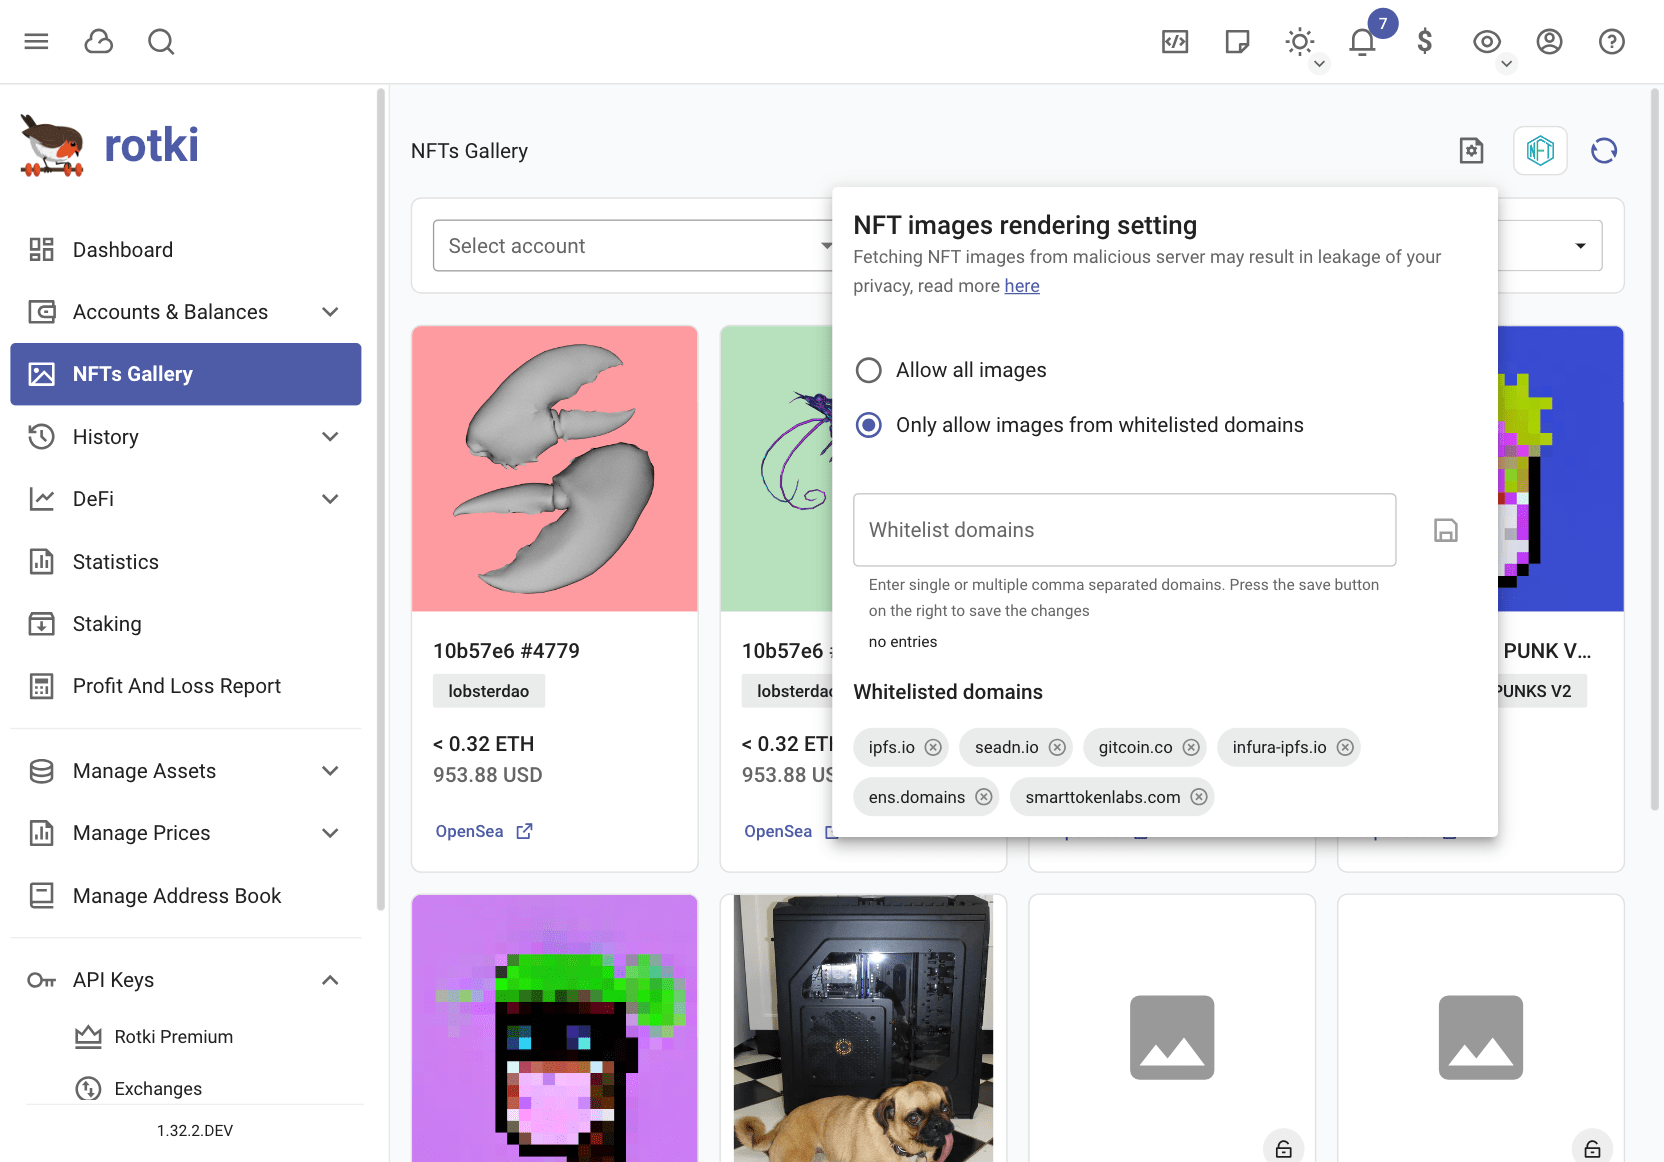
This will enable image rendering of only whitelisted NFT domains.
Filtering by tags
You can filter the tables by a combination of tags.
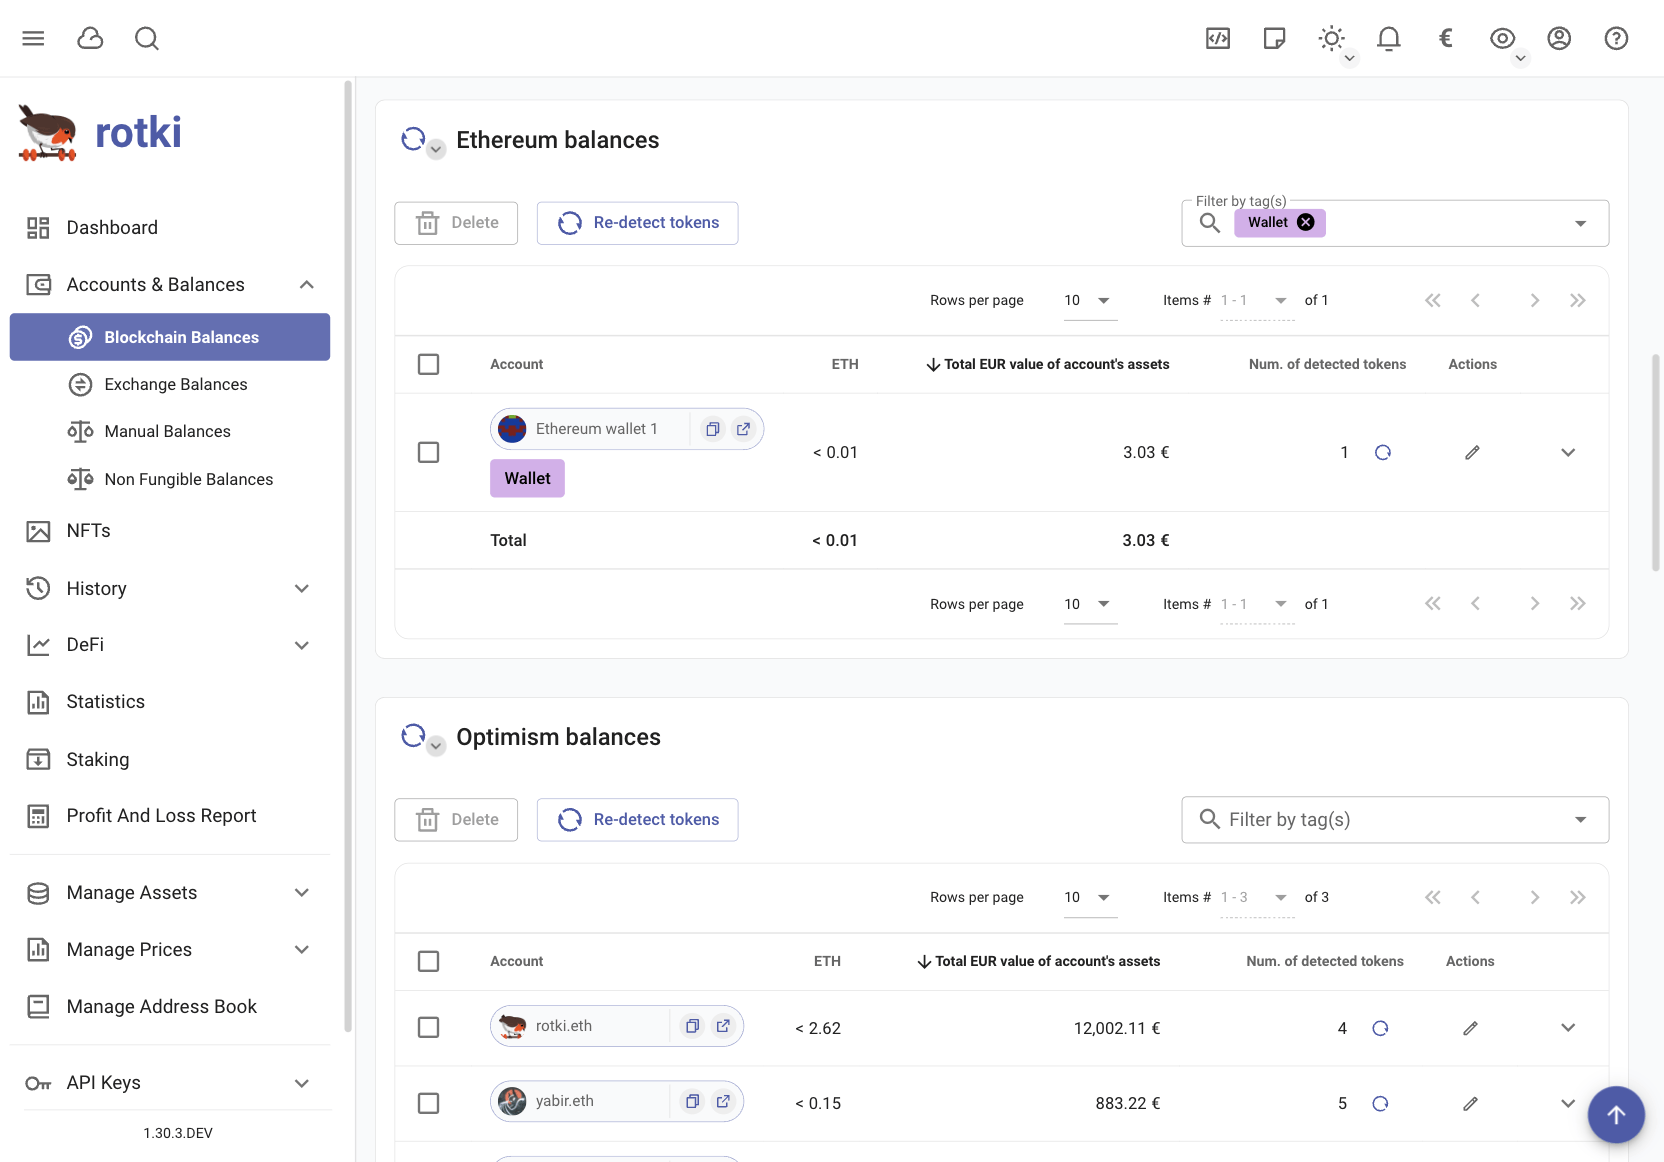
Simply add the tags you wish to filter by in the filter textbox above the tables.
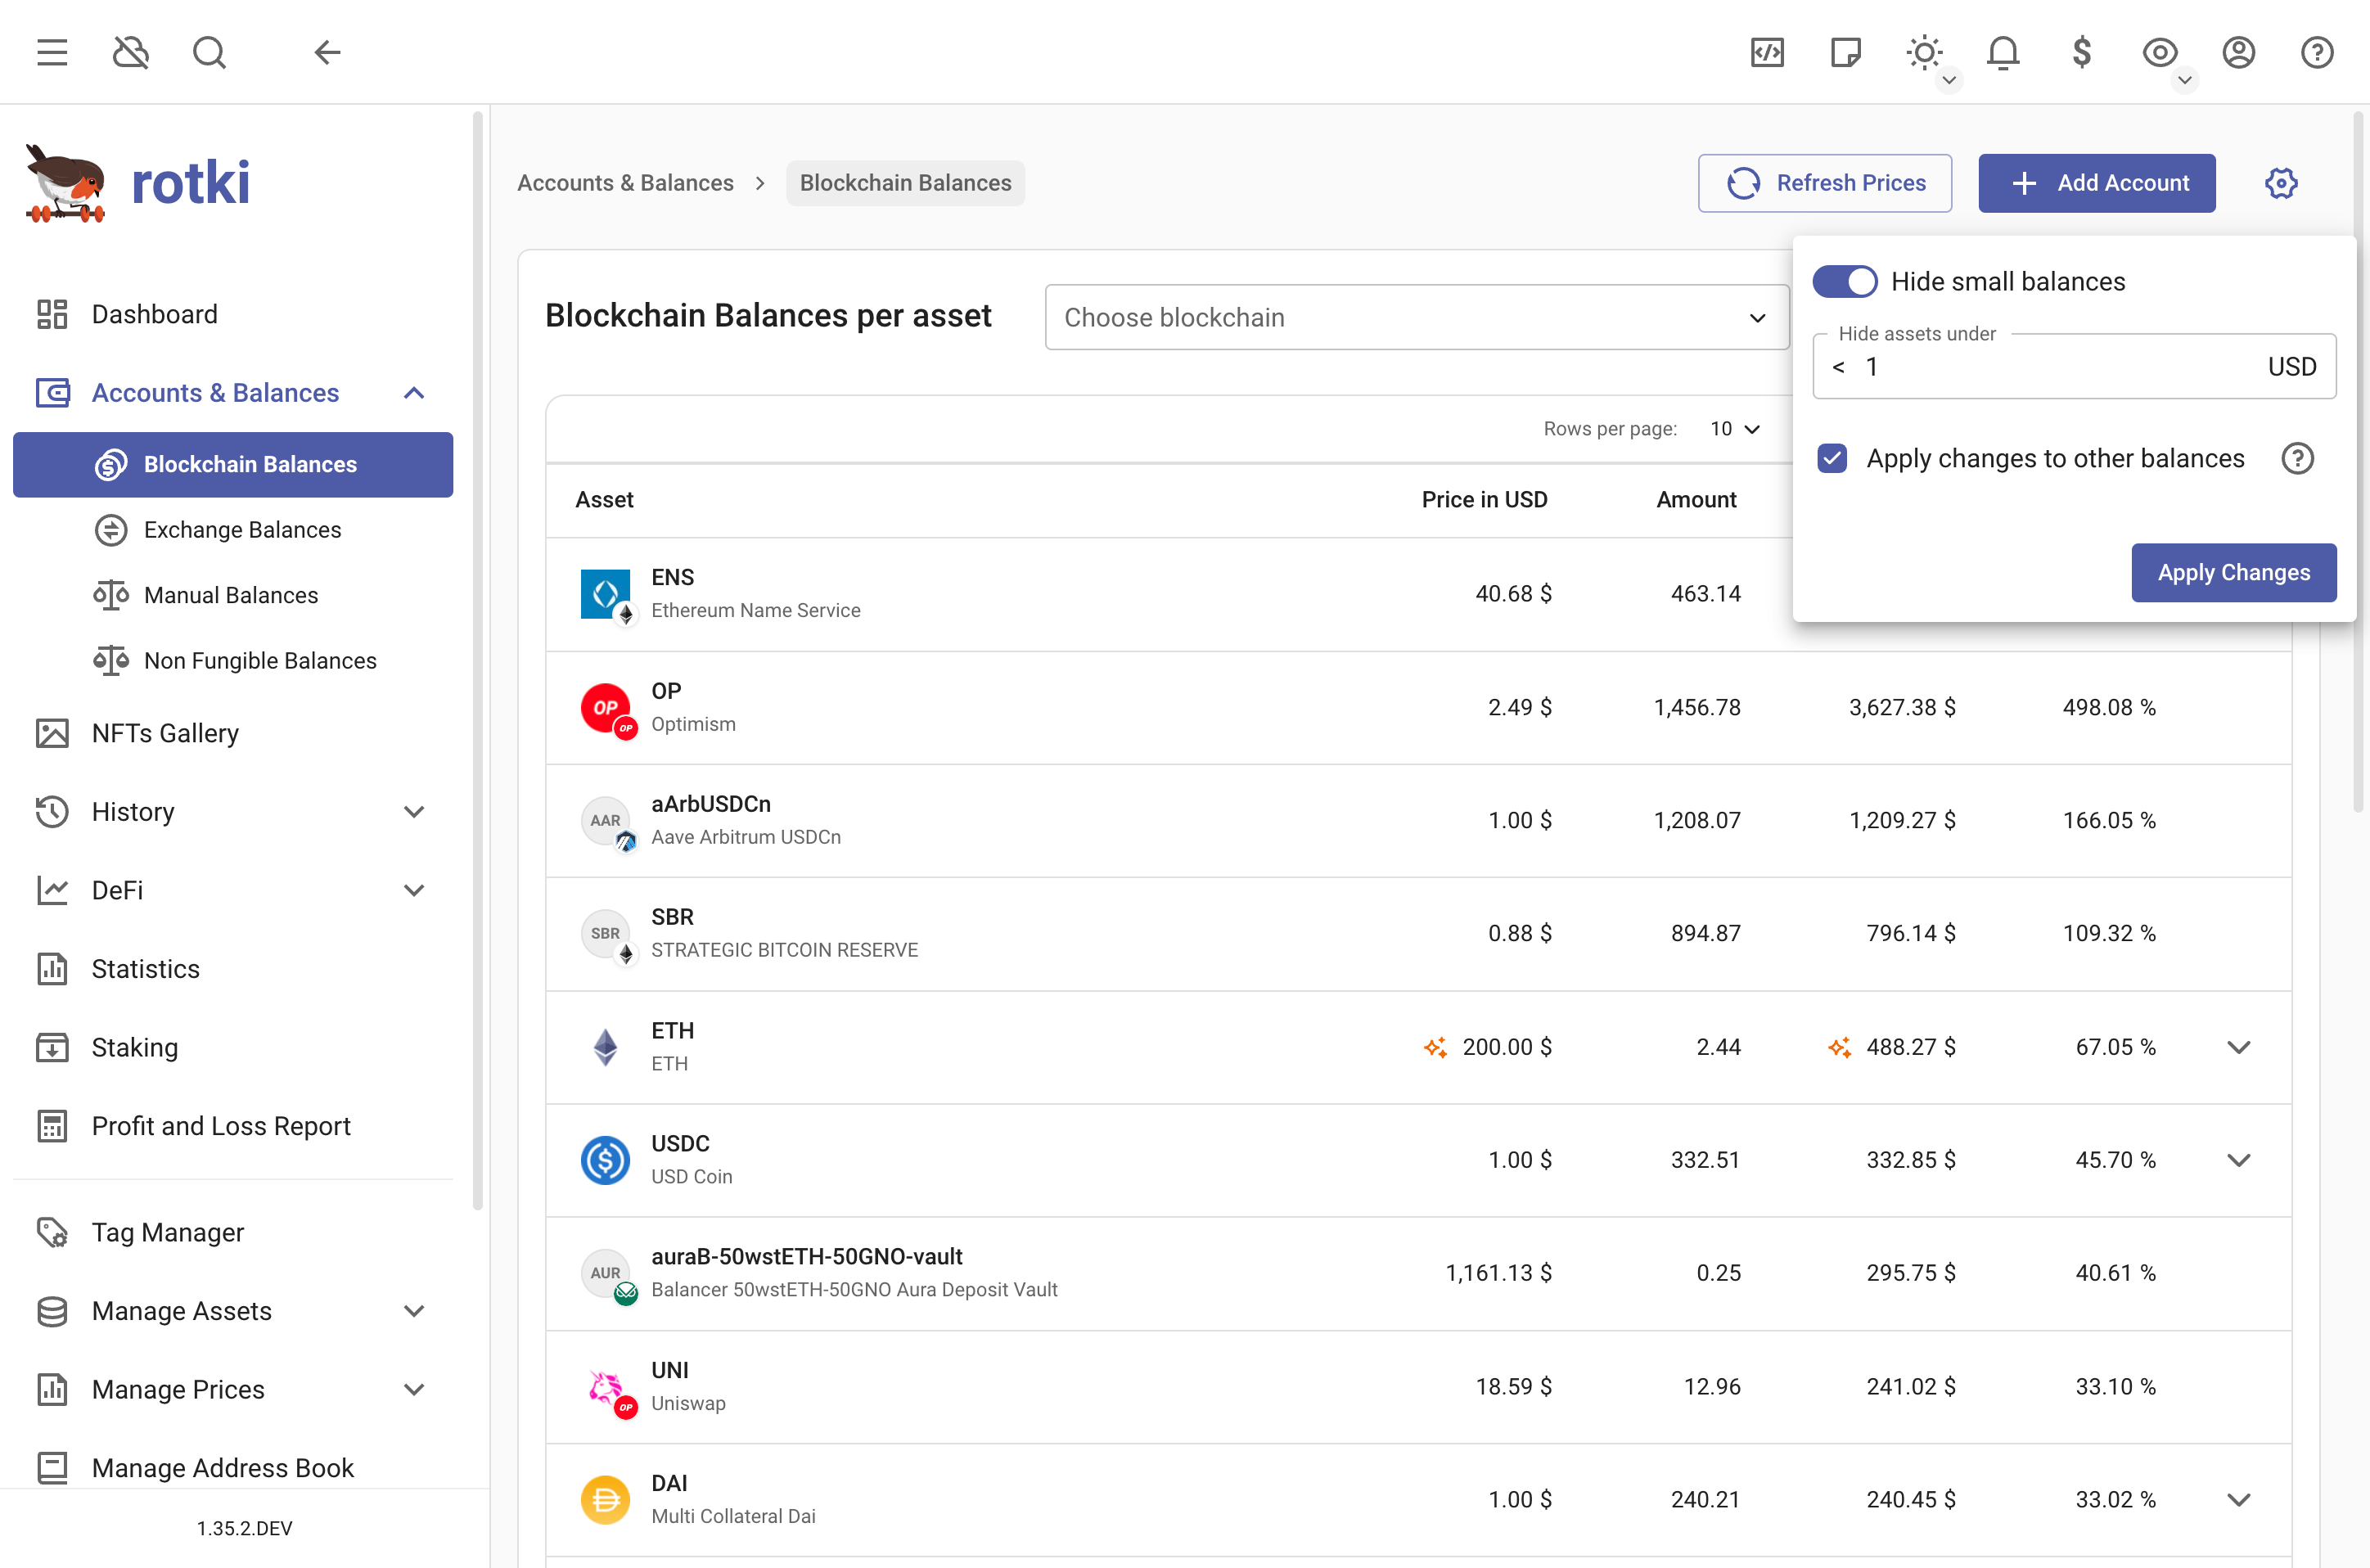
Hide small balances
You can filter out small balances and set the threshold yourself.
By default, this setting will apply to all balance types (blockchain balances, exchange balances, and manual balances). You can uncheck the checkbox to apply the setting only to the current balances view.
NOTE
You need to press "Apply Changes" for the setting to take effect.
Airdrops
rotki can detect some airdrops for you

The list of supported airdrops is pulled from the rotki/data repository and is updated automatically. New airdrops may be added over time without requiring an app update.
Each airdrop shows one of the following statuses:
- Claimed — The airdrop has been claimed.
- Unclaimed — The airdrop is available but has not been claimed yet.
- Missed — The claim window has expired.
- Unknown — rotki can't determine the status. You need to check it yourself.
Balances Snapshots
The application automatically saves balance snapshots to your local database:
- Occurs at login
- Default interval: every 24 hours (configurable)
To manually create a snapshot:
- Click the
arrow downnear the graph - Select
Force Save
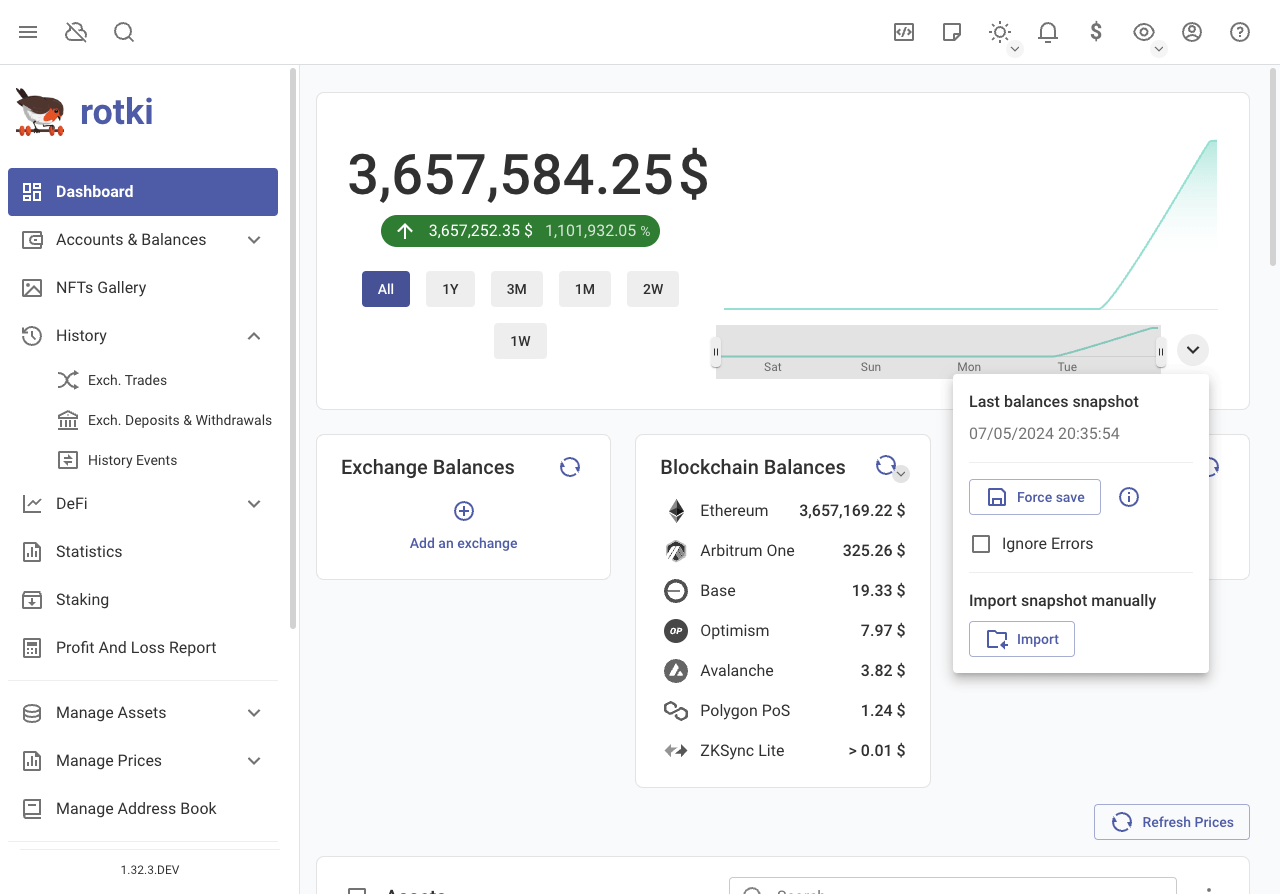
Error Handling
- Snapshots won't save if there are external source query errors
- To save despite errors, select
Ignore Errors
Modify a snapshot point
- Click on a snapshot point in the dashboard's net value graph
- From the menu you can:
- Edit snapshot data
- Remove the snapshot
- Download the snapshot
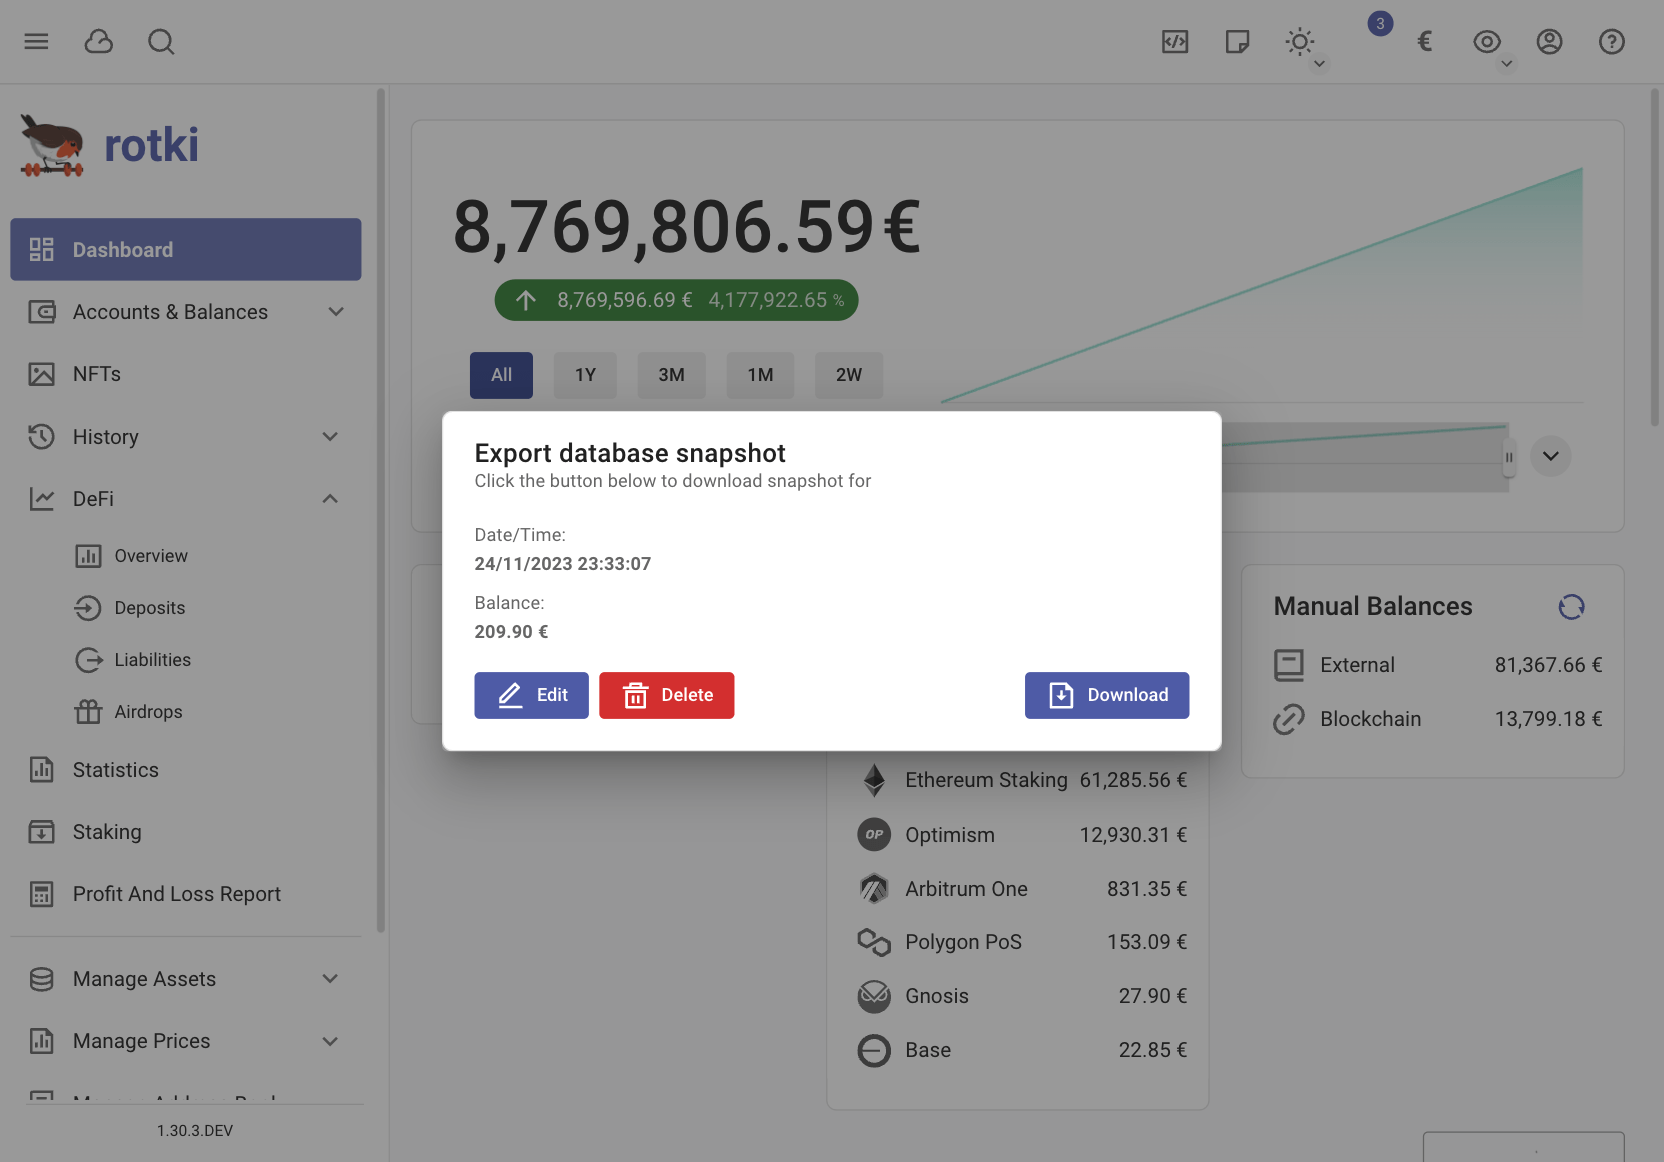
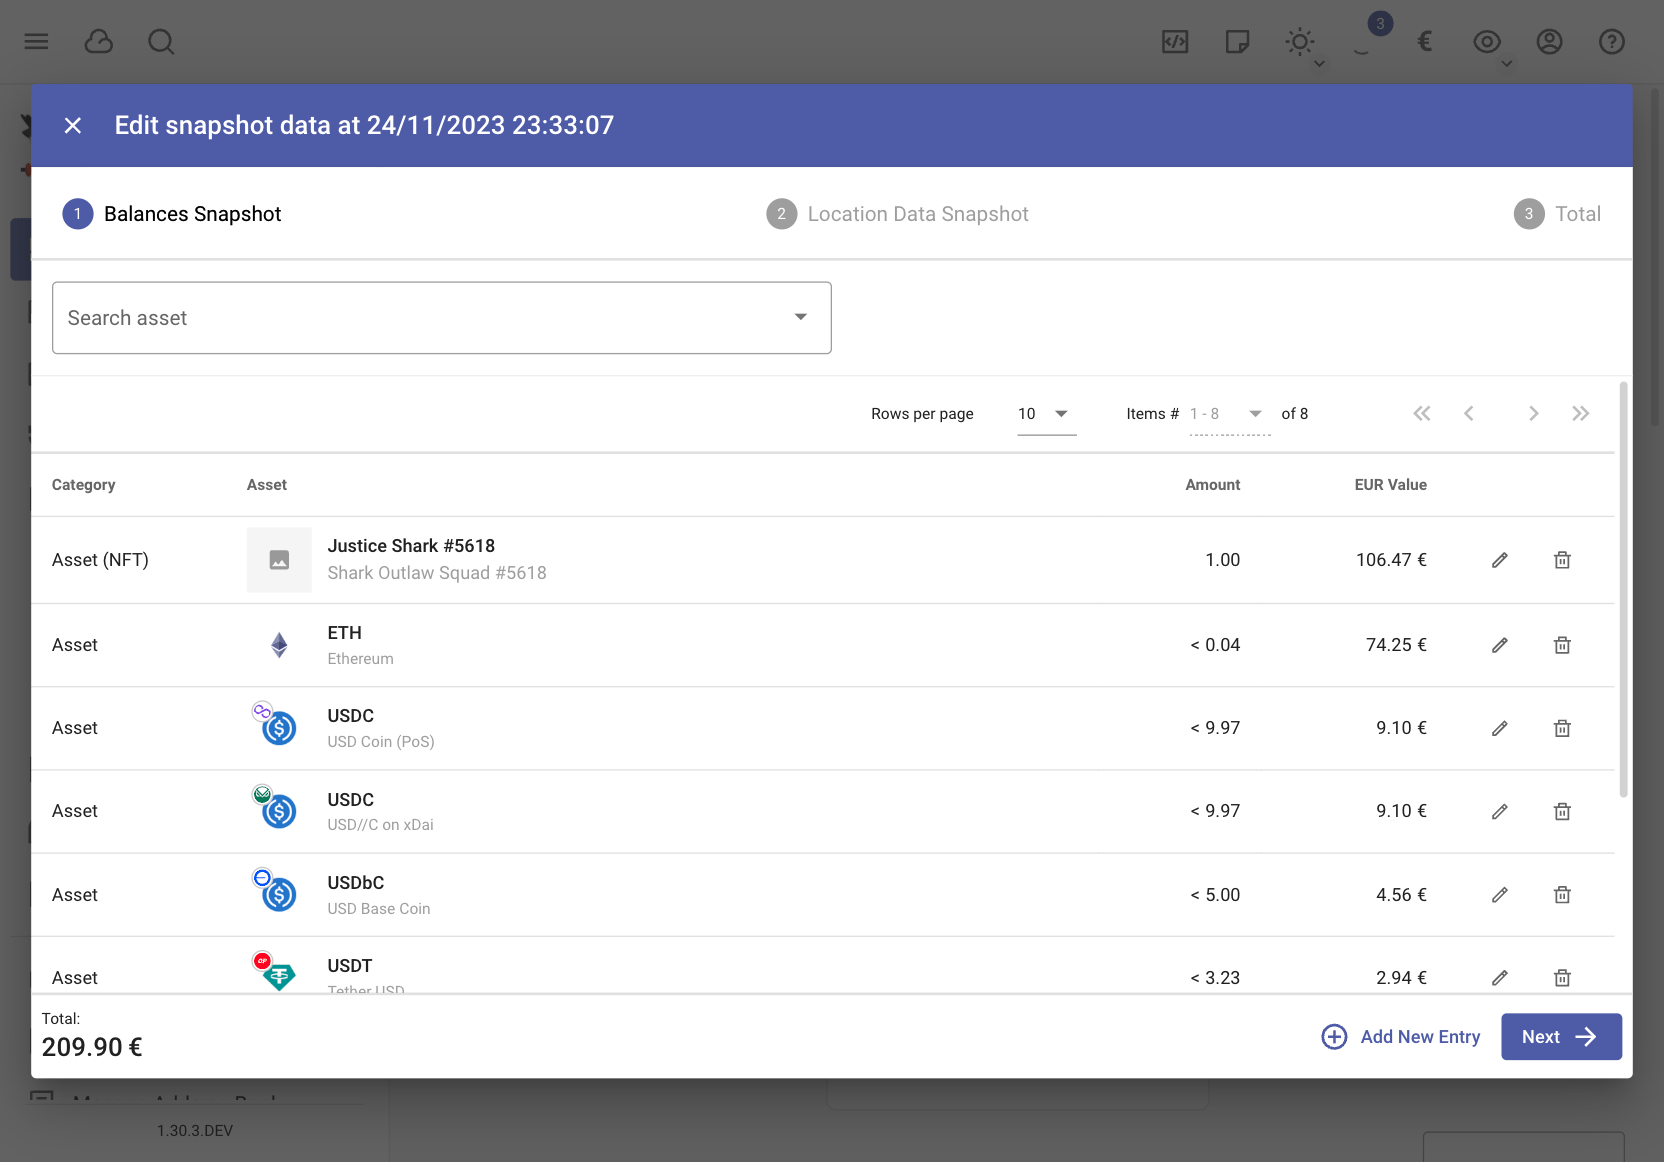
Edit Snapshots Value
- Click a snapshot point
- Select edit
- Modify values for assets and locations as needed
Delete Snapshots
Click a snapshot point and select delete to remove saved information.
Download/Export Snapshots
When exporting, four files are generated:
- Two files for future data import
- Two human-readable files for accounting:
balances_snapshot: Asset balances at snapshot timelocation_data_snapshot: Value per location for each asset
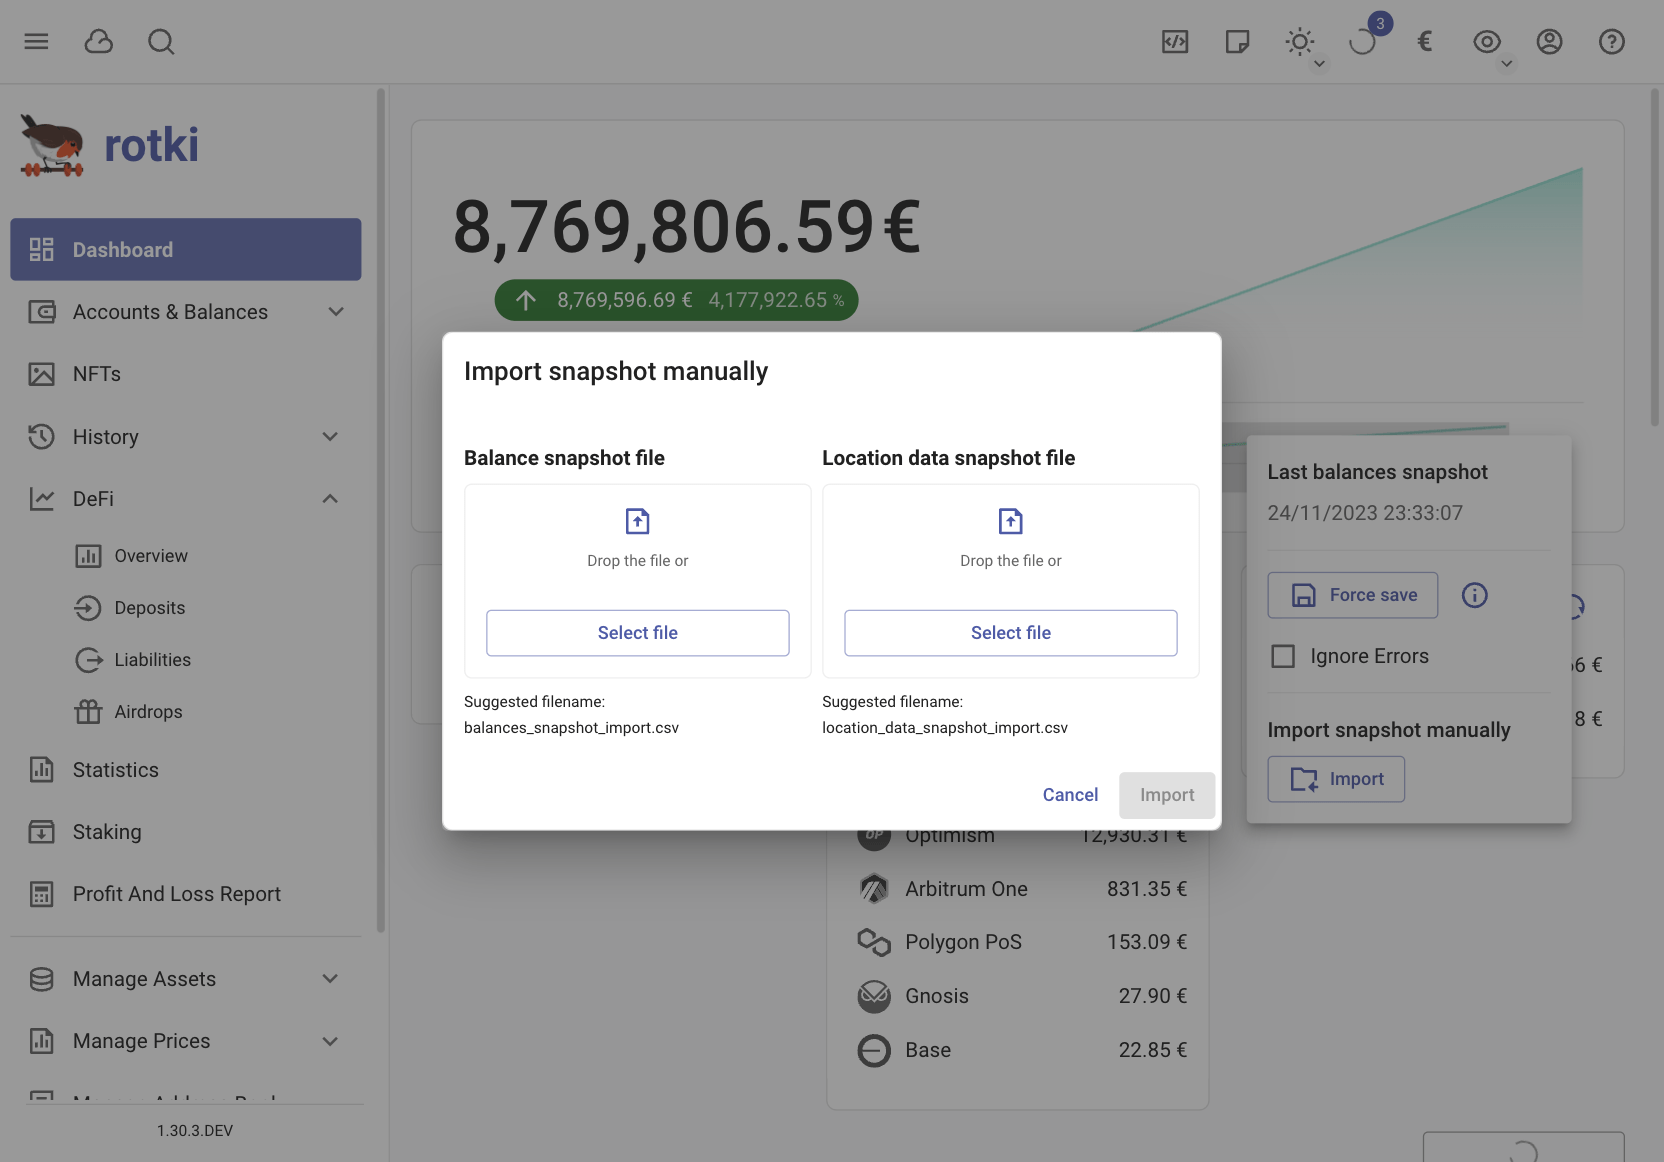
Import Snapshot Back
To import previously exported snapshot data:
- Use files with
_importsuffix - Click the
Arrow downbutton near the chart - Select
Import