Build from Source
Building rotki from source is for contributors and for users who want to run unreleased code from git branches. If you just want to use rotki, the packaged binaries are easier.
WARNING
Don't switch between unreleased git builds and official releases on the same data directory. Unreleased code has no forward-compatibility guarantees for the database schema.
Prerequisites
Before starting, ensure you have the following installed:
- Git
- Python 3.11.x
- uv — Python package manager
- Node.js — check
frontend/package.jsonenginesfor the exact supported range - pnpm — managed via
corepack(see Installing pnpm) - Rust / Cargo — needed to build the Colibri service locally
Get the source
Fork the rotki repository on GitHub, then clone your fork locally:
git clone https://github.com/your-user/rotki.git
cd rotki
This guide assumes you checked out the develop branch, which is the default for contributors.
Backend setup
The backend setup is the same across Linux, macOS, and Windows — install uv, then run uv sync --locked to create the development environment. OS-specific notes are below.
Install uv
Linux and macOS:
curl -LsSf https://astral.sh/uv/install.sh | shWindows (PowerShell):
powershell -c "irm https://astral.sh/uv/install.ps1 | iex"Install dependencies
From the rotki repo root:
uv sync --locked --group dev --group lintThis creates a .venv and installs the backend, dev, and lint dependency groups.
Verify the backend
Start the backend once to confirm it runs:
uv run python -m rotkehlchenYou should see:
rotki REST API server is running at: 127.0.0.1:5042Stop it with Ctrl+C — we'll run everything together once the frontend is set up.
OS-specific notes
Install Homebrew first if you don't have it. Homebrew is used as a bootstrap for Python 3.11 and other toolchain dependencies.
Frontend setup
The frontend lives under frontend/ and uses pnpm.
Installing pnpm
The repo uses corepack to manage pnpm. Enable it and corepack will automatically use the version pinned in frontend/package.json under packageManager:
corepack enable pnpm
pnpm --version
Install dependencies
cd frontend
pnpm install --frozen-lockfile
Run rotki in development mode
From the frontend/ directory:
pnpm run devThis starts the Electron app together with the backend, the Colibri service (if Cargo is available), and the frontend dev server. If VITE_BACKEND_URL is set in frontend/app/.env.development.local, the development proxy starts as well.
For browser-only development (no Electron), use:
pnpm run dev:webSee Working with the Frontend for environment variables, feature flags, and proxy configuration.
Packaging
To build a distributable package for your platform:
# Install packaging dependencies
uv sync --locked --group packaging

# Run the packaging script (works on all platforms)
uv run python ./package.py --build full
Nix
If you use Nix, create a flake.nix at the repo root with the following:
{
  description = "rotki project with uv-managed virtualenv";

  inputs = {
    nixpkgs.url          = "github:NixOS/nixpkgs/nixos-24.05";
    nixpkgs-unstable.url = "github:NixOS/nixpkgs/nixpkgs-unstable";
    flake-utils.url      = "github:numtide/flake-utils";
  };

  outputs = { self, nixpkgs, flake-utils, ... }:
    flake-utils.lib.eachDefaultSystem (system:
      let
        pkgs = nixpkgs.legacyPackages.${system};

        python311         = pkgs.python311;
        nodejsWithPython  = pkgs.nodejs.override { python3 = python311; };
        nodePackages      = pkgs.nodePackages.override { nodejs = nodejsWithPython; };
        pnpmWithPython311 = nodePackages.pnpm;

        devShell = pkgs.mkShell {
          name = "rotki-dev";
          buildInputs = [
            pkgs.gcc
            pkgs.stdenv.cc.cc.lib
            pkgs.bash
            pkgs.git
            pkgs.lzma
            pnpmWithPython311
            python311
            pkgs.uv
          ];

          shellHook = ''
            uv sync
            cd frontend
            pnpm install
            cd ..
          '';
        };
      in { inherit devShell; });
}
Then enter the development environment with:
nix develop
cd frontend
pnpm run dev:web
Building a Docker image
To build a Docker image from source using the repo's Dockerfile:
docker build -t rotki .Troubleshooting
Blank screen when running the dev server
If you get a blank screen on Electron when starting the dev server, check the console for a syntax-error message:
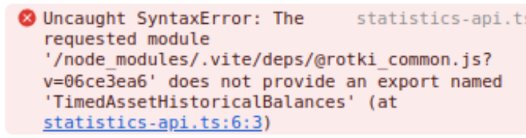
If you see one, go to Help → Clear Cache, then View → Force Reload. If the issue persists, follow the frontend troubleshooting steps.
Windows build tool errors
If uv sync fails on Windows with errors like Microsoft Visual C++ 14.0 is required, the Visual Studio Build Tools aren't installed correctly. Make sure you selected the Desktop development with C++ workload when installing — see the prerequisites above.