Settings
This section provides information on how to customize the application through the settings. Click on the user icon on the top right and choose "Settings" to access basic customization options.
Profit Currency
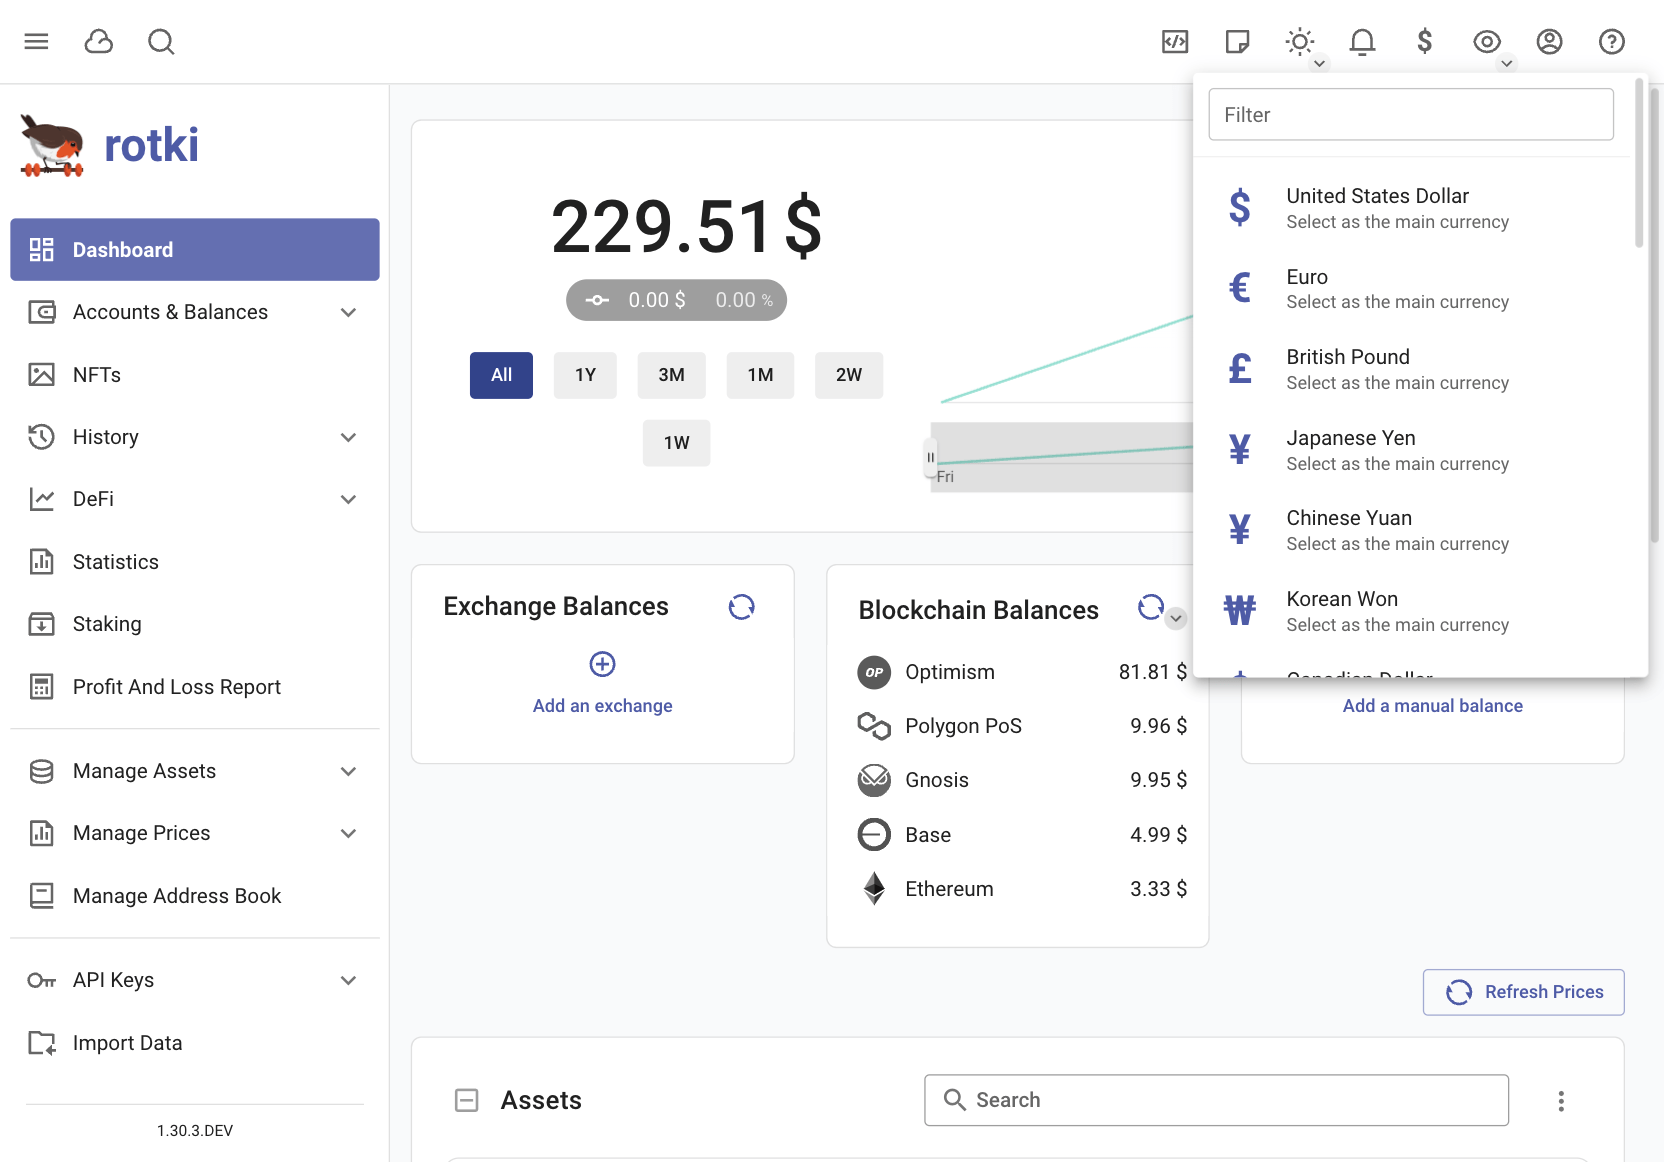
rotki calculates everything, including your total profit/loss during the PnL report, in a given fiat currency, called the profit_currency. By default, this is USD. You can change this by clicking on the currency icon in the top right menu and selecting your preferred currency.
Application Settings
Access the settings menu via User icon → Settings.
Account Settings
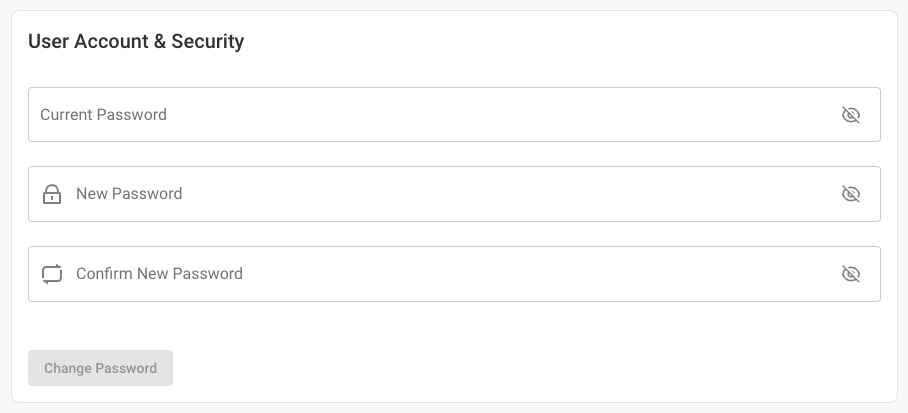
Changing Password
Choose the "User & Security" section to change the user password.
General Settings
Anonymous Usage Analytics
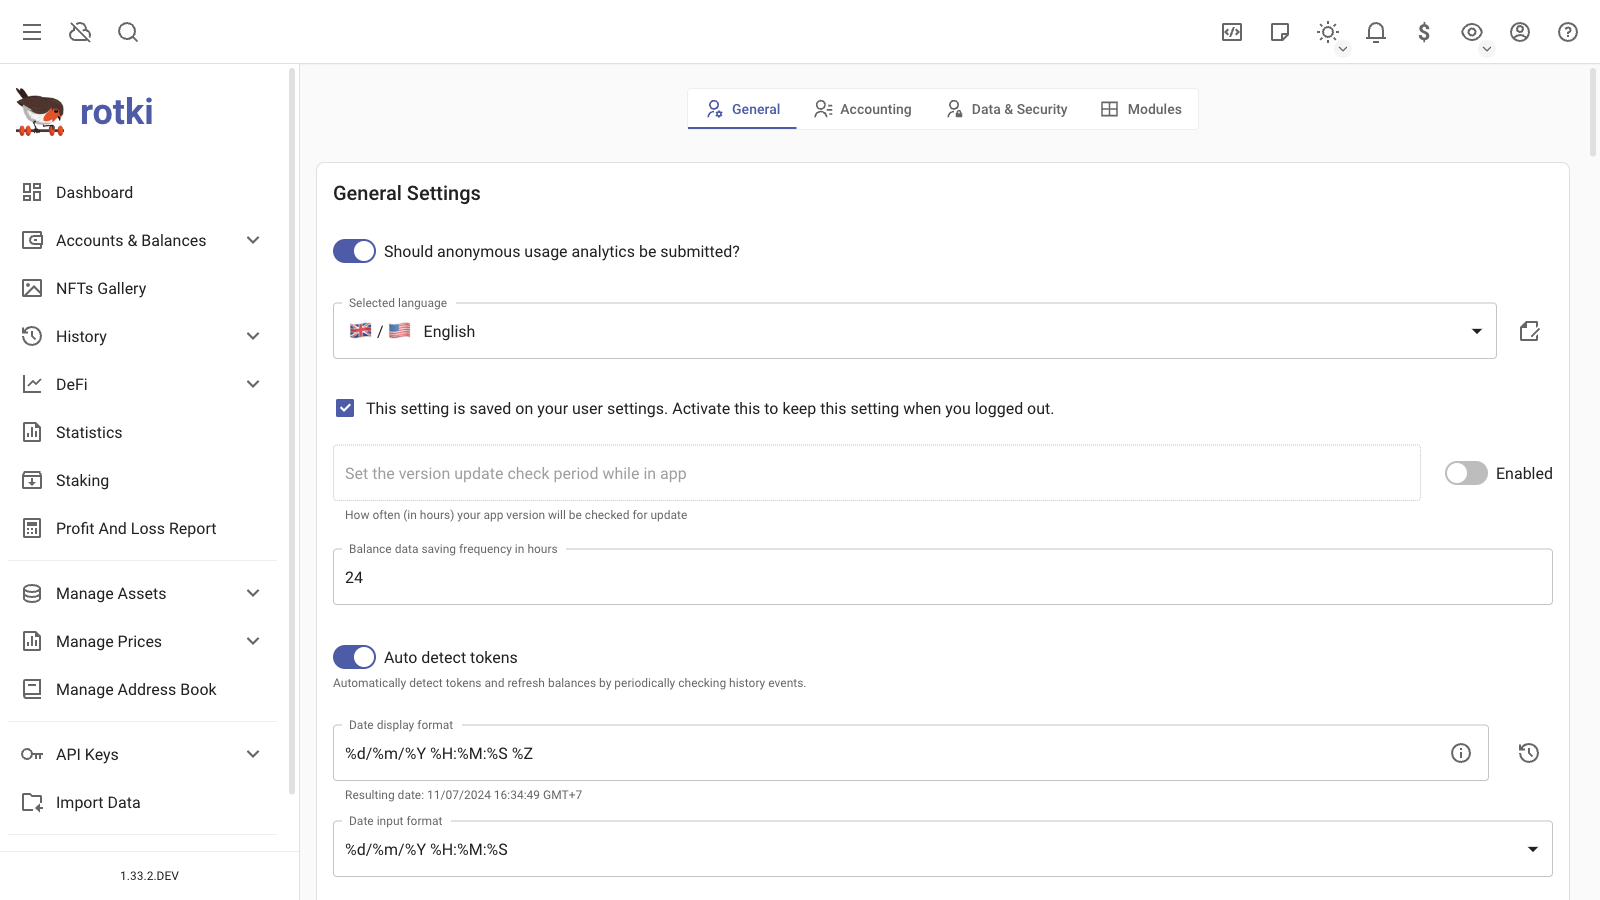
Specify whether the application can submit anonymous usage analytics. This helps measure active users while ensuring data is anonymized and contains no sensitive information.
Auto detect tokens
Specify whether to automatically detect tokens and refresh balances by periodically checking historical events.
CSV Export
Specify your preferred date format and delimiter for CSV exports.
Automatic database sync
Whether to force push when a size discrepancy occurs during automatic db sync.
Version update check
Set how often (in hours) the version will be checked for updates.
Balance Snapshots Saving Frequency
Set how often (in hours) the balance data snapshots are saved. This data helps calculate statistics historical and graph data for the user.
BTC Derivation Gap Limit
Set the derivation gap limit for deriving addresses from a bitcoin xpub. More information here.
Date Format
Set the date display and date input format in the rotki user interface, such as
%m/%d/%Y %H:%M:%Sfor month/day/year hour:minutes:seconds. Check here for valid formats.
Amount Settings
Main Currency
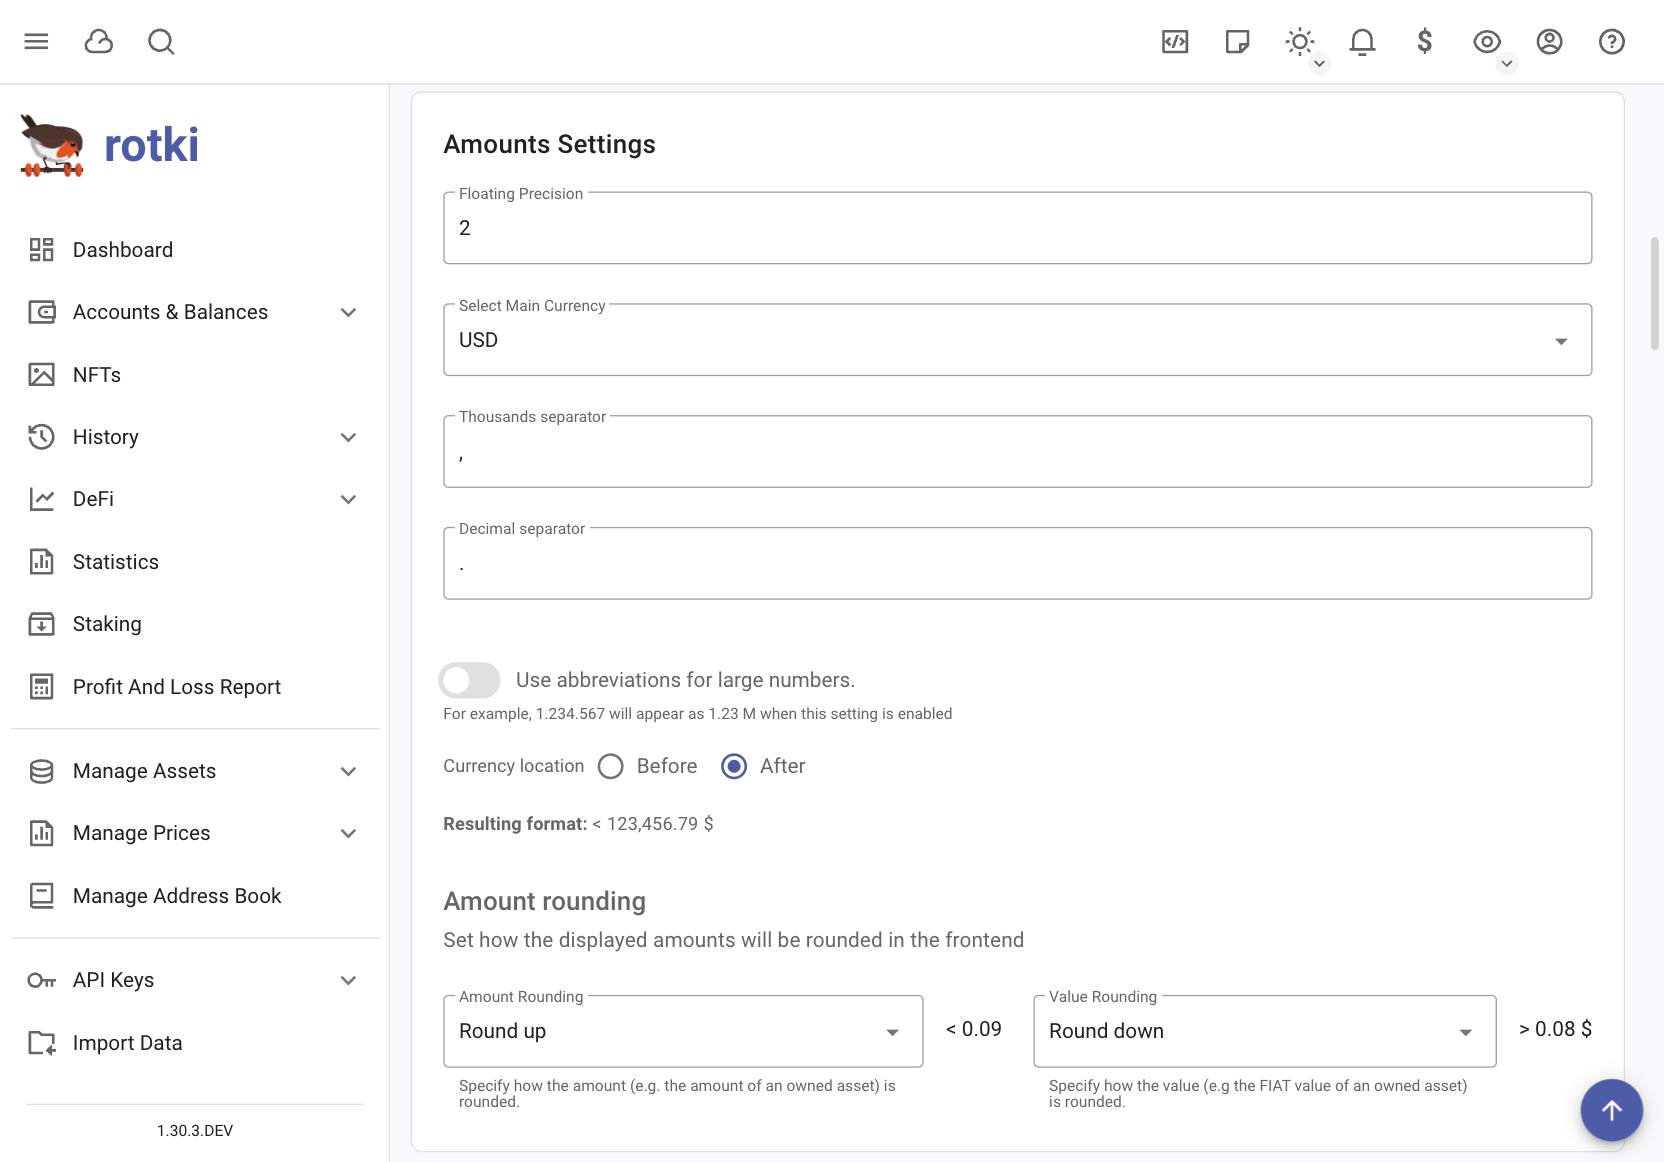
Same as changing the profit currency.
Floating Precision
Set the number of decimal points shown in the UI for floating point numbers.
Thousands Separator
Set the symbol separating every 3 digits for large numbers, e.g.,
1,000,000.
Decimal Separator
Set the symbol separating the floating part of a number, e.g.,
5.42.
Subscript Format
Whether to apply subscript formatting for consecutive zeros after the decimal point in small numbers, e.g.,
0.000000087=>0.0₇87.
Amount Rounding
Choose the rounding mechanism:
Round up,Round down, orHalf even. Customize how amounts and values are rounded.
Abbreviation for large numbers
If enabled, large numbers will be abbreviated, e.g.,
1,234,567as1.23 M. Set the minimum value to be abbreviated.
Currency Location
Set whether the currency symbol appears before or after the number, e.g.,
$1,000or1,000$.
NFT Settings
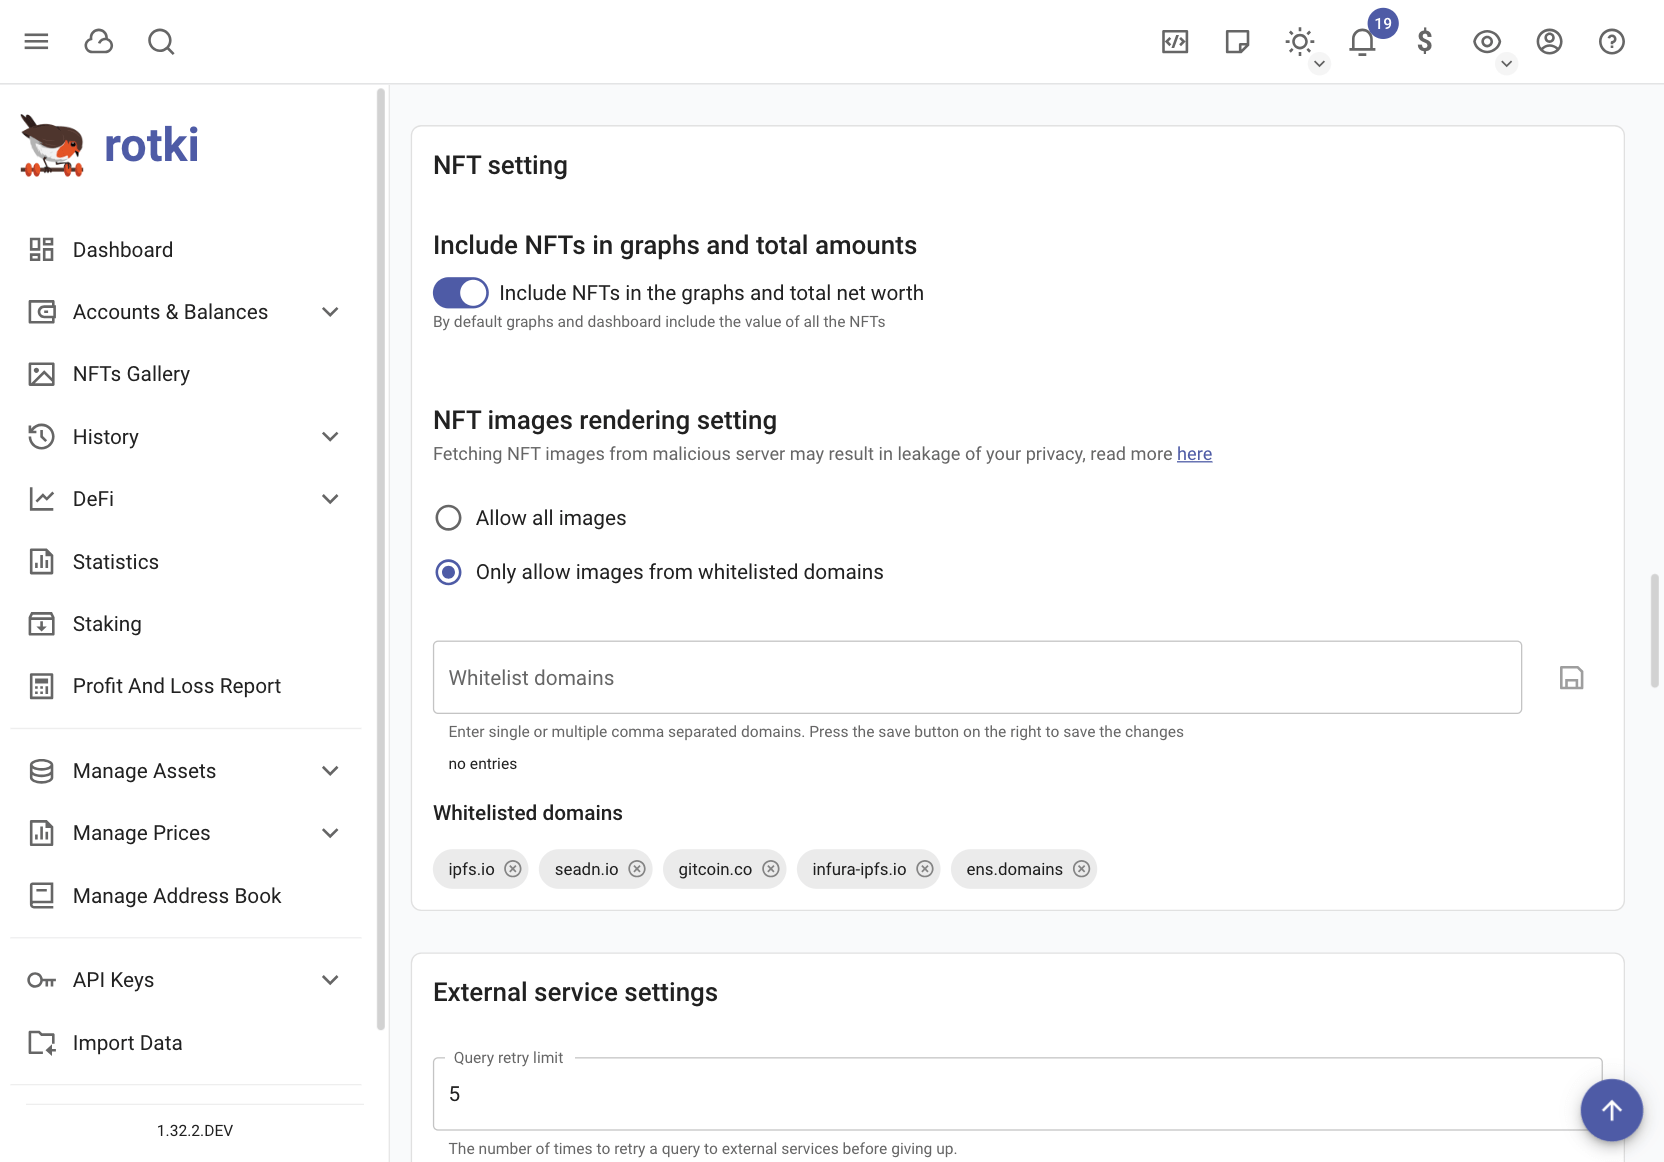
Include NFTs in Graphs and Total Amounts
Decide whether to include NFTs in total net worth calculations and displayed graphs.
NFT Images Rendering Setting
For privacy, allow images from all or specific domains. More details here.
External Service Settings
Define rules for retry and timeout for external service calls made by rotki.
Database Settings
Database Info & User Database Backups
View information about your user and global database, such as directory, size, and version.
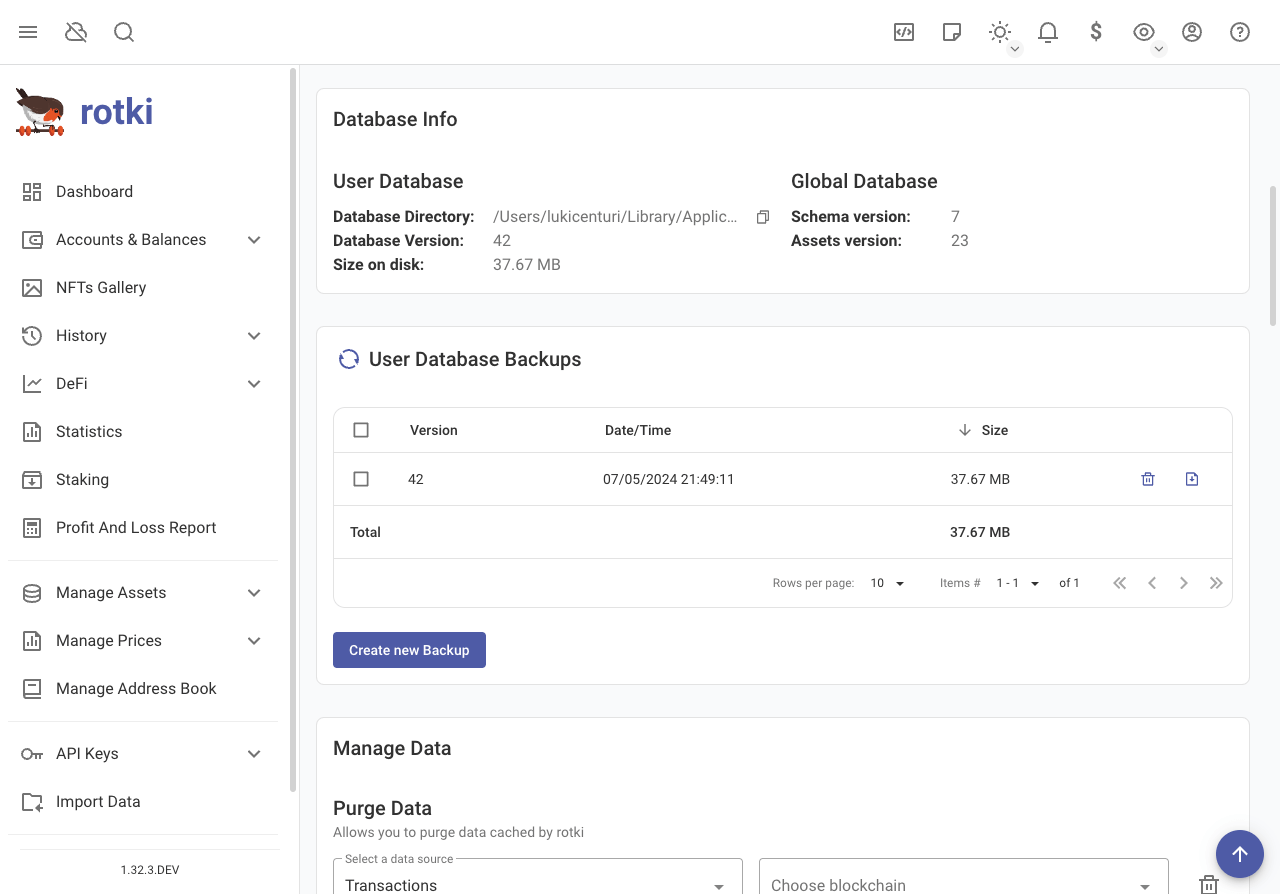
Create new database backups, delete backups, and download backups locally.
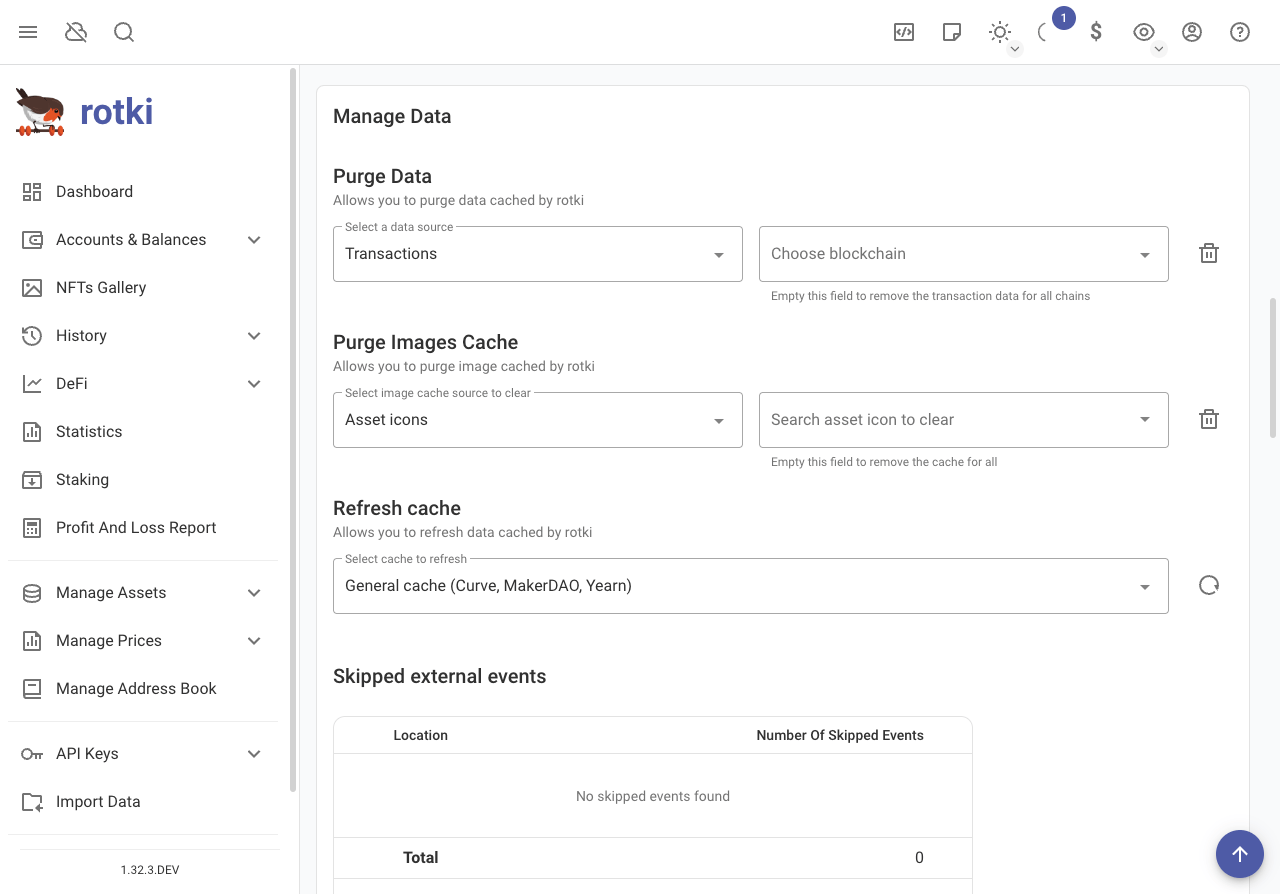
Purging Data
rotki keeps a lot of data cached locally. Clean this data periodically from the "Manage Data" section in the settings. Remove specific exchanges by first removing any active API keys.
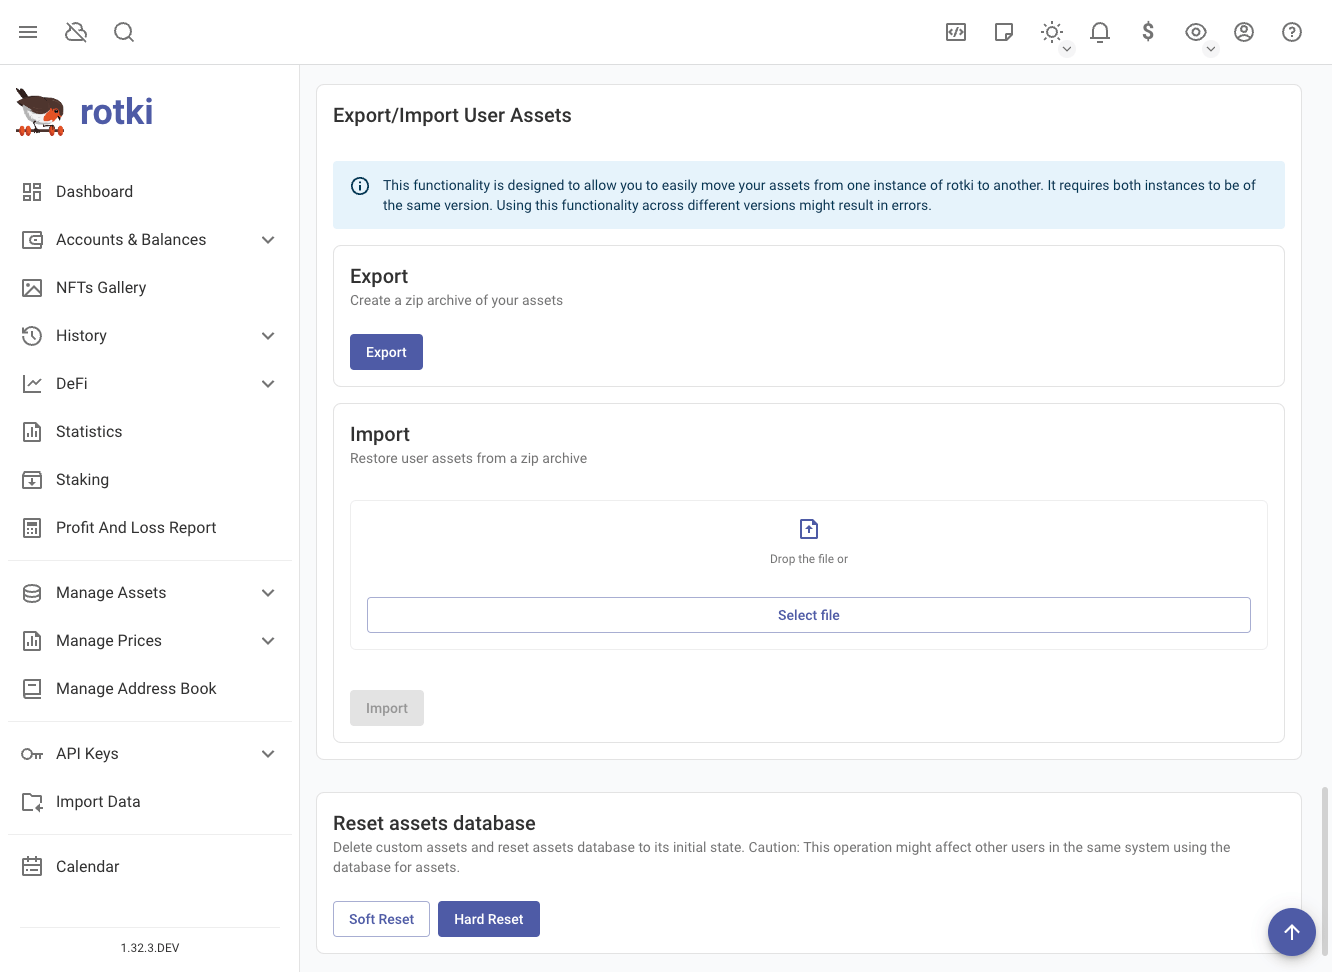
Exporting and Importing User Assets
Use the export/import function to migrate user assets between computers. This function creates a zip archive of user assets for transfer.
WARNING
This archive cannot be used as a backup/restore across different versions of rotki since there is no guarantee of compatibility across versions.
Reset Assets Database
There are two options to reset the assets database:
- Soft Reset: This option will not reset assets added by the user.
- Hard Reset: This option will reset assets added by the user.
Accounting Settings
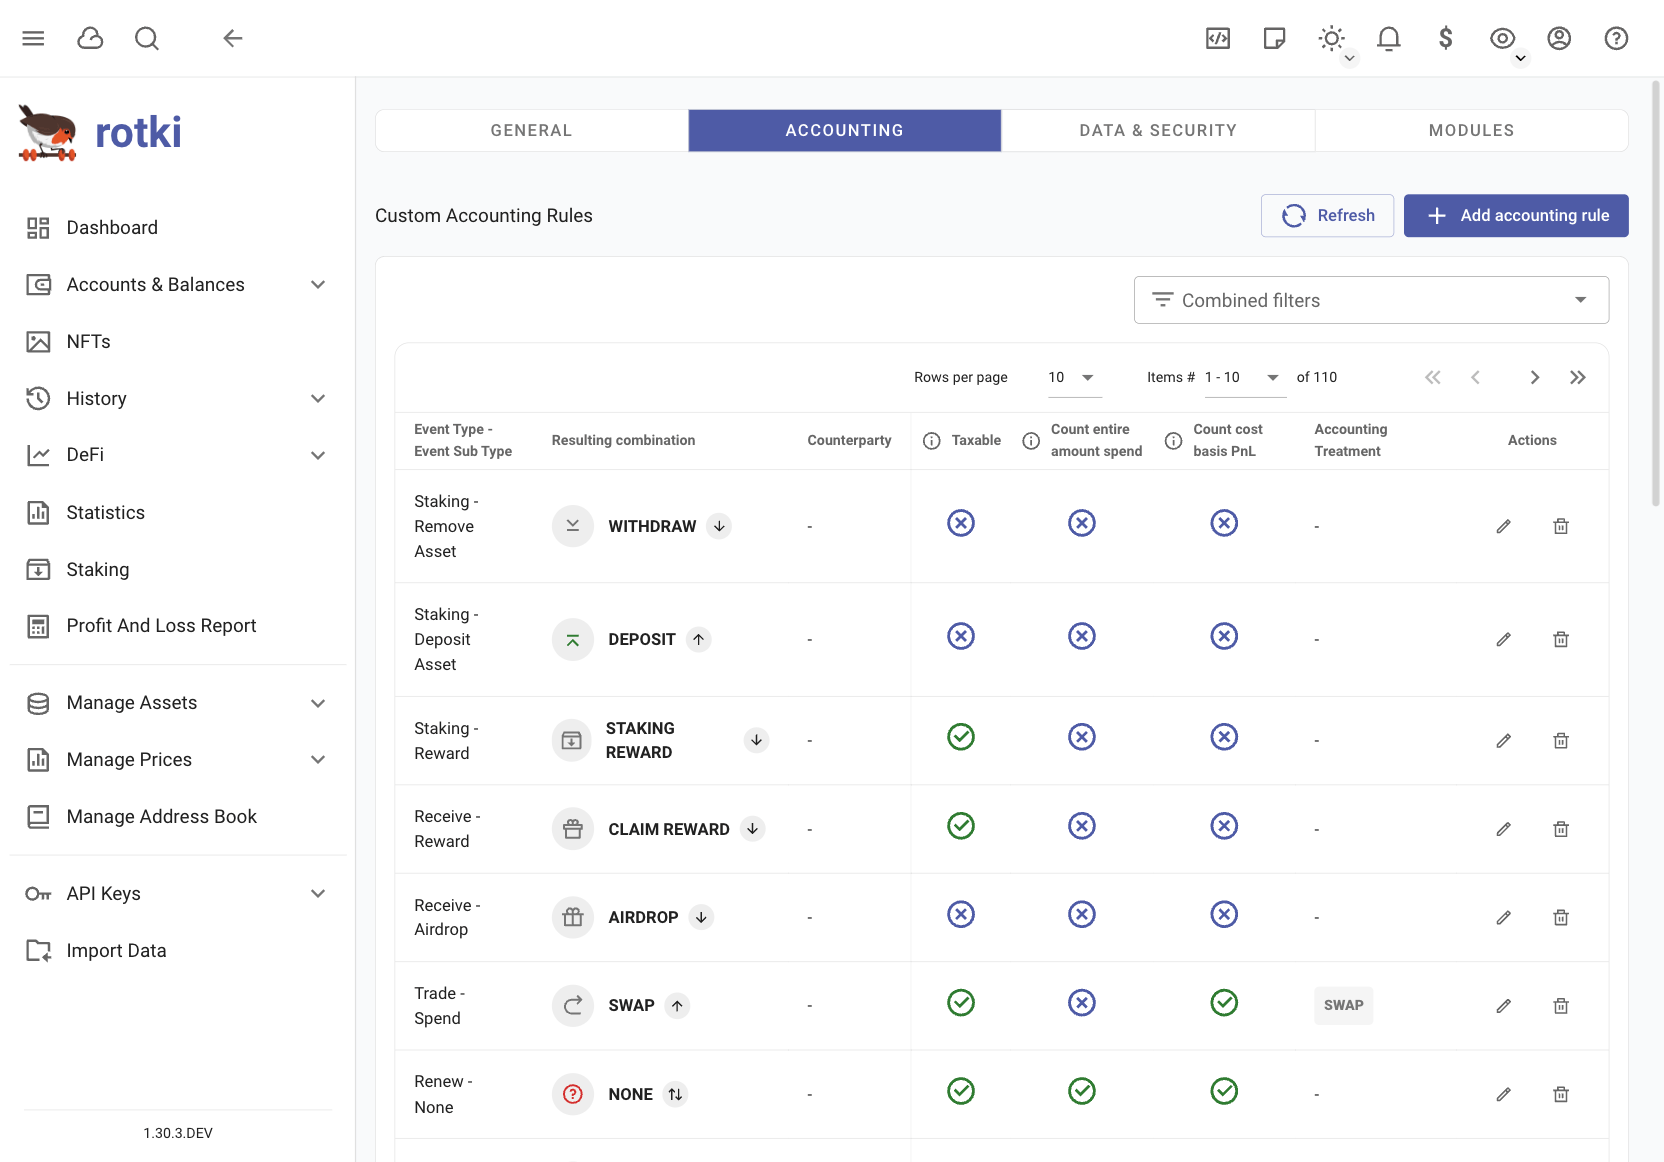
In the accounting menu, you can customize application settings related to accounting calculations. These settings will affect the PnL report calculations.
IMPORTANT
Before changing any settings:
- Review each option carefully
- Check with your tax advisor about what's required in your country
- Make adjustments based on their guidance
Current Default Settings:
- Based on German tax rules
- Uses first-in/first-out (FIFO) method for calculating profits/losses
- Treats crypto sales as tax-free after holding for 1 year
You can change these settings to match your country's tax requirements.
Add/Edit Accounting Rules
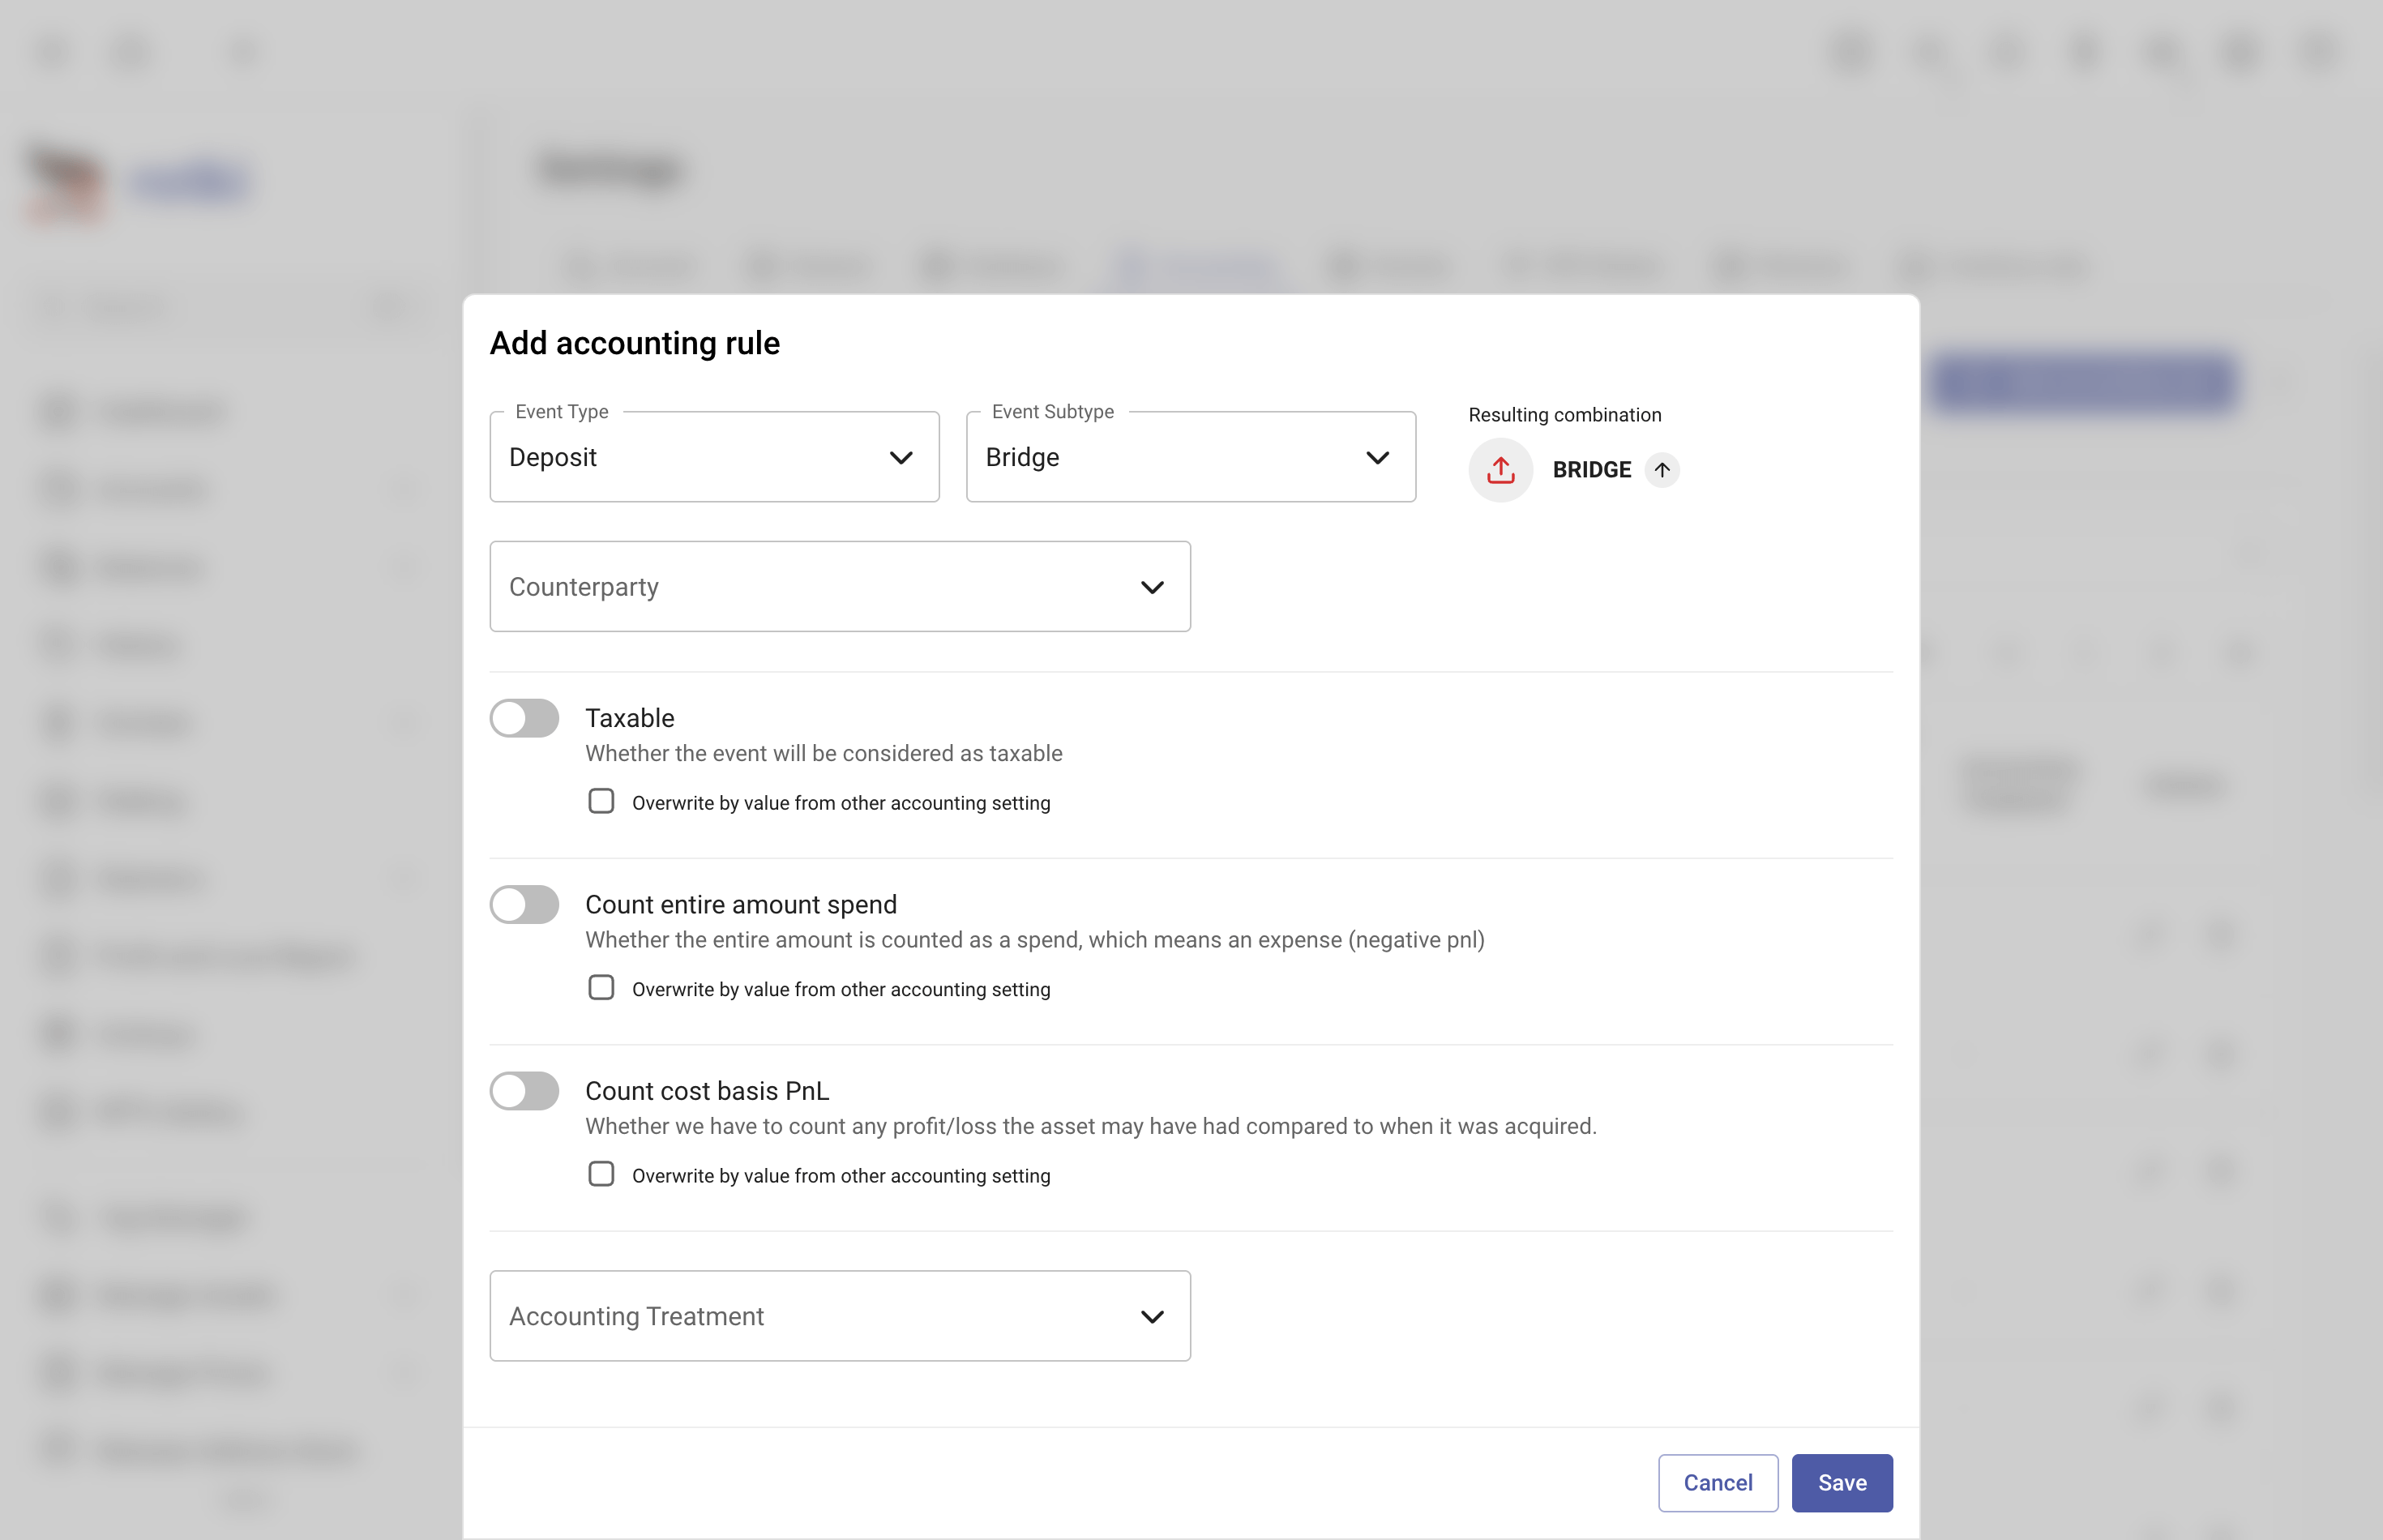
You can add or edit accounting rules based on Event type, Event subtype, and Counterparty.
Special Accounting Rules For Specific Events
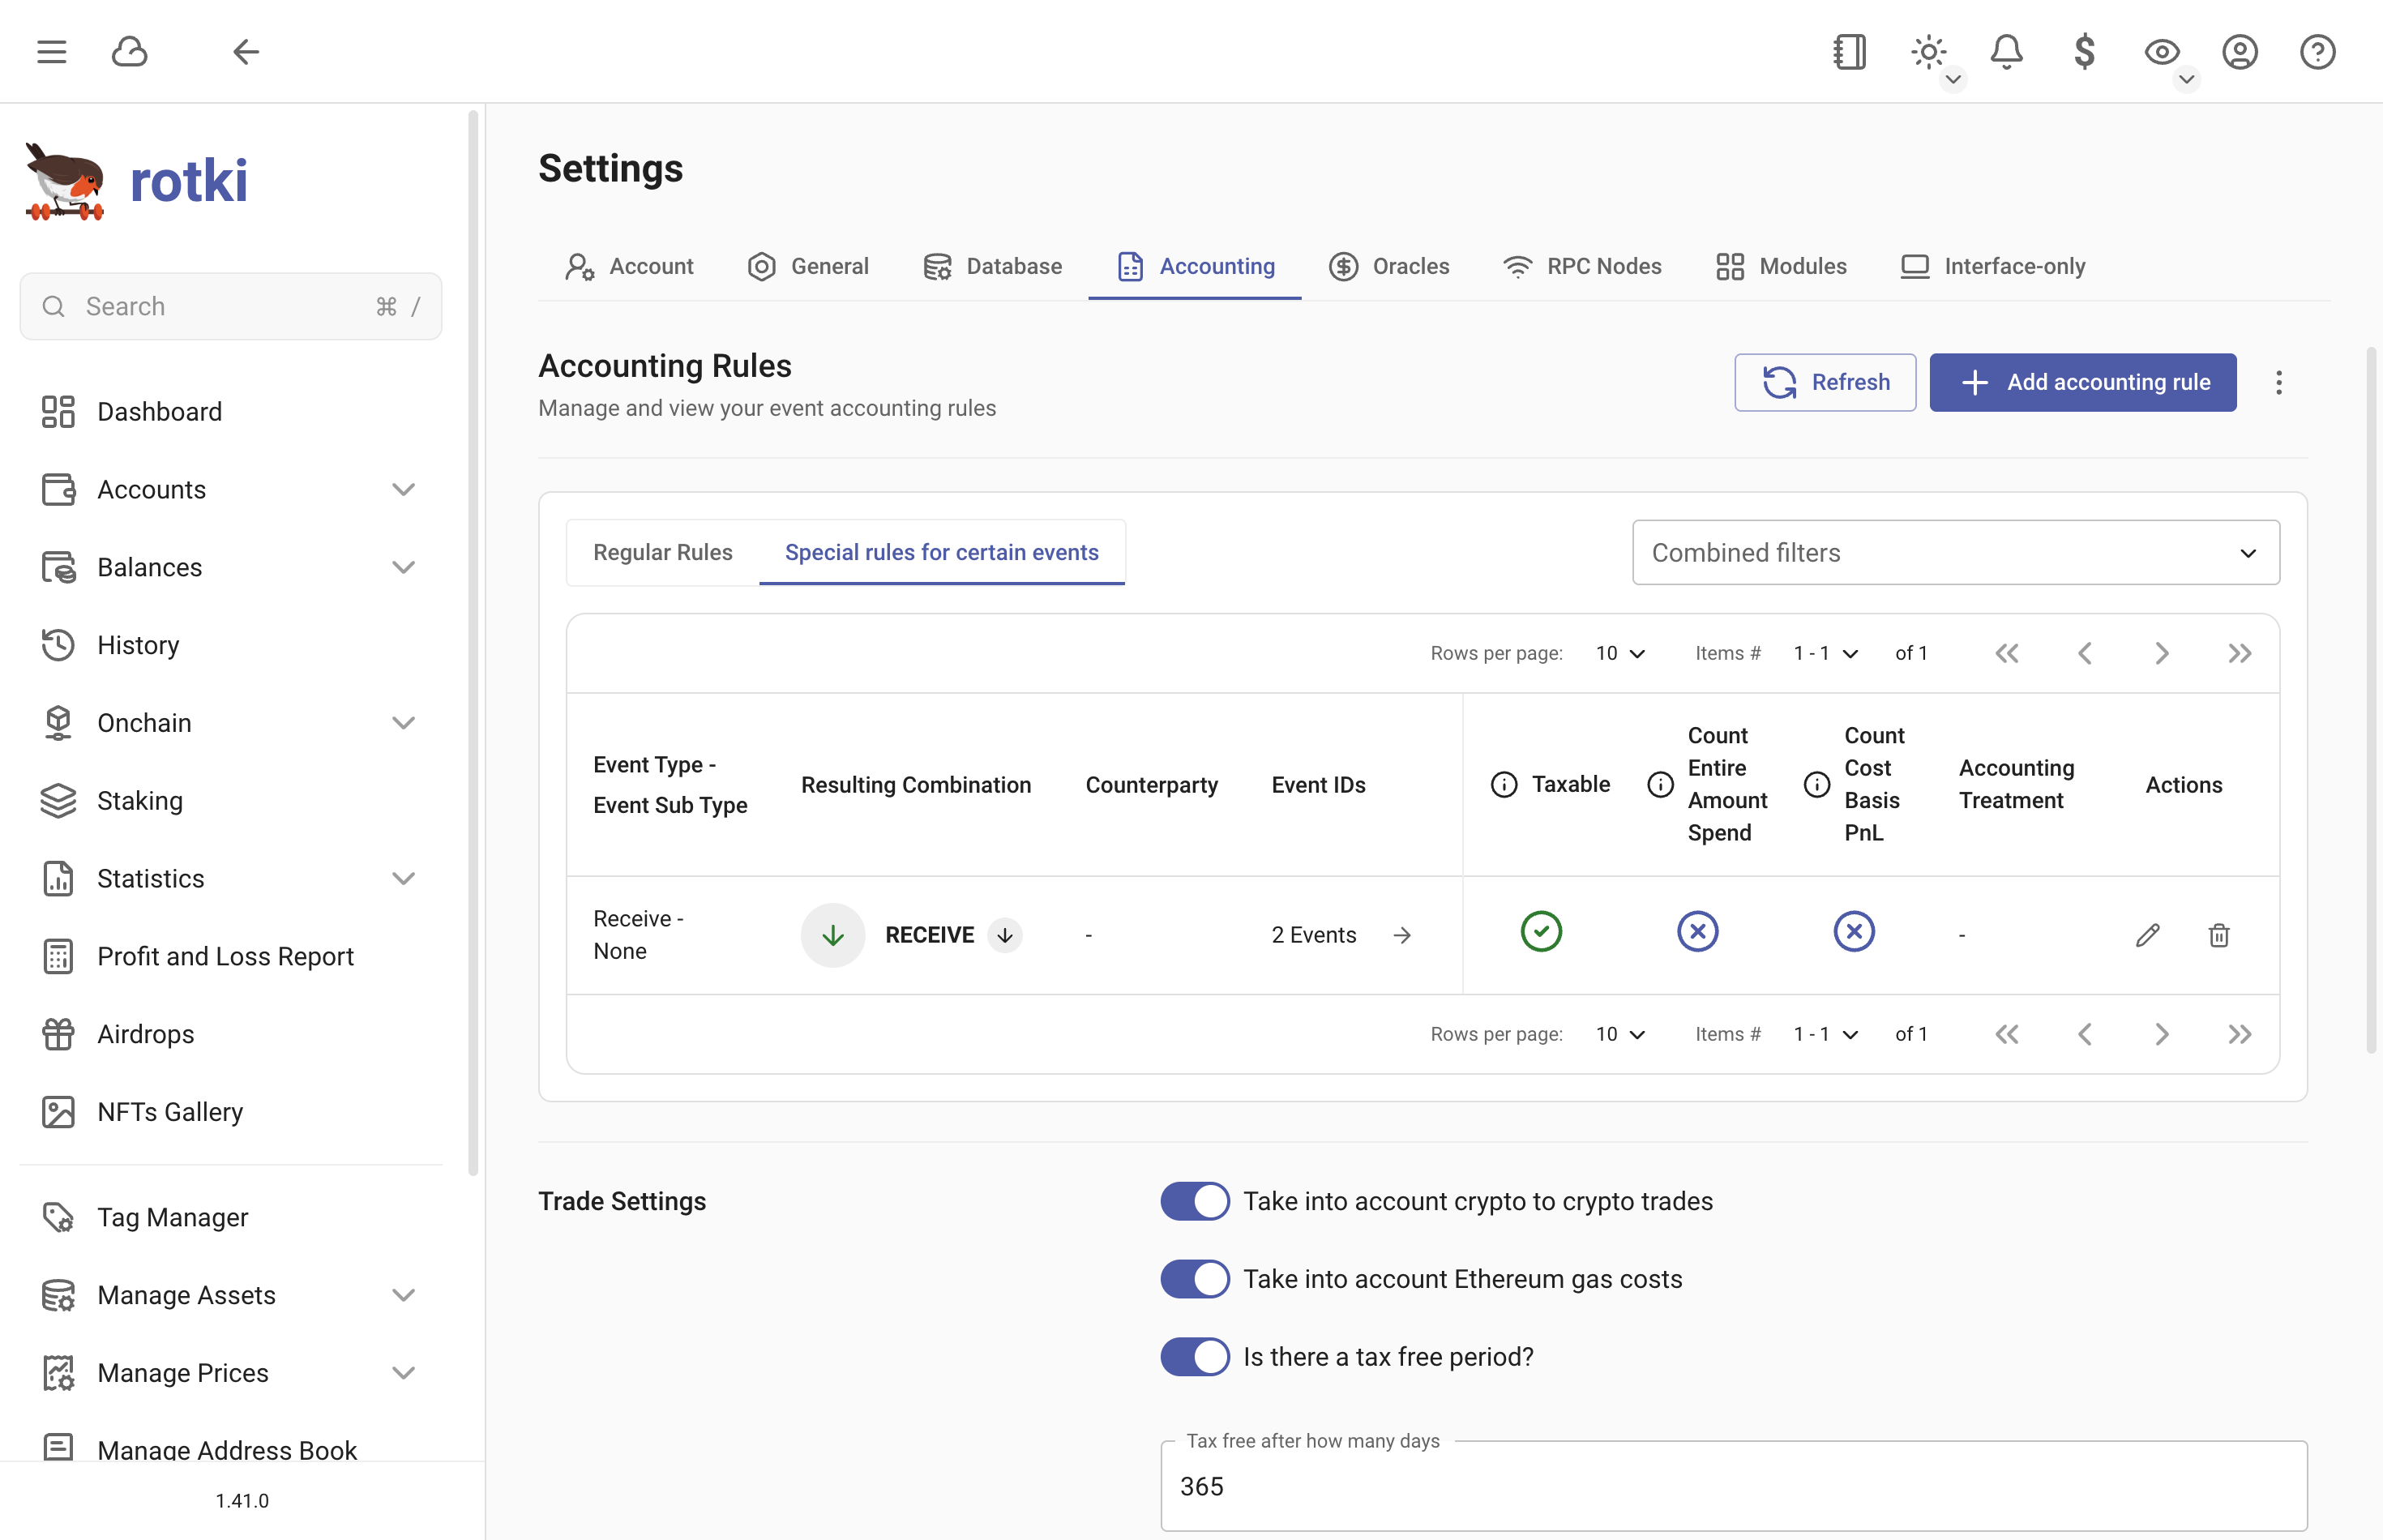
You can set custom accounting rules for individual events or groups of events directly from the History Events page. This allows you to override the default accounting behavior for specific events.
There are two ways to apply special rules:
- Use the Edit accounting rule menu for individual events
- Use Select multiple events to apply rules to multiple events at once
Trade Settings
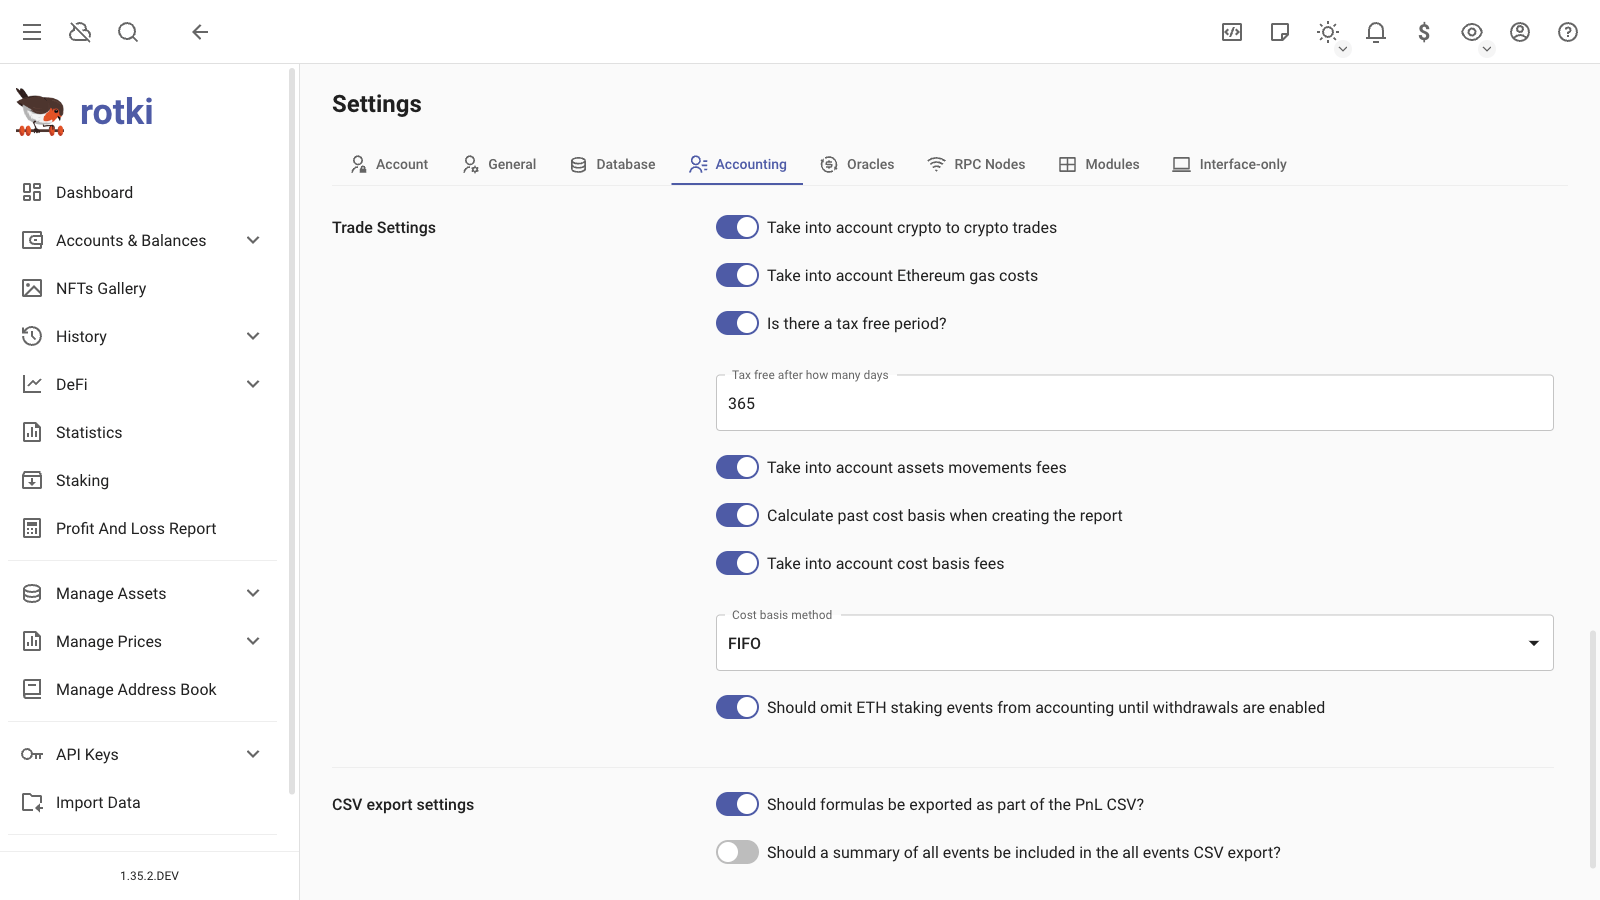
Crypto to Crypto Trades
A setting to determine whether crypto to crypto trades or any events that spend crypto are taxable and should be taken into account. By default it’s True.
Illustration: You trade your
1 ETH, to get11 USDT. Current price of ETH is10 EUR, but you bought it when it was5 EUR.
If
True, virtual trades are generated, and profits/losses are calculated based on the difference in asset prices. By making this trade, we will create two virtual trade, which are:- Virtual Trade 1: Sell
1 ETHfor10 EUR. PnL of this virtual trade is calculated asthe value when you sell this ETH (10 EUR)minusthe value when you bought this ETH (5 EUR)=5 EUR. - Virtual Trade 2: Buy
11 USDTwith10 EUR. PnL of this virtual trade is0 EURbecause it's a buy. However, later on, when you trade thisUSDTwith another crypto, point (1) will also be applied.Total PnL =
5 EUR.
- Virtual Trade 1: Sell
If
False, no virtual trades are generated, and no additional profits/losses are calculated.Total PnL =
0 EUR.
EVM Gas Costs
Specify if EVM transaction gas costs should be counted as a loss.
Tax Free Period
Specify if there is a tax-free holding period for crypto assets.
Calculate Past Cost Basis
Enable or disable calculating cost basis from all past events, even before the report period.
Omit ETH Staking Events
Specify if ETH staking events are taxable only after the merge and withdrawals are enabled or at the point of receiving.
Cost Basis Method
Select the cost basis calculation method:
FIFO,LIFO,HIFO, orACB.
Include Fees in Cost Basis
A setting to determine if trade fees should be included in the cost basis of the asset being bought/sold. By default, this setting is True.
Illustration: You bought
1ETH for10 EURand paid1 EURfee.
The fee event only reduces the amount of the fee asset paid. The actual fee is then used to determine the cost basis of the asset being bought or sold.
The cost basis of that ETH is
10 + 1=11 EUR. This is where the fee is taken into account.
CSV Export Settings

Export Formulas
Specify if formulas should be exported as formulas in the CSV or as actual values.
Have Summary
Specify whether the all_events CSV export should include a summary of all events and the total profit/loss at the end. This summary would also include the rotki version and the settings used during the PnL report, making it easier to reproduce a report run.
EVM
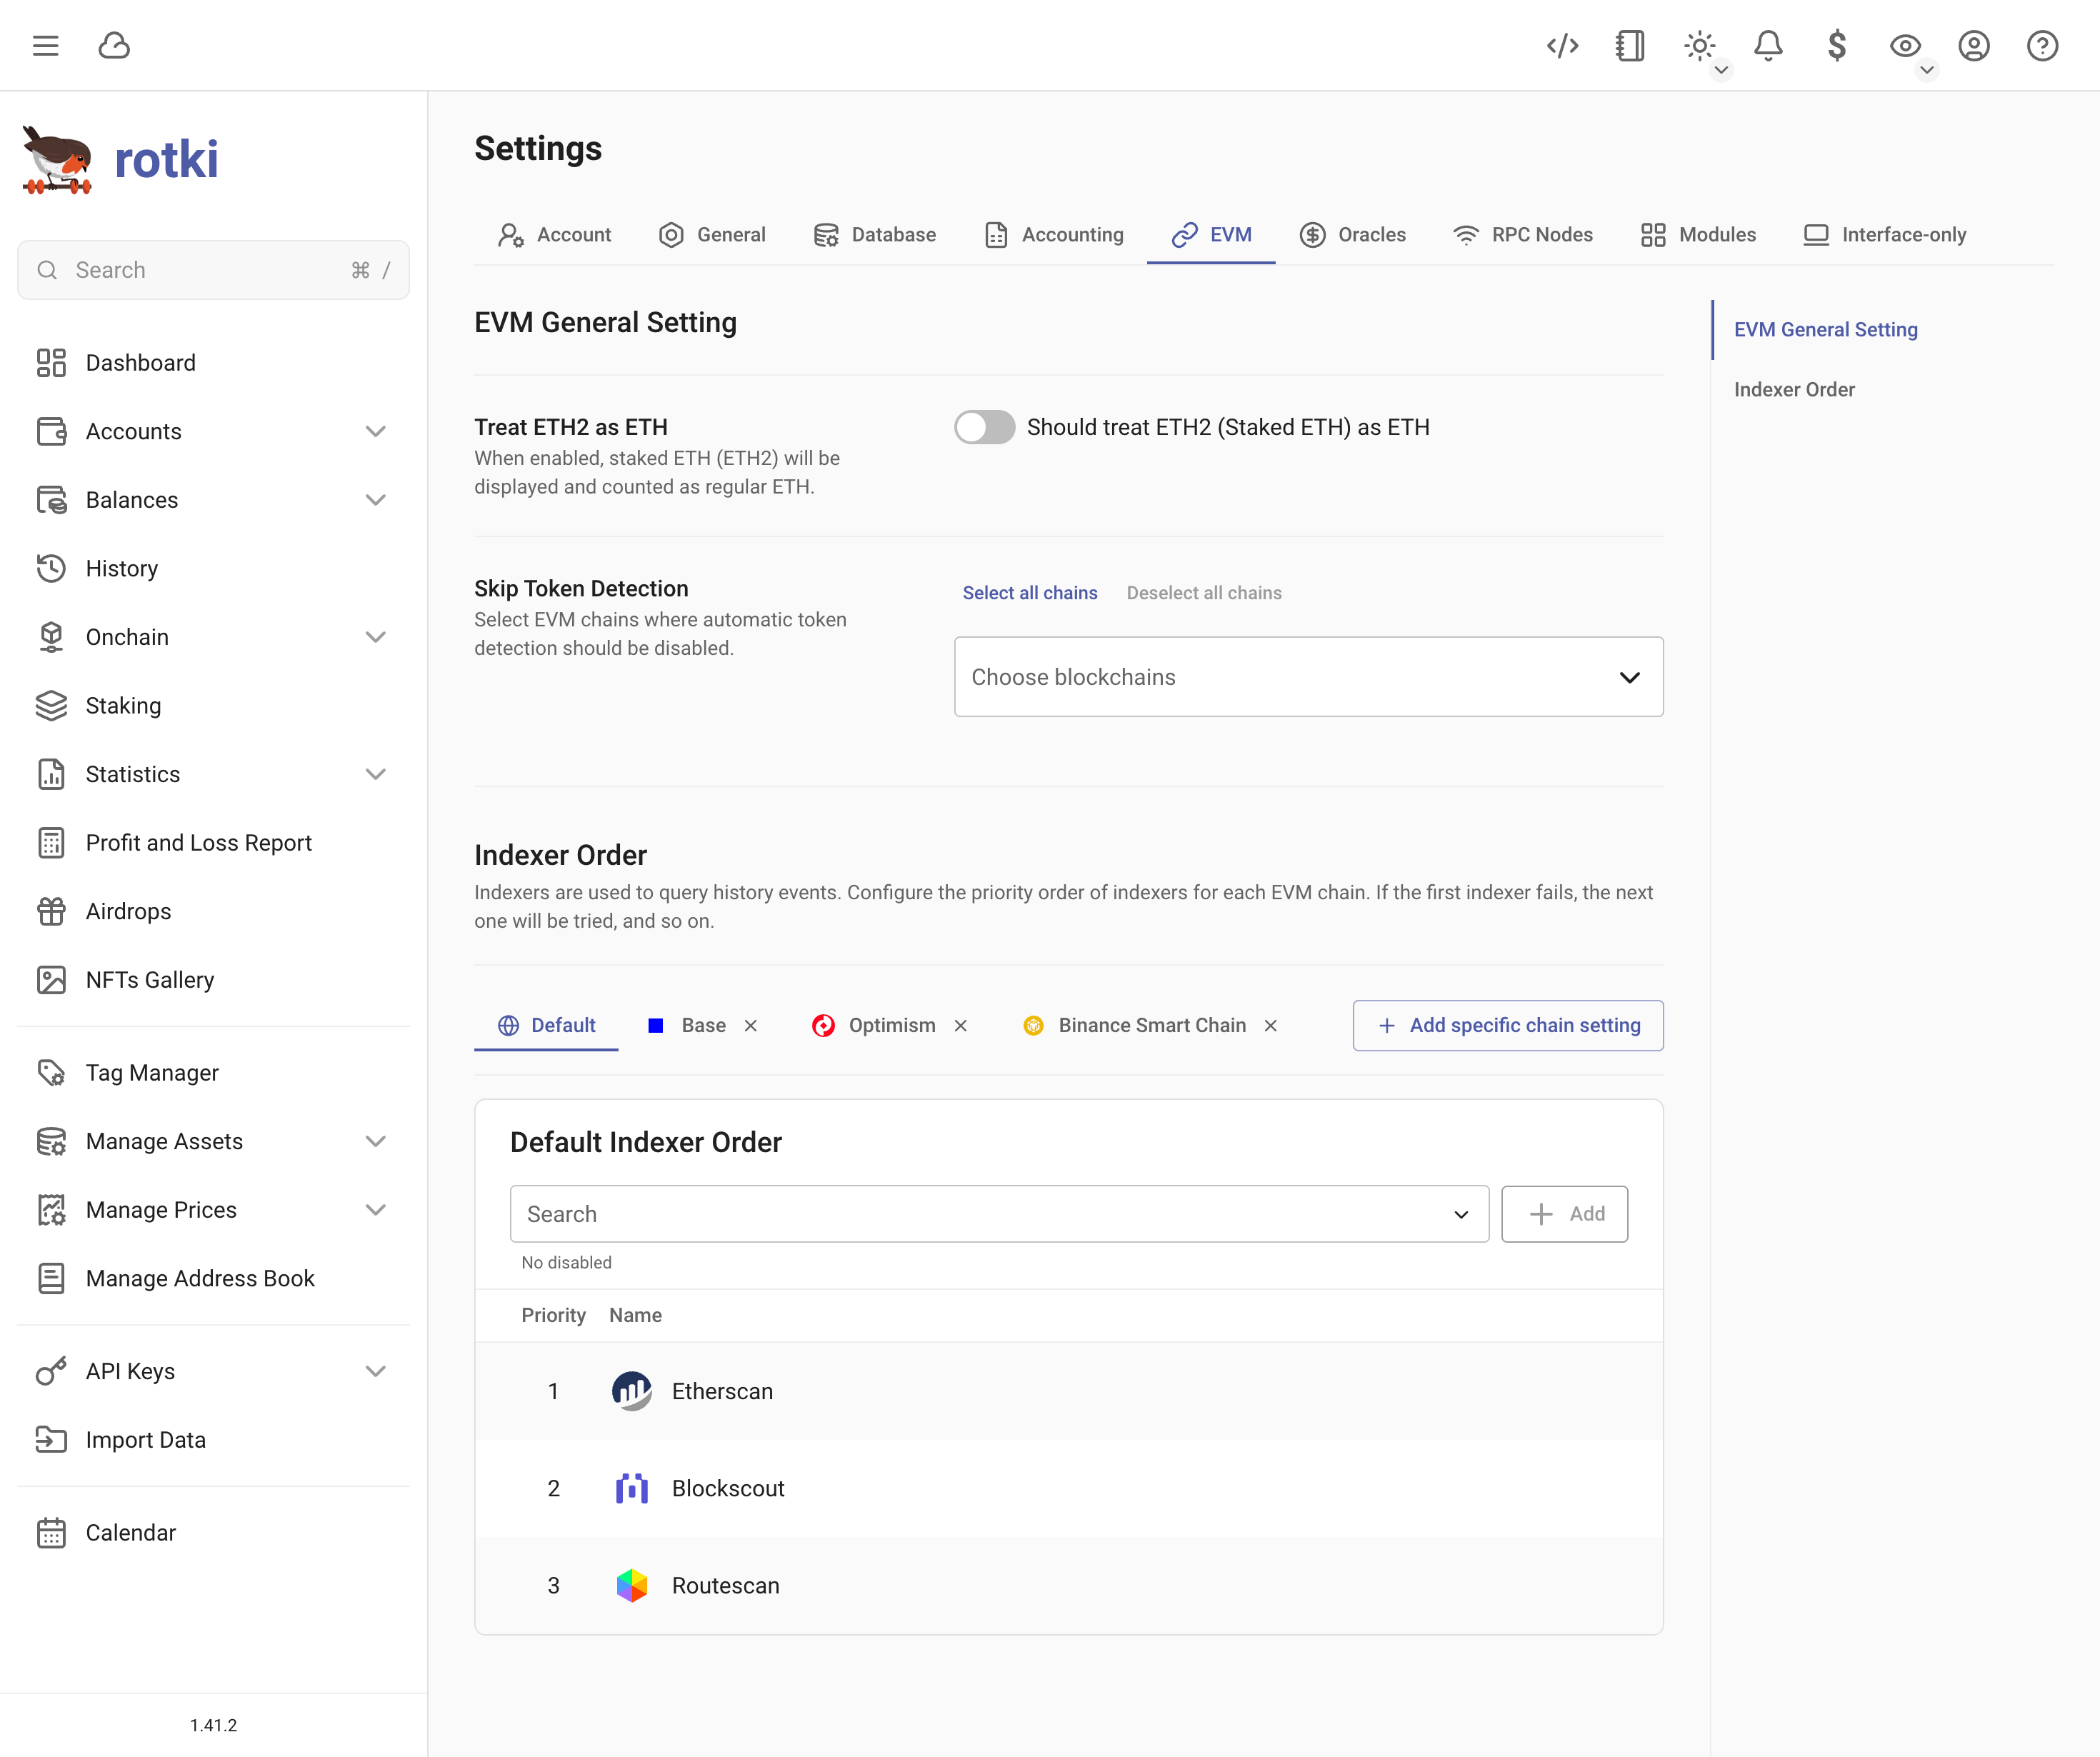
Treat Staked ETH as ETH
If enabled, ETH2 (staked ETH) will appear as ETH in the UI, and all tables and charts will combine the values of ETH and ETH2.
EVM Chains for Automatic Detection
Configure which EVM chains should not automatically detect tokens. By default, EVM chains detect activities of all registered EVM accounts in other EVM chains.
Indexers
rotki uses several indexers to identify which transactions belong to your tracked addresses. The order used for each chain can be adjusted in the default settings and will apply unless a specific chain configuration overrides it. For example you may want to avoid using etherscan on Optimism and Base if you do not have a paid API key for those networks.
This lets you control which sources are queried and change the configuration if one of them is unreliable for a particular chain.
In addition to querying historical events, indexers are used when detecting onchain activity, for example when you add a new address to all supported EVM chains or when the periodic task performs this check in the background.
At the time of writing the only chain that cannot be queried for free is Binance SC because neither blockscout nor routescan are available and etherscan requires an API key under the Lite plan.
Regarding the need for API keys:
- Etherscan requires an API key in the free tier to perform API calls.
- Blockscout does not require an API key and has a default limit of 10 requests per second.
- Routescan offers a free tier comparable to etherscan and does not require an API key.
Price Oracle Settings
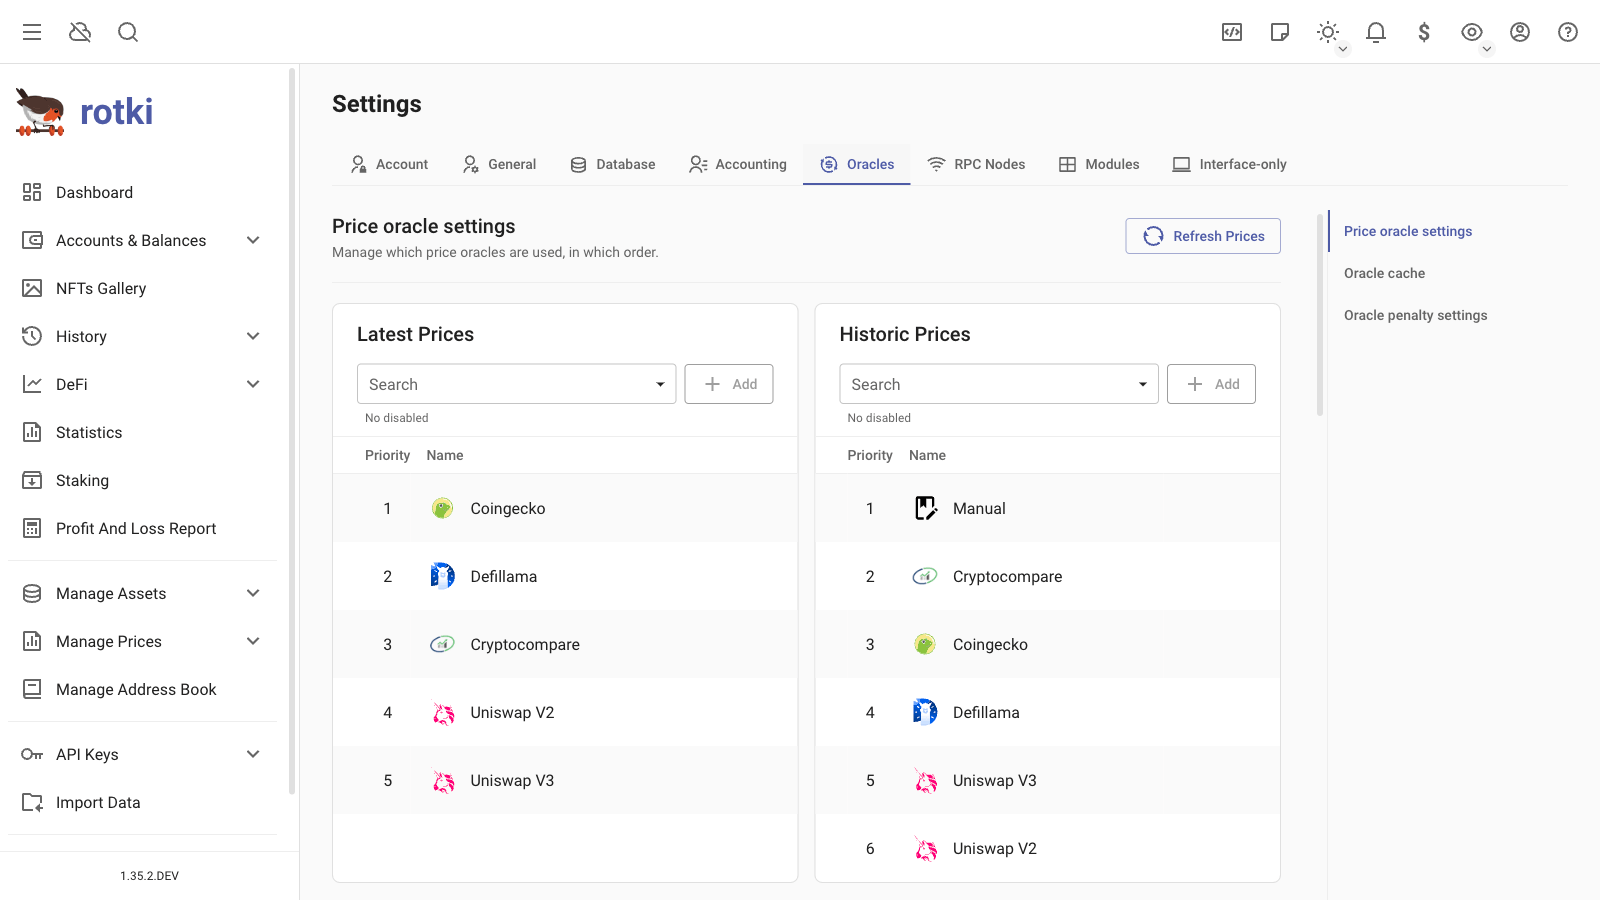
Here, you can customize the order in which price oracles are queried, both for current and historical prices. This determines which price source to check first, second, and so on.
DeFi oracles like Uniswap V2 and Uniswap V3 use only on-chain information to get current prices. This makes querying a bit slower, but it relies solely on the Ethereum chain. Prices for some assets may differ from Coingecko or CryptoCompare, depending on the conditions of the pools at the time of the query.
Oracle cache
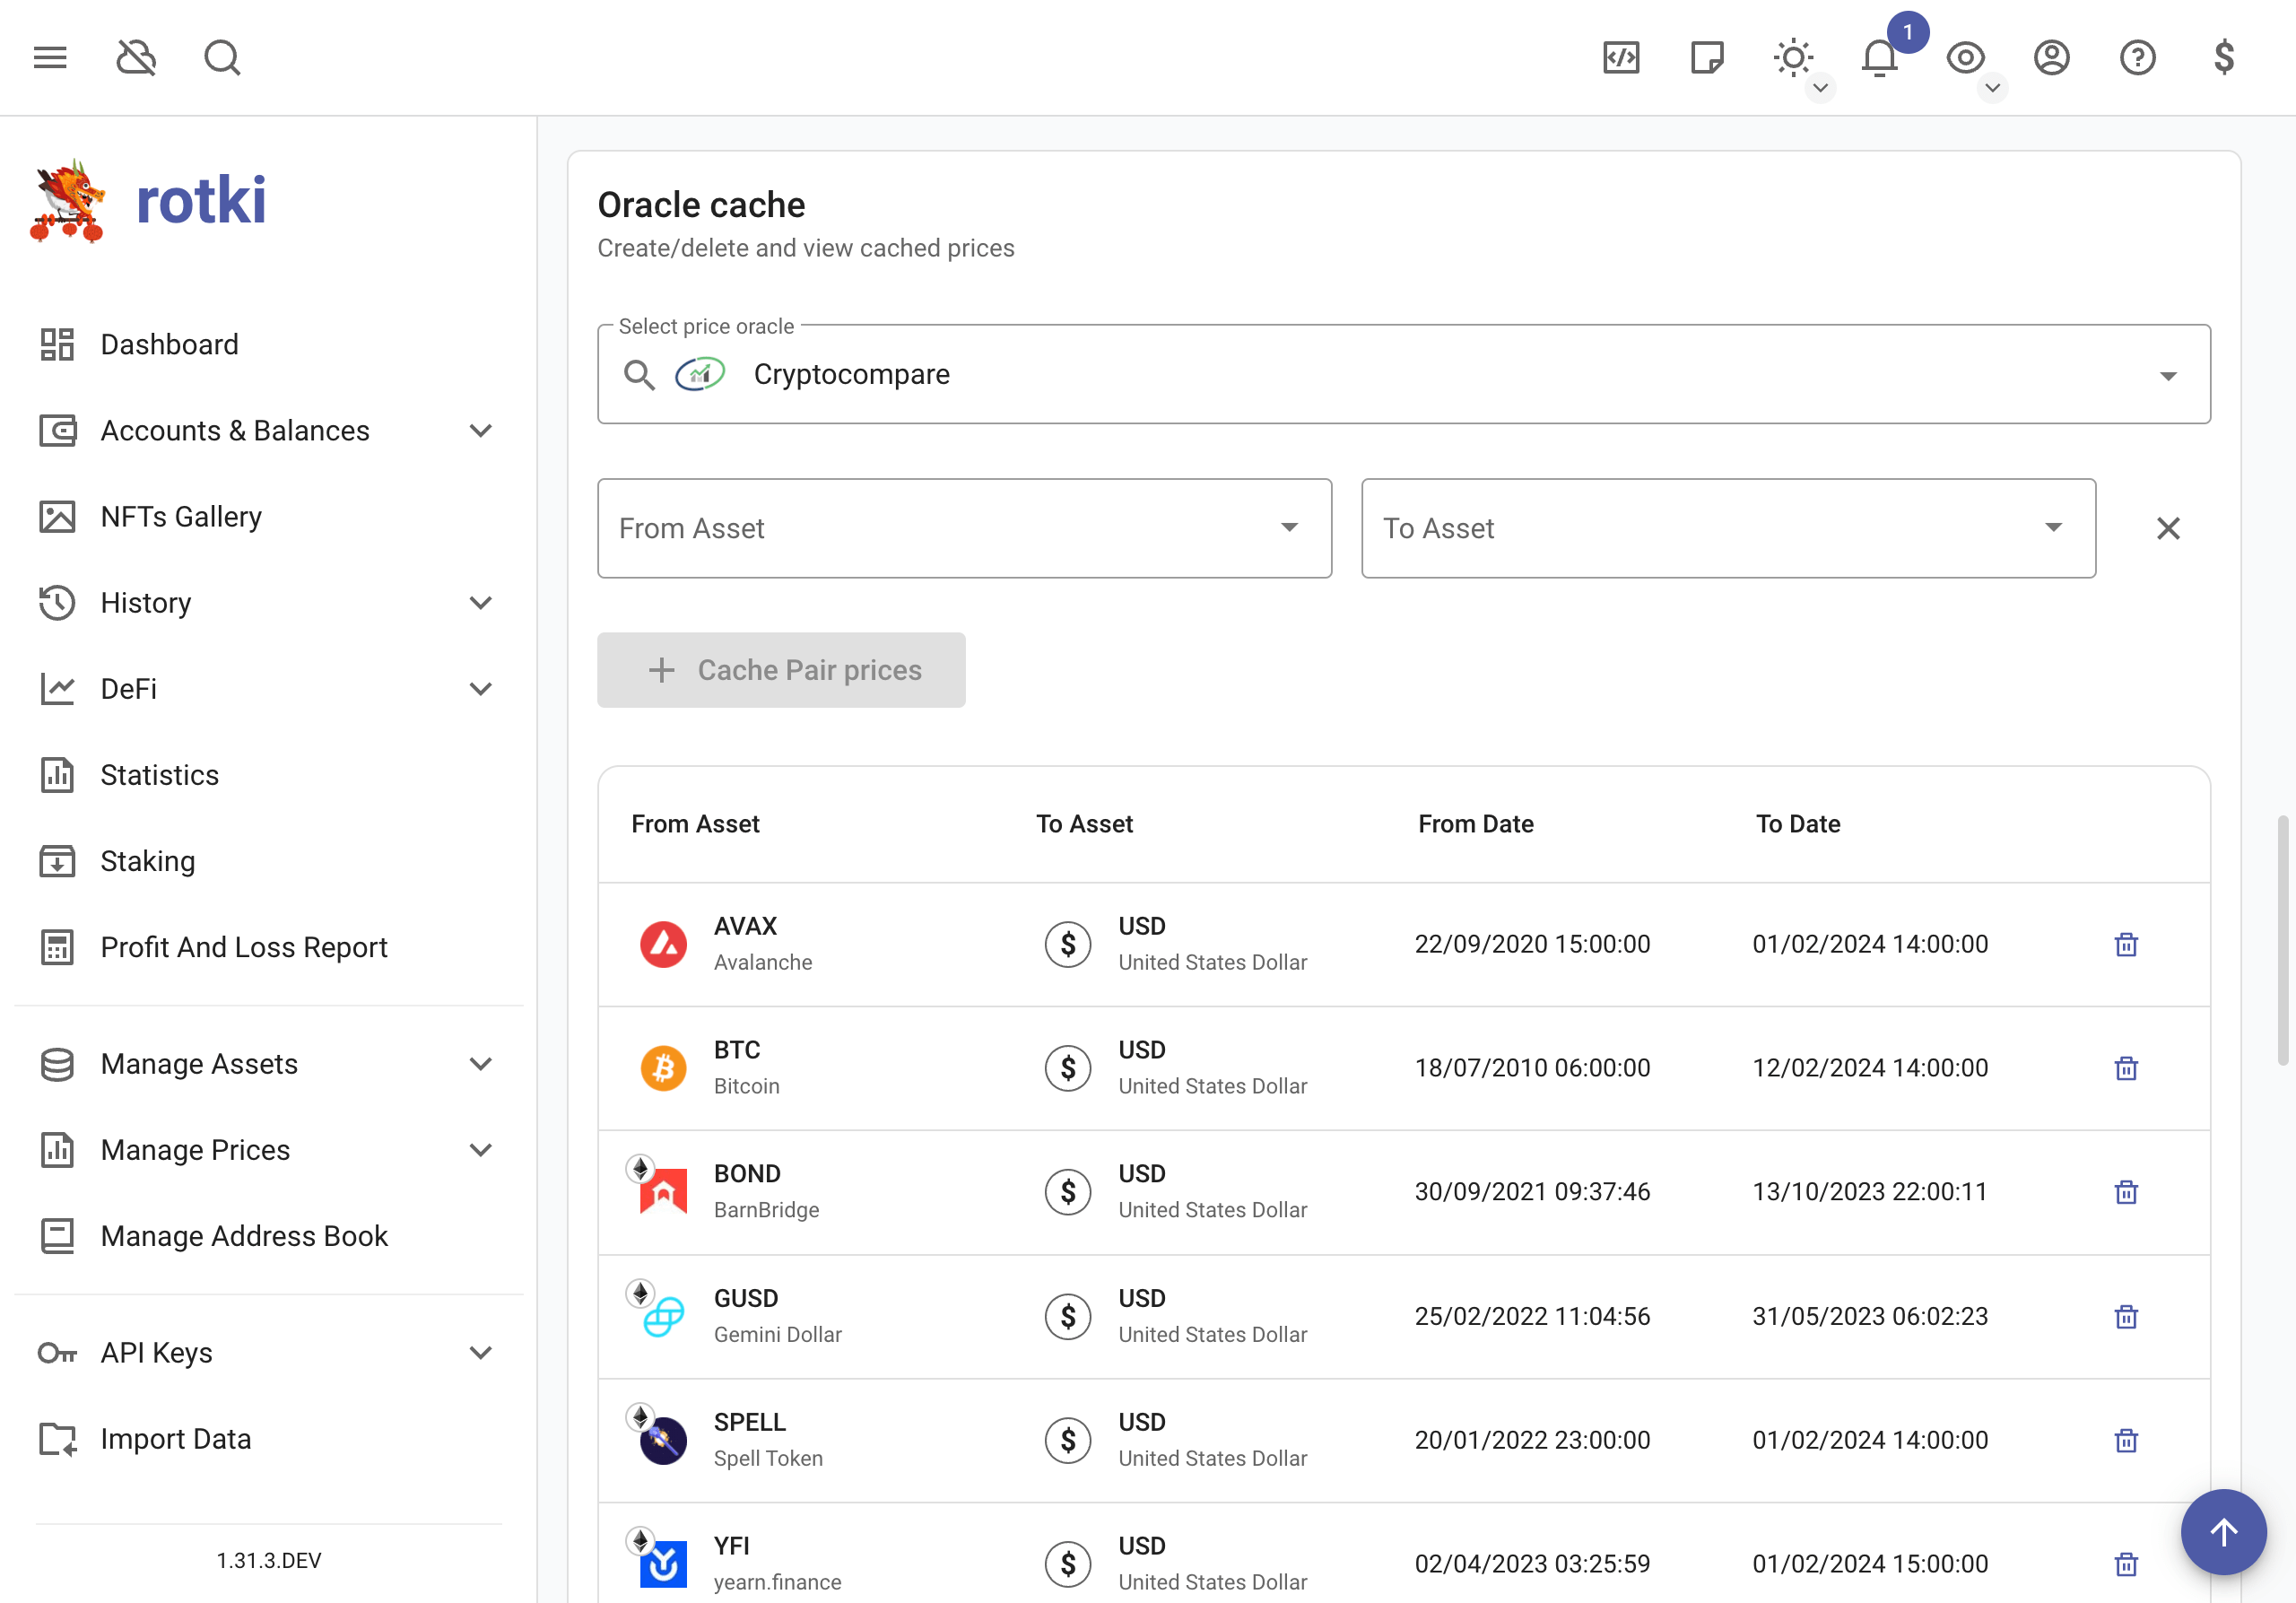
Querying historical prices from oracles such as CryptoCompare and CoinGecko is slow and can be slower due to rate limiting. rotki creates historical price caches during idle times.
Request the creation of such a cache by going to the Oracle cache section, selecting the oracle, the from asset of the pair, the to asset of the pair, and then pressing "Cache pair prices".
Manage existing historical price cache entries, inspect start and end dates, and delete caches if needed.
RPC Node Setting
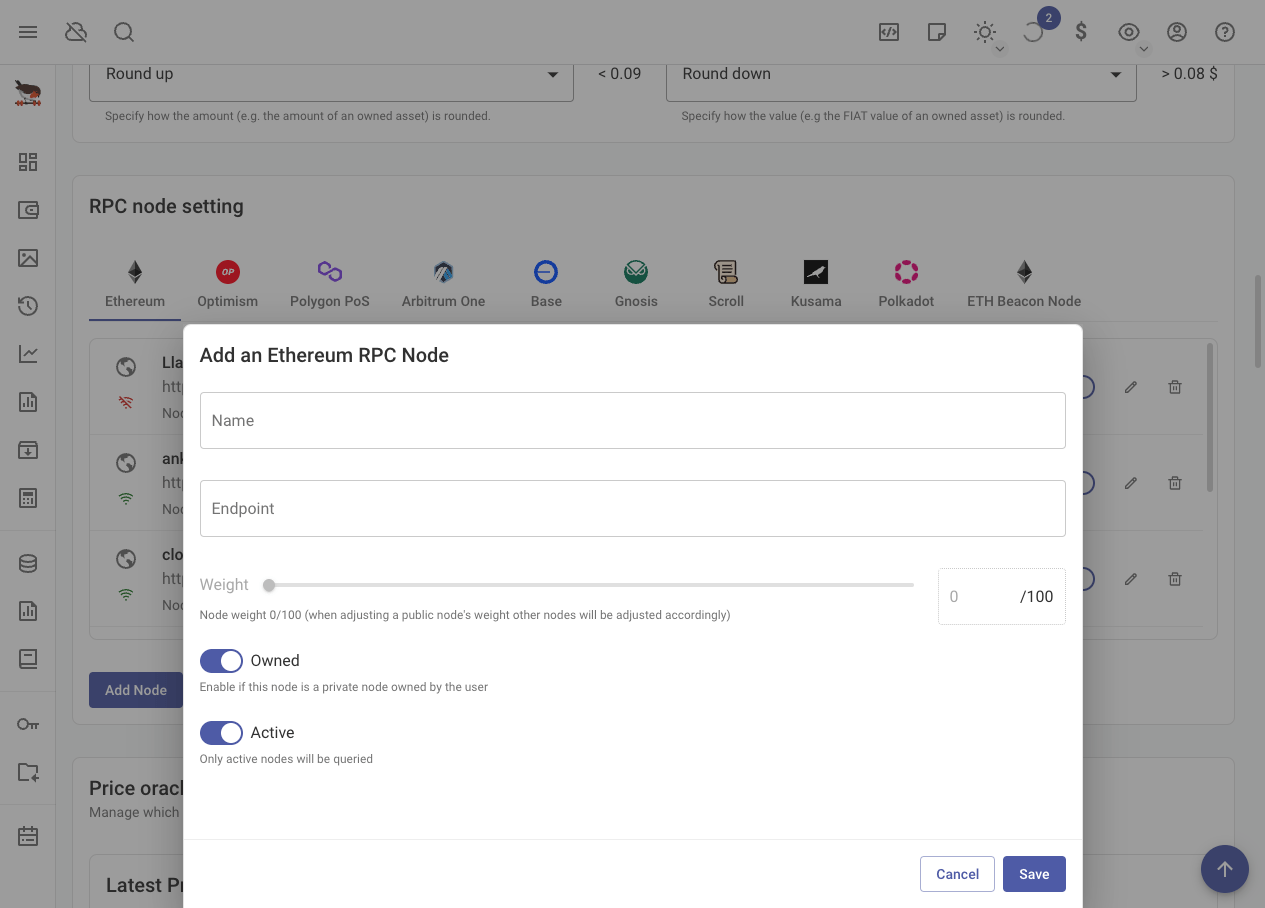
This setting lets you change the nodes used to connect to blockchains. We give you a list of public nodes, but sometimes they are busy or down. You will see a green or red icon showing if a node is working.
It is good to add more nodes and set their priority. We always try your own nodes first, then use some random public nodes if needed. If you don't have your own node, we use public nodes.
The node's weight (percentage) shows how likely it is to be used. You can turn nodes on or off with the toggle button.
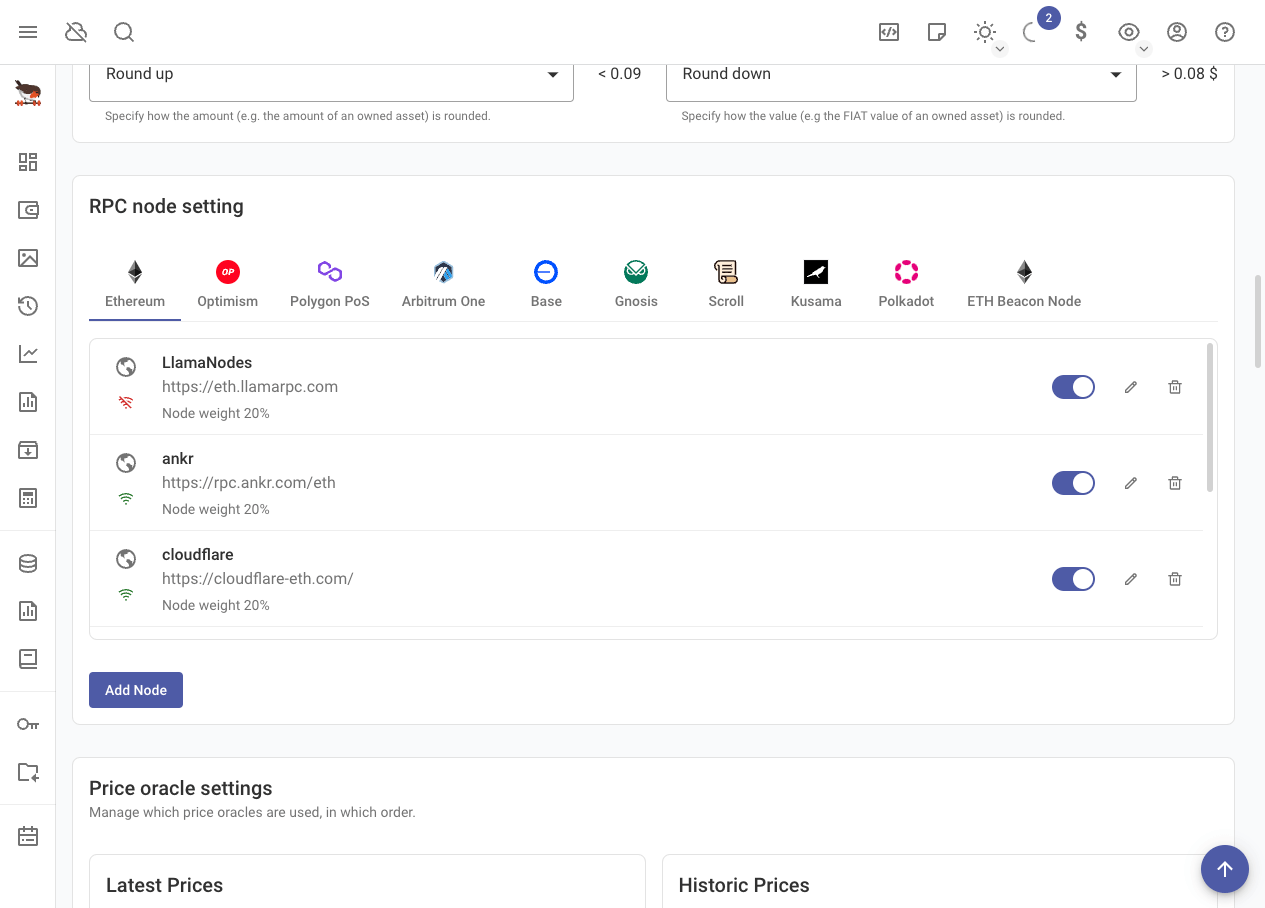
In this menu you can also edit, delete or add more nodes.
Local Nodes
Connecting to a Kusama Client
rotki attempts to connect to a local Kusama node running on the default port
9933. If no client is running, blockchain queries will use an external service.
Connecting to a Polkadot Client
Set the RPC endpoint for a Polkadot node here.
Connecting to an ETH Consensus Layer Beacon Node
Set the RPC endpoint for the Ethereum consensus layer beacon node. If unreachable, beaconcha.in will be used. For DAppNode Ethereum validator users, find the RPC node setting in the DAppNode Package for the Execution Client.
Connecting to a Bitcoin Mempool instance
A local Bitcoin node can be used to query balances and transactions via Mempool's API. Mempool is an open source project that can be self-hosted on Bitcoin nodes. It is readily available to install on many full-node distros such as Umbrel or Raspiblitz. Mempool uses port 4080 by default. Please include this when setting the endpoint (e.g.
http://localhost:4080). Other custom ports should also work. Please note that transaction querying is currently not supported and historical transaction fetching will fail. Only address balance querying is supported when using a custom mempool instance.
Module Settings
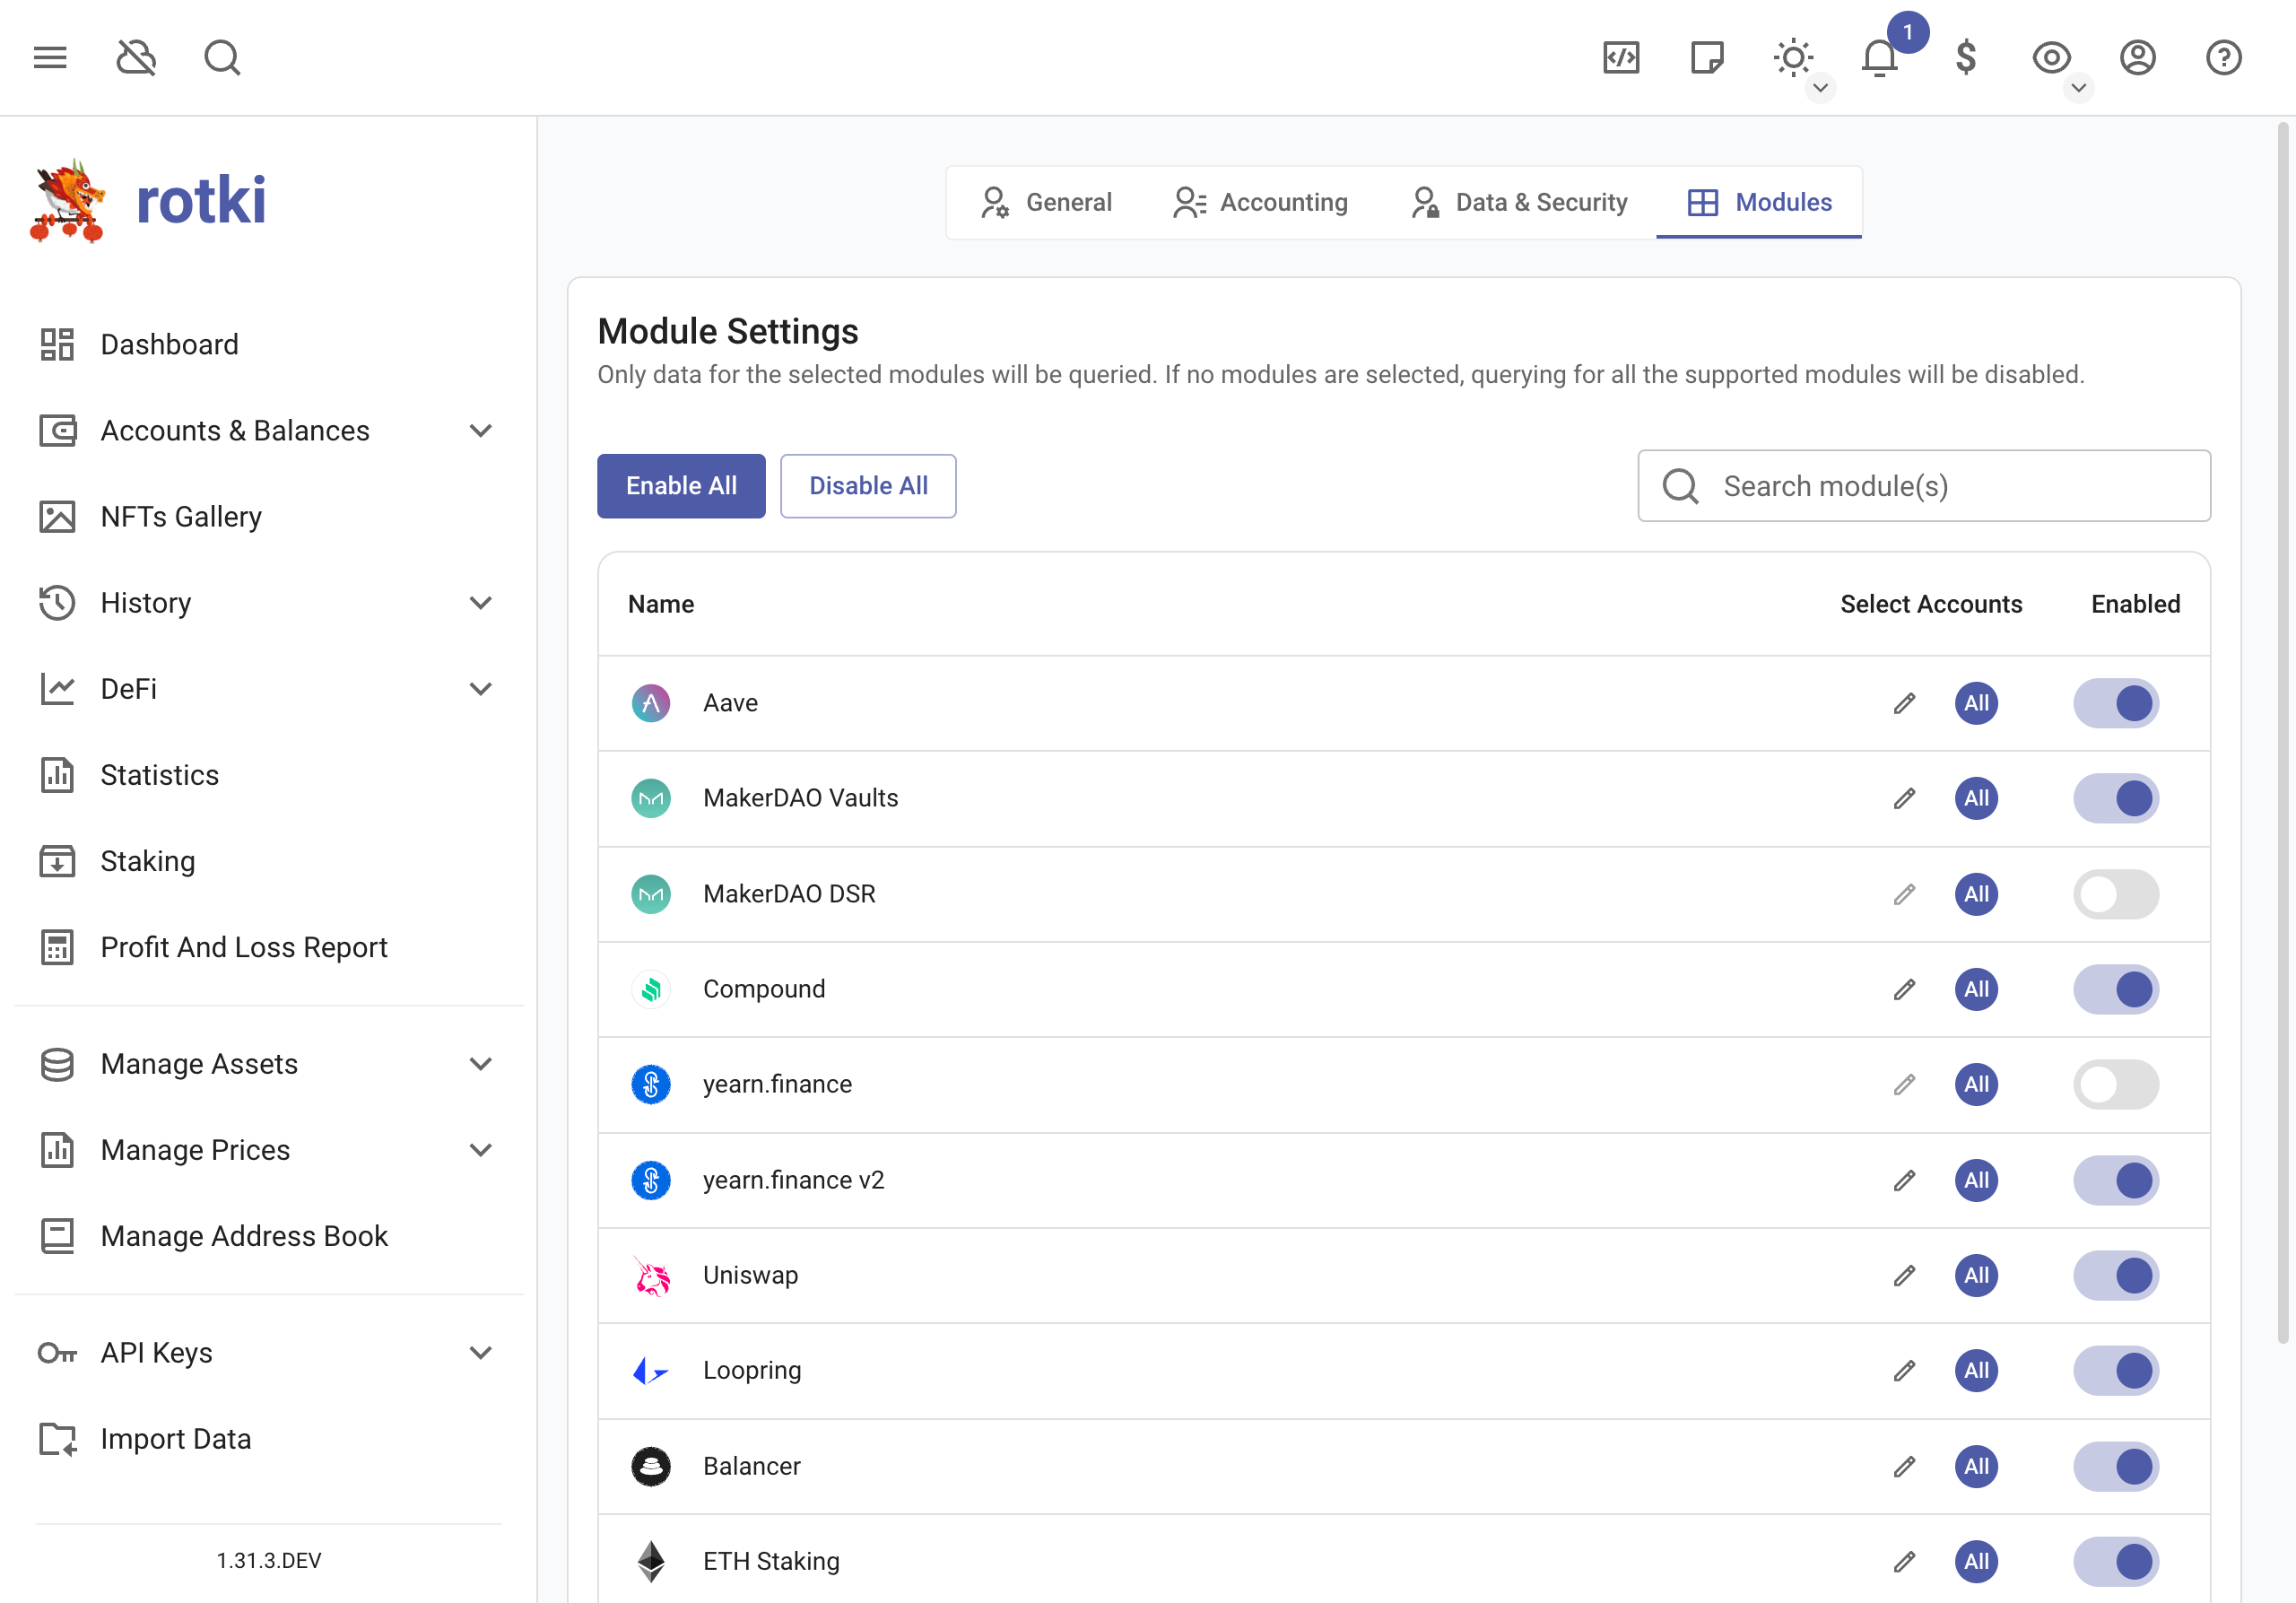
Choose the "Module" section of the settings to customize the enabled modules and the queried addresses for each module.
Enabling only the modules you use and specifying addresses improves querying speed.
Activating/Deactivating Modules
View all modules in the table. Some are activated by default. Enable/disable a module by toggling the switch. Re-login for changes to take effect.
Selecting Addresses
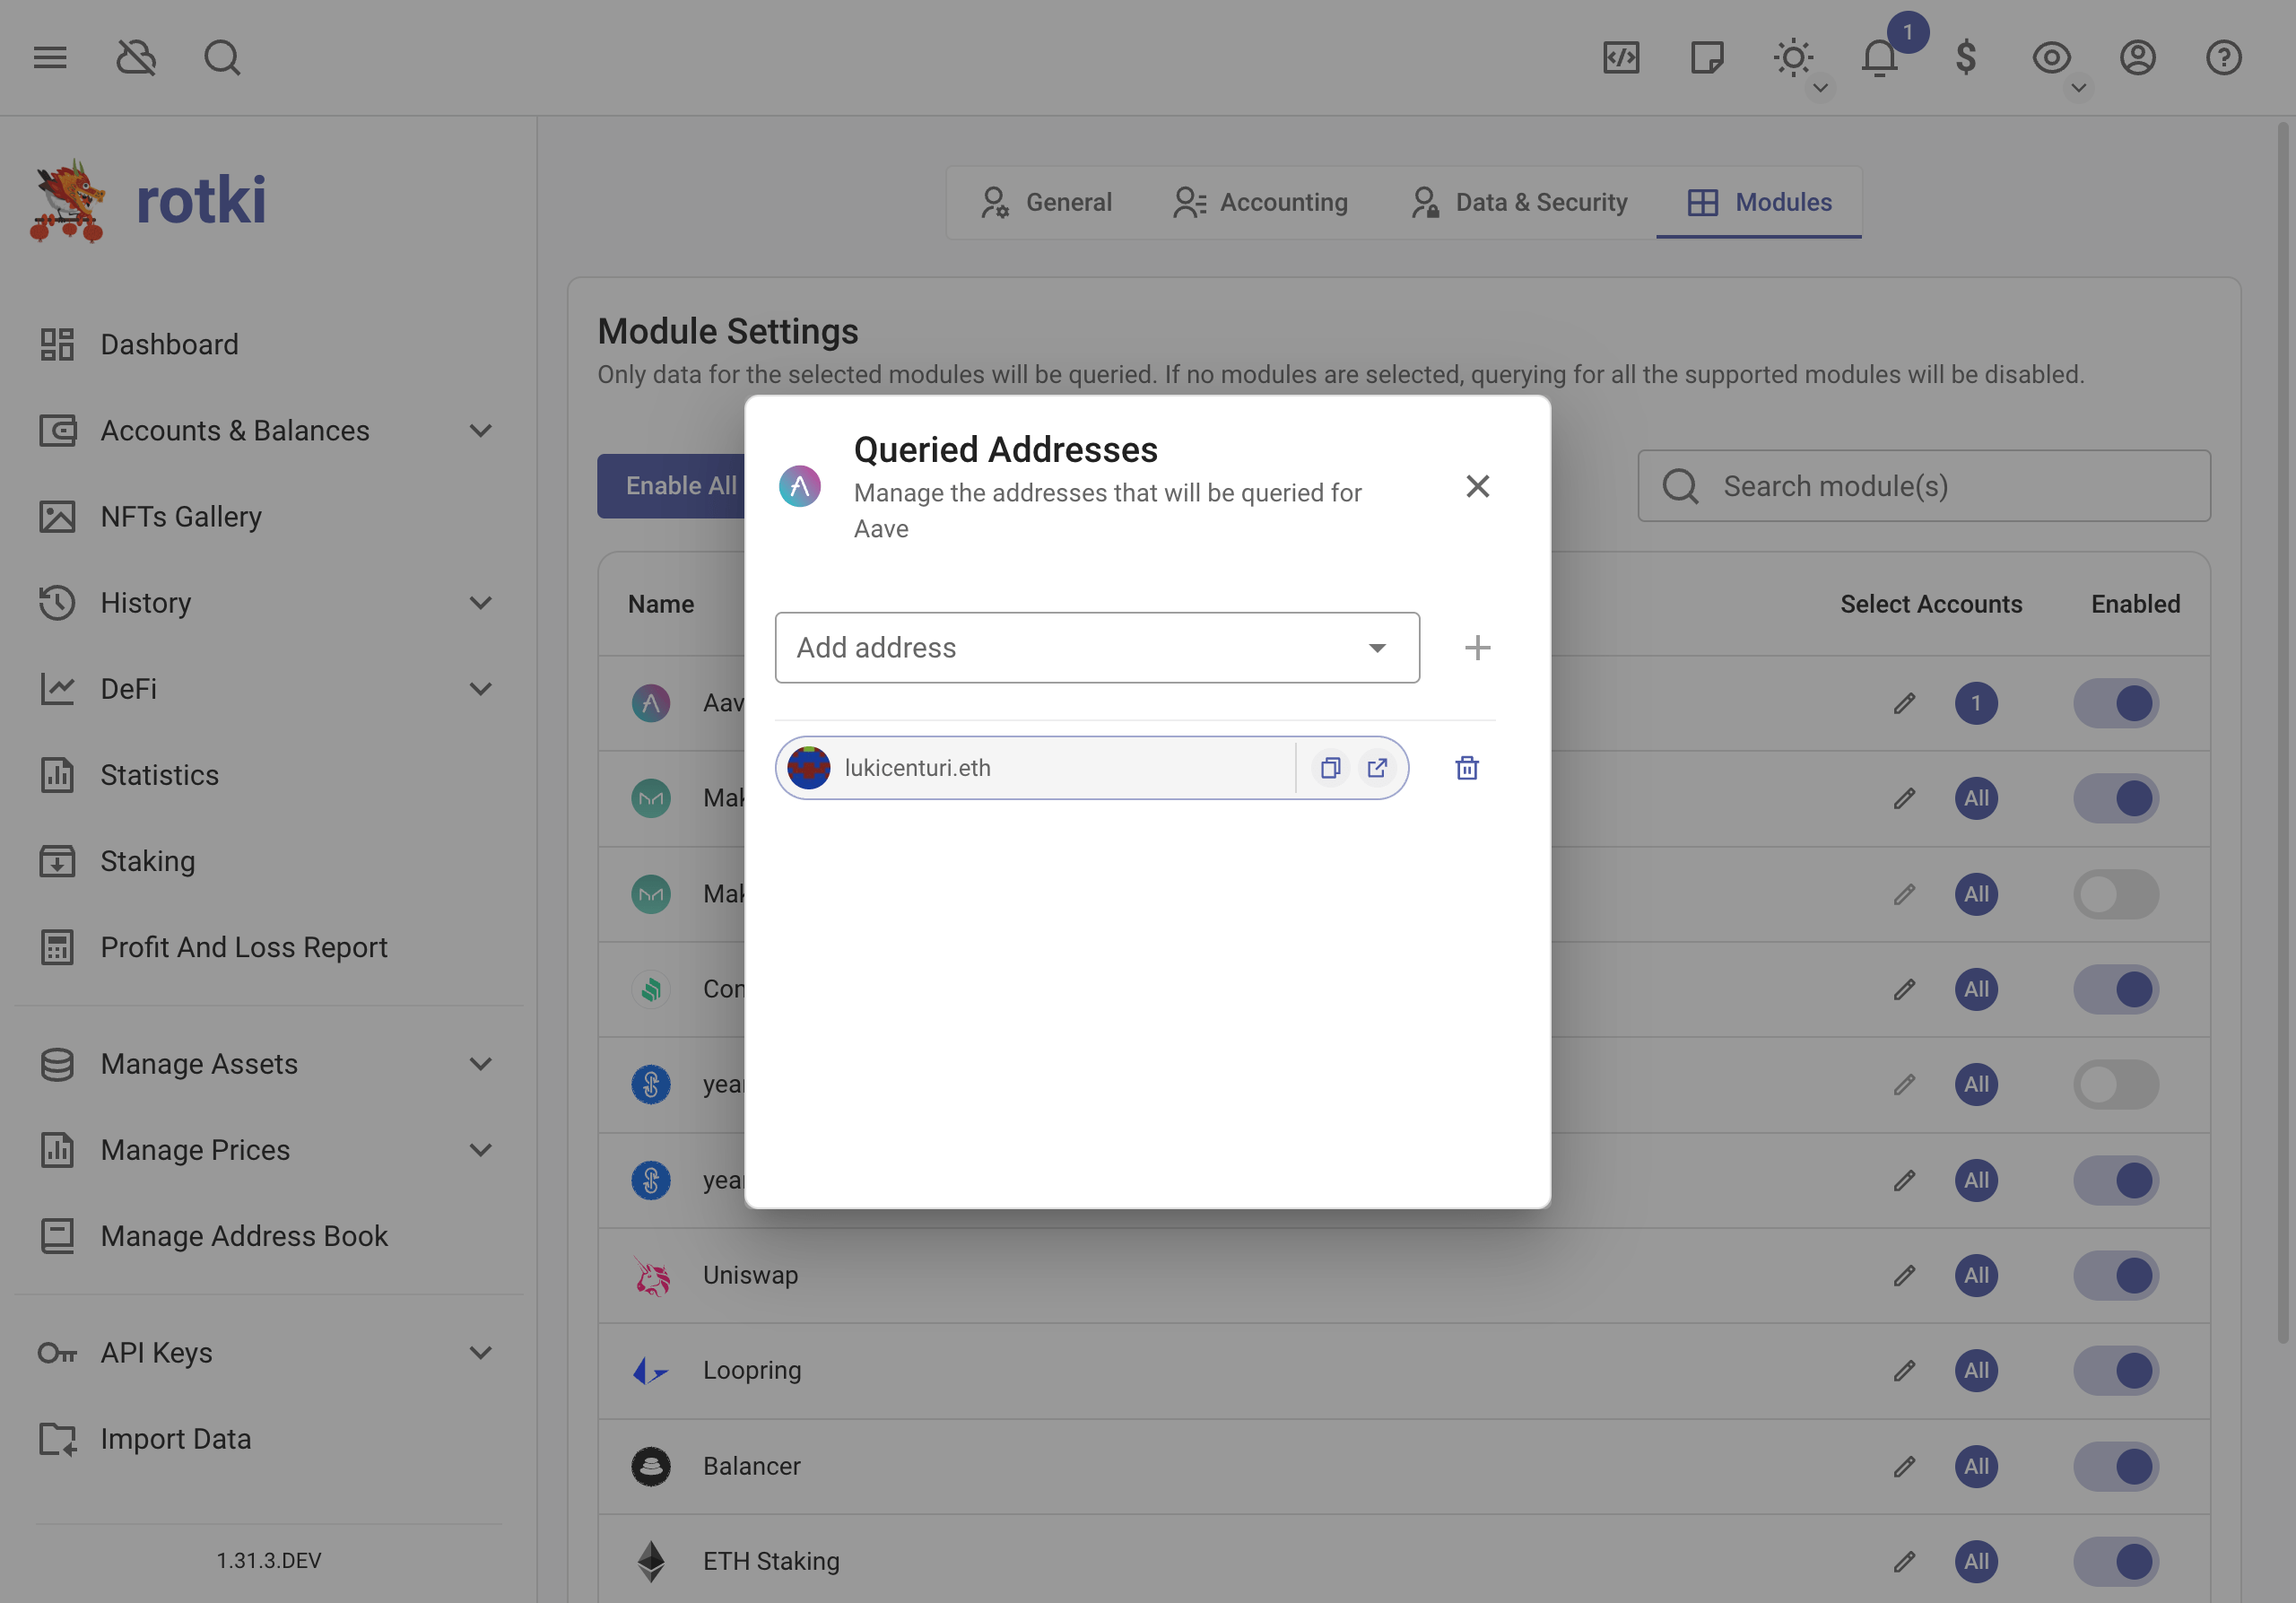
To limit querying to selected addresses, click the "edit/pencil" button on the module to select addresses. If no addresses are selected, rotki checks all eligible addresses, increasing query duration.
Interface-only Settings
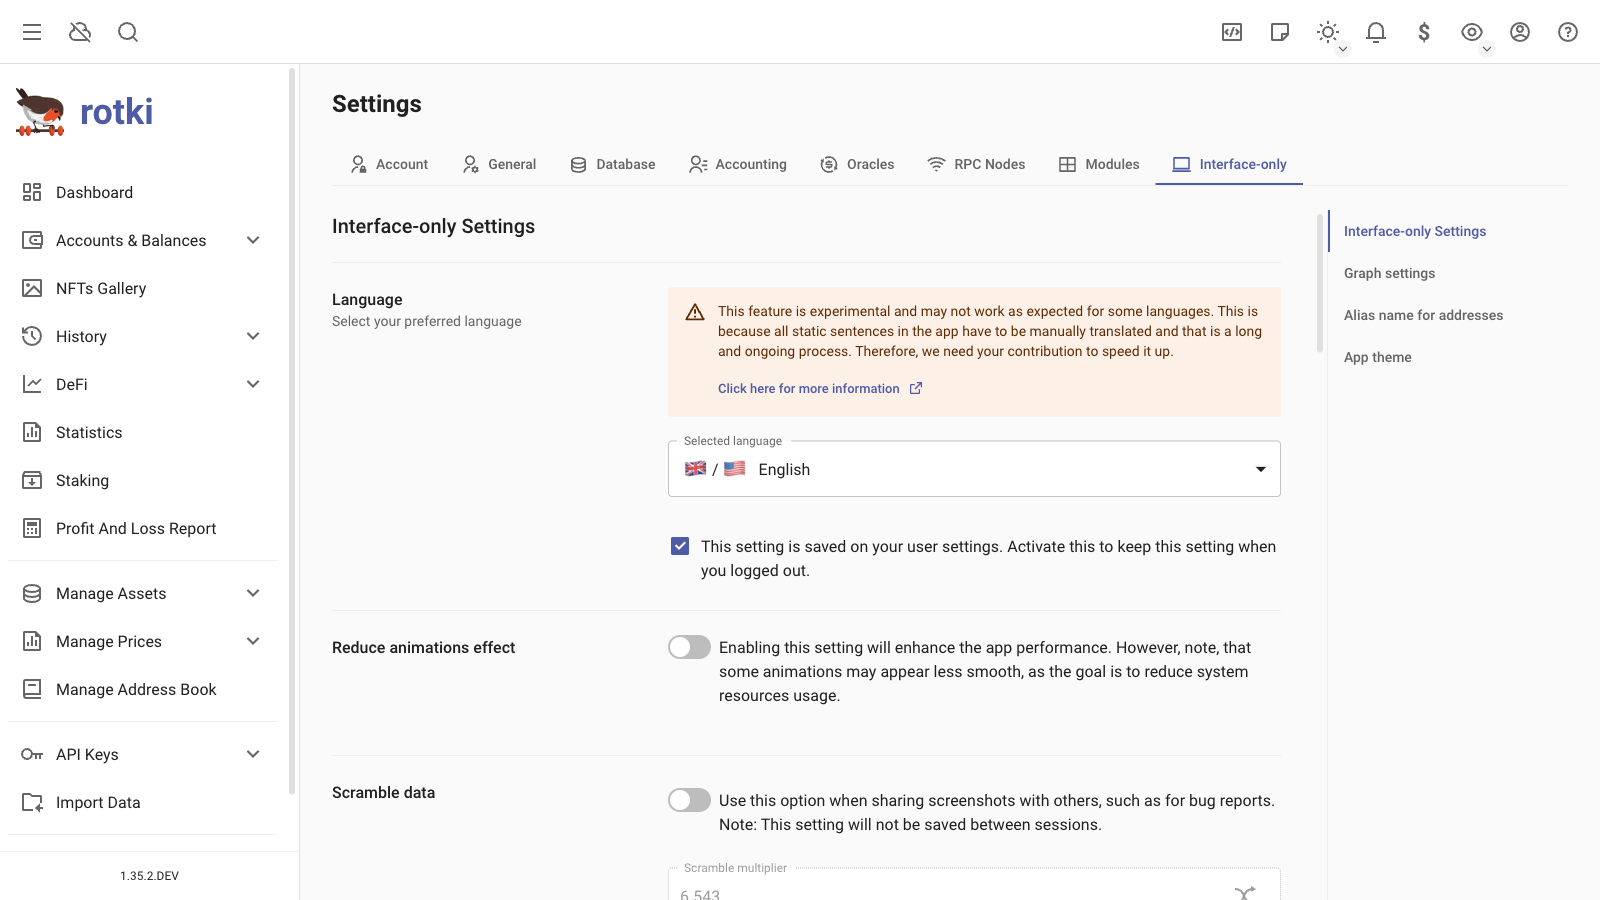
Language
Set the language used in the app. This feature is experimental and may not work as expected for some languages. Help us speed up the translation process by contributing here.
Animation Effect
Reduce animation effects to improve performance. This affects animation quality but optimizes resource usage.
Data Scrambling
Enable data scrambling to randomize amounts, dates, and other data for privacy in screenshots. This setting does not persist across sessions.
Automatic Balance Refresh
Enable or disable automatic balance refresh and set the refresh interval. Disabled by default due to potential slow queries and rate limits.
Periodic Status Query
Set the frequency of backend data updates. Default is 5 seconds.
Blockchain Explorer Customization
Customize which explorer is used for transaction and address links.
Graph Settings
Dashboard Graph Default Timeframe
Set the default timeframe for the dashboard graph, which will be pre-selected upon login.
Graph Basis
Configure whether the graph y-axis starts at 0 or the minimum amount for the period.
Alias Name for Addresses
Enable or disable alias names for blockchain addresses. Aliases are obtained from
ENS,addressbook, orblockchain account label. Change the order of resolution as needed.
Theme Customization [Premium]
Premium users can customize colors for light or dark mode.
Backend Settings
Desktop app users can change the default data directory and log directory via the login screen. Click the cog wheel at the bottom right to view the backend settings dialog.
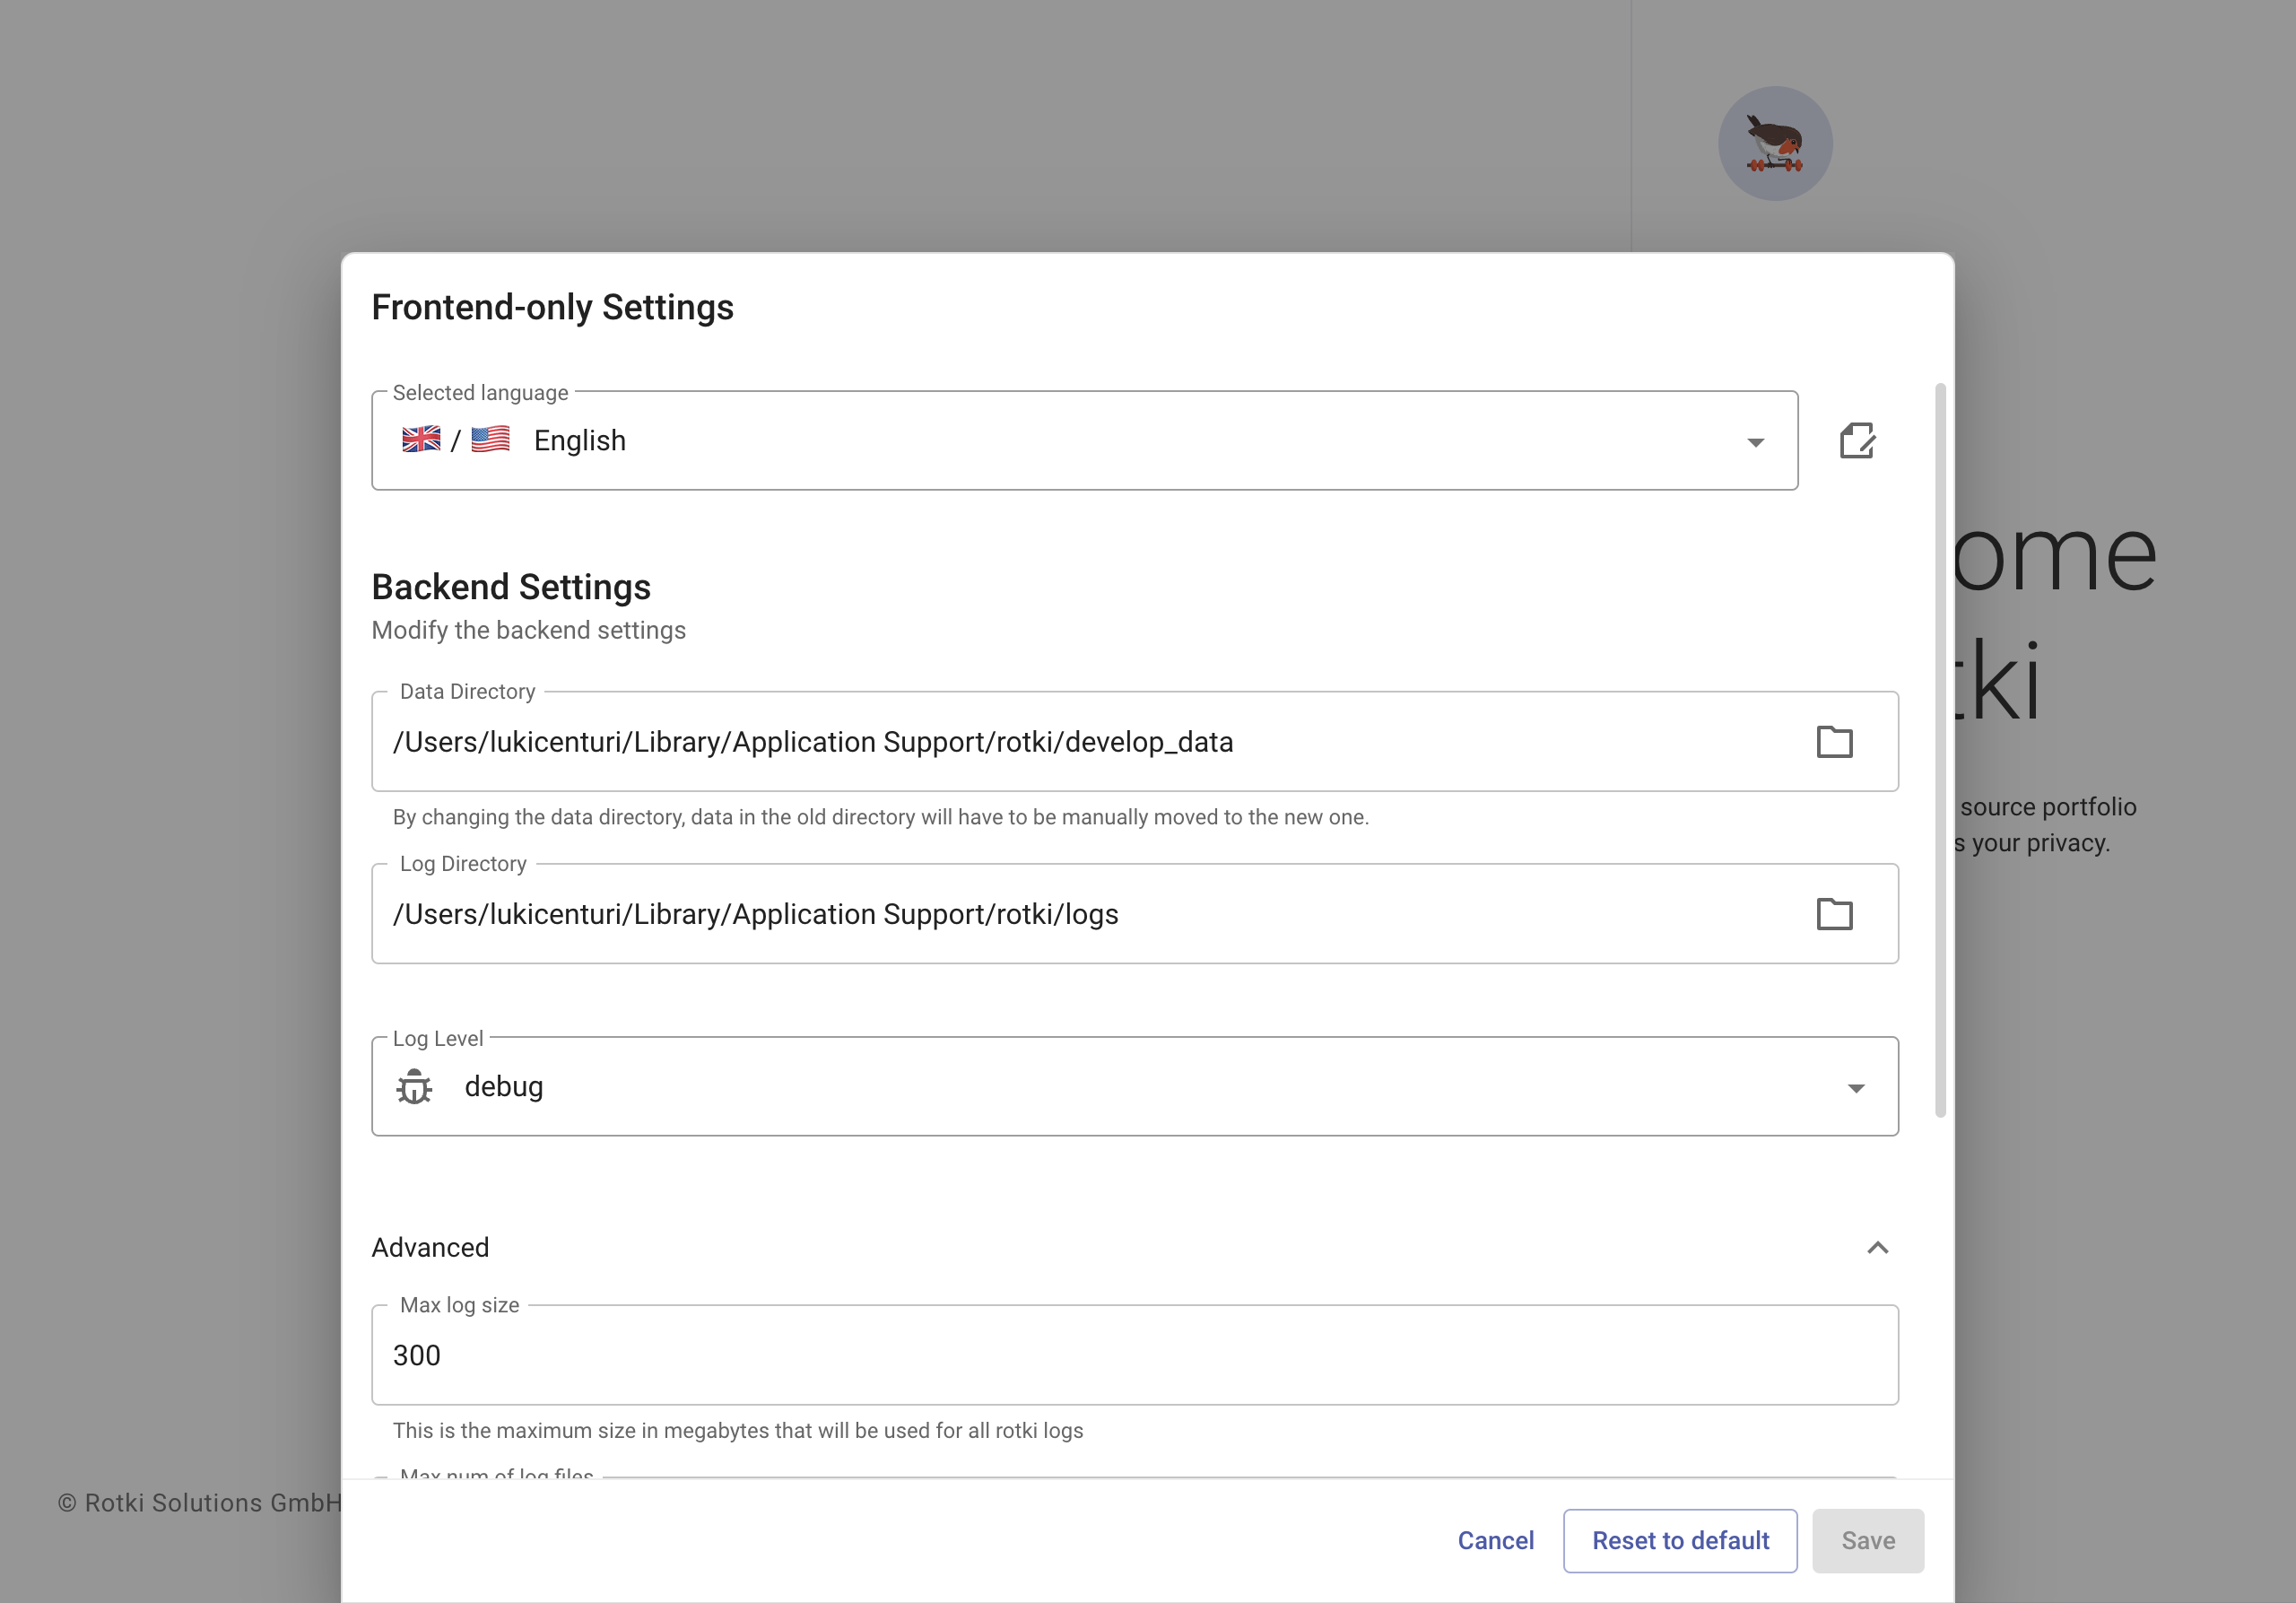
Select a new data directory, log directory, etc., and press "Save". Previously created accounts won't be accessible in the new location; move them manually.
Advanced Backend Settings
Modify the following settings in the advanced section:
- Max log size: Maximum size (MB) of all logs for a single run.
- Max number of log files: Maximum number of backup (rotated) logs for a single run.
- Instructions per SQLite context switch: Specify instructions count for context switch between cooperative threads. Set to
0to disable async DB access. - Log from other modules: Include log entries from dependent libraries, not just rotki. Disabled by default.
Disabling the Tray Icon
Disable the application tray icon by clicking the View menu entry in the application menu bar. Select Display Tray Icon to enable/disable the tray icon.
