Tracking Accounts & Balances
To manage Blockchain Accounts, you need to visit the Accounts section from the left sidebar.

Blockchain Accounts
rotki allows to track balances of blockchain accounts.
For now, the following chains are supported in rotki (and the list will be growing as we add more chains in the future):
| Chain Type | Blockchain | Chain ID for importing purposes |
|---|---|---|
| EVM Chains | Ethereum | eth |
| Optimism | optimism | |
| Polygon PoS | polygon_pos | |
| Arbitrum One | arbitrum_one | |
| Base | base | |
| Gnosis | gnosis | |
| Scroll | scroll | |
| Binance Smart Chain | binance_sc | |
| Avalanche | avax | |
| zkSync Lite | zksync_lite | |
| Bitcoin Chains | Bitcoin | btc |
| Bitcoin Cash | bch | |
| Substrate Chains | Polkadot | dot |
| Kusama | ksm | |
| Solana Chains | Solana | solana |
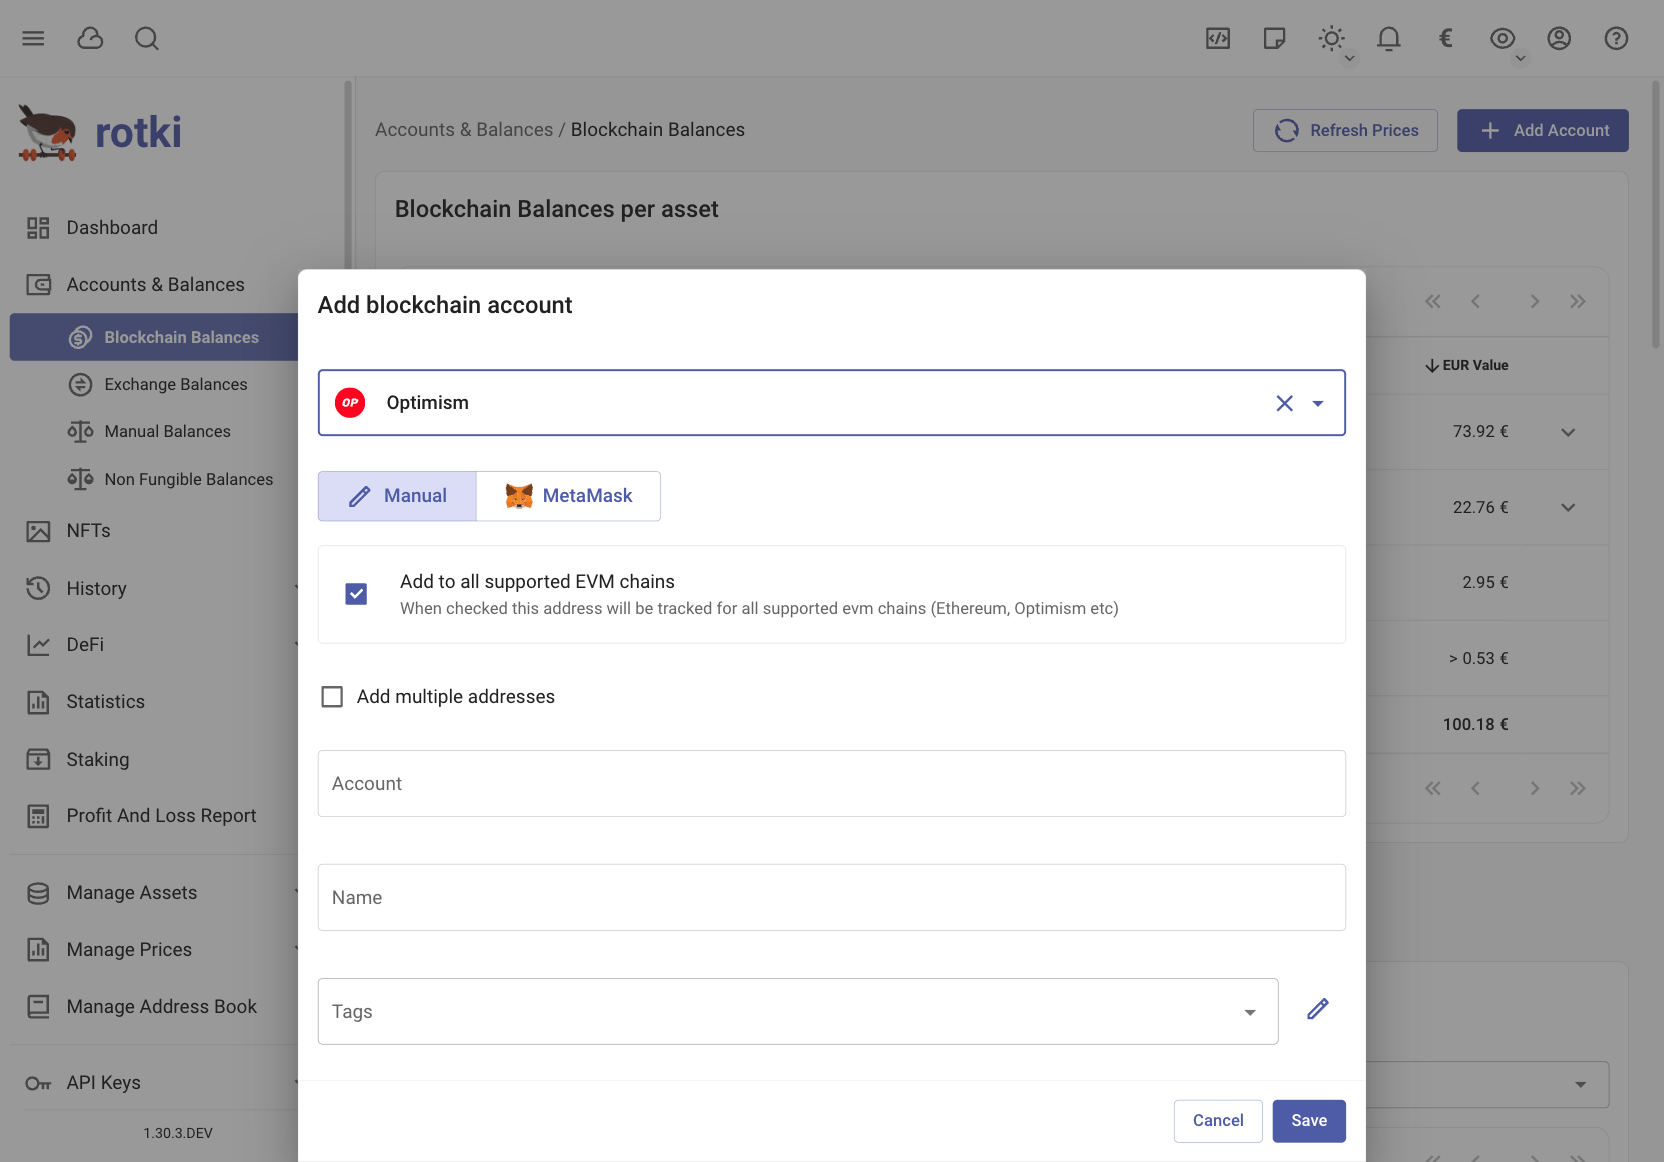
Steps to Add an Account:
- Go to the chain category sub-page
- Click
Add Account(top right) - Select your blockchain
- Enter the address in
Accounttextbox - Click
Save
Adding Multiple Accounts:
- Check
Add multiple addressesbox - Enter addresses as comma-separated list
Adding Account to all EVM Chains
- Choose
All Supported Chainsin the chain selector.
You can edit or delete an account using the buttons at the end of the row. For editing, you can modify the label or the tags.
Account detection on Binance SC
We verify whether an address should be tracked by querying its on-chain activity through the indexers you have configured. Since Binance Smart Chain is not accessible under the free tier for any supported indexer, a paid Etherscan API key is required to detect activity there. If that key is not provided, BSC address detection will not work.
Bitcoin Chains
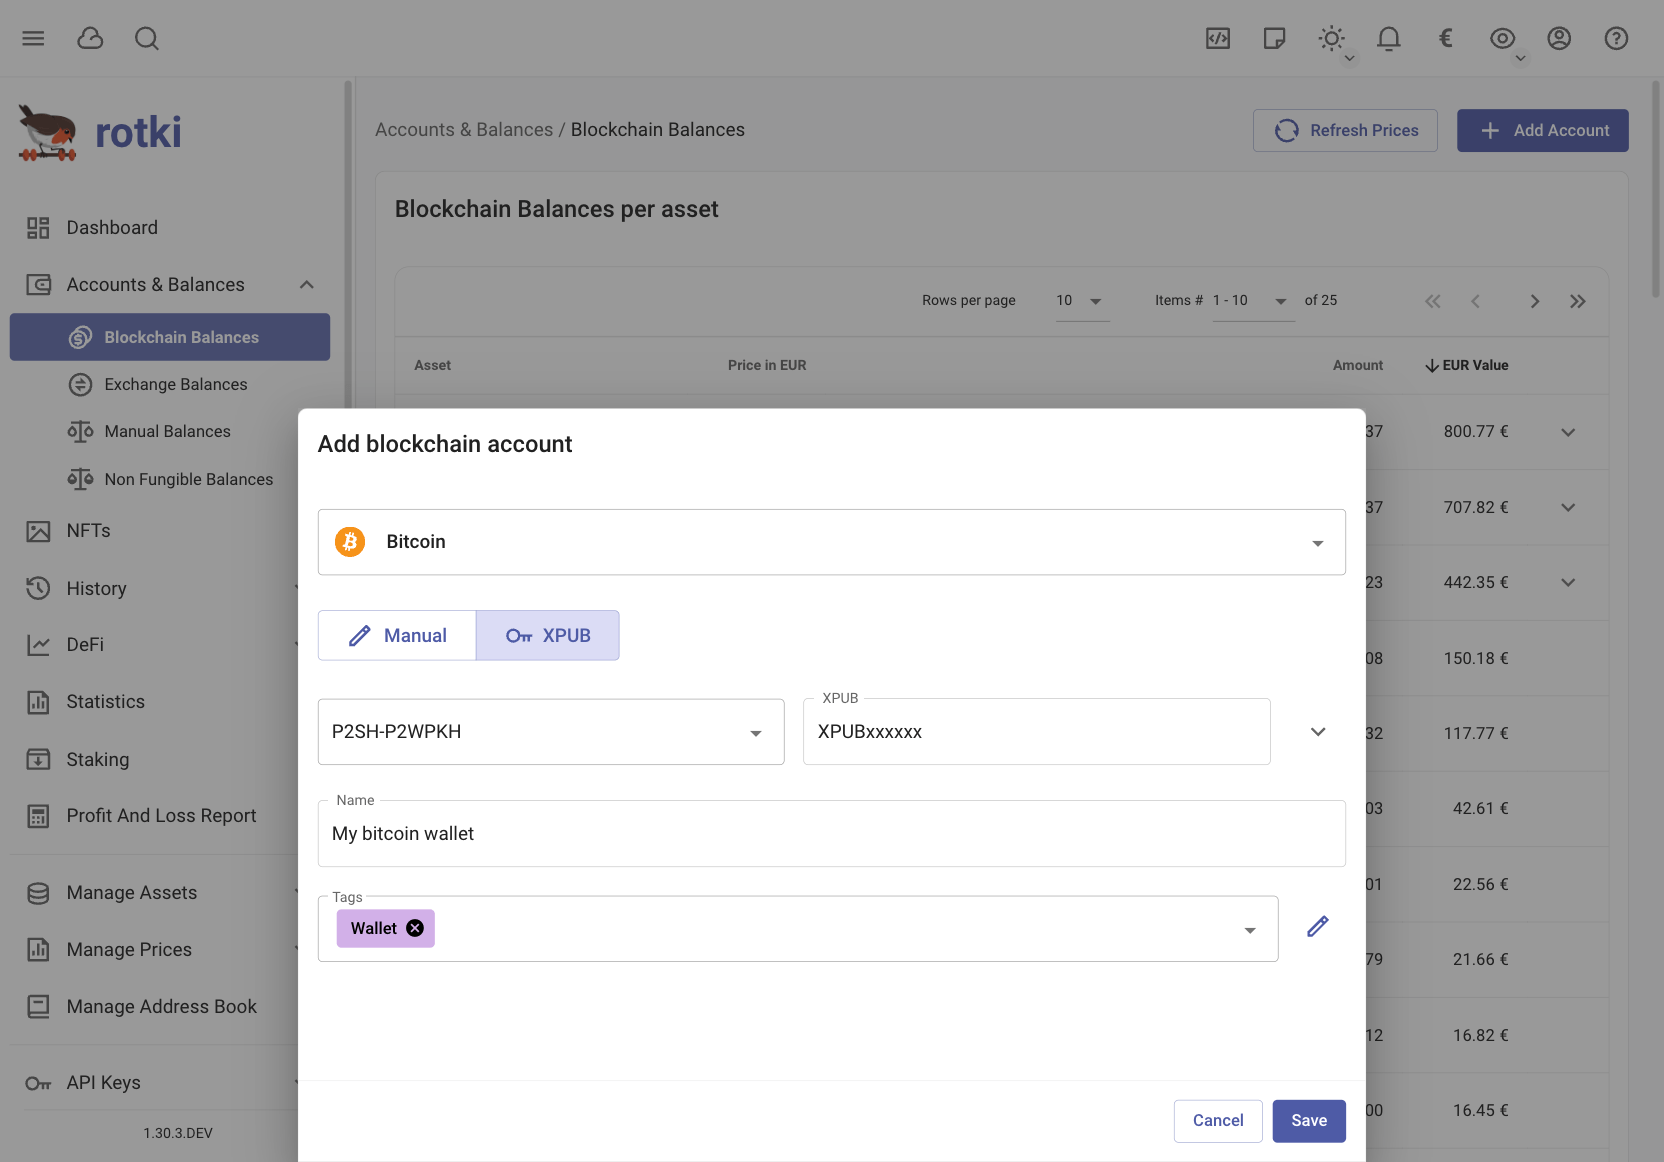
There are two ways to add your Bitcoin or Bitcoin Cash addresses to rotki:
- Manual entry of individual addresses
- Using an xpub (extended public key) for automatic address discovery
What is an xpub?
An xpub is a special key that lets rotki find all your wallet addresses without giving access to your funds. When you provide an xpub, rotki will:
- Generate your addresses locally
- Query the blockchain activity for each address
- Stop when it finds unused addresses
- Store this information securely in your local database
Types of XPUB
| Type | Common Name | Address Starts With | Description |
|---|---|---|---|
| P2PKH | Legacy | "1" | The original Bitcoin address format |
| P2SH-P2WPKH | Segwit | "3" | More efficient than legacy |
| WPKH | Native Segwit | "bc1" | Most efficient for transactions |
| P2TR | Taproot | "bc1p" | Newest type with enhanced privacy |
How to Use Your xpub
- Check what type of addresses your wallet generates
- Select the matching type in rotki's dropdown menu
Good to know
- If your xpub starts with "ypub" or "zpub", rotki will automatically detect the correct type
- For Ledger hardware wallet users, you can get your xpub by following this guide
- Bitcoin Cash only works with Legacy (P2PKH) and Segwit (P2SH_P2WPKH) addresses
Aggregated view filtering
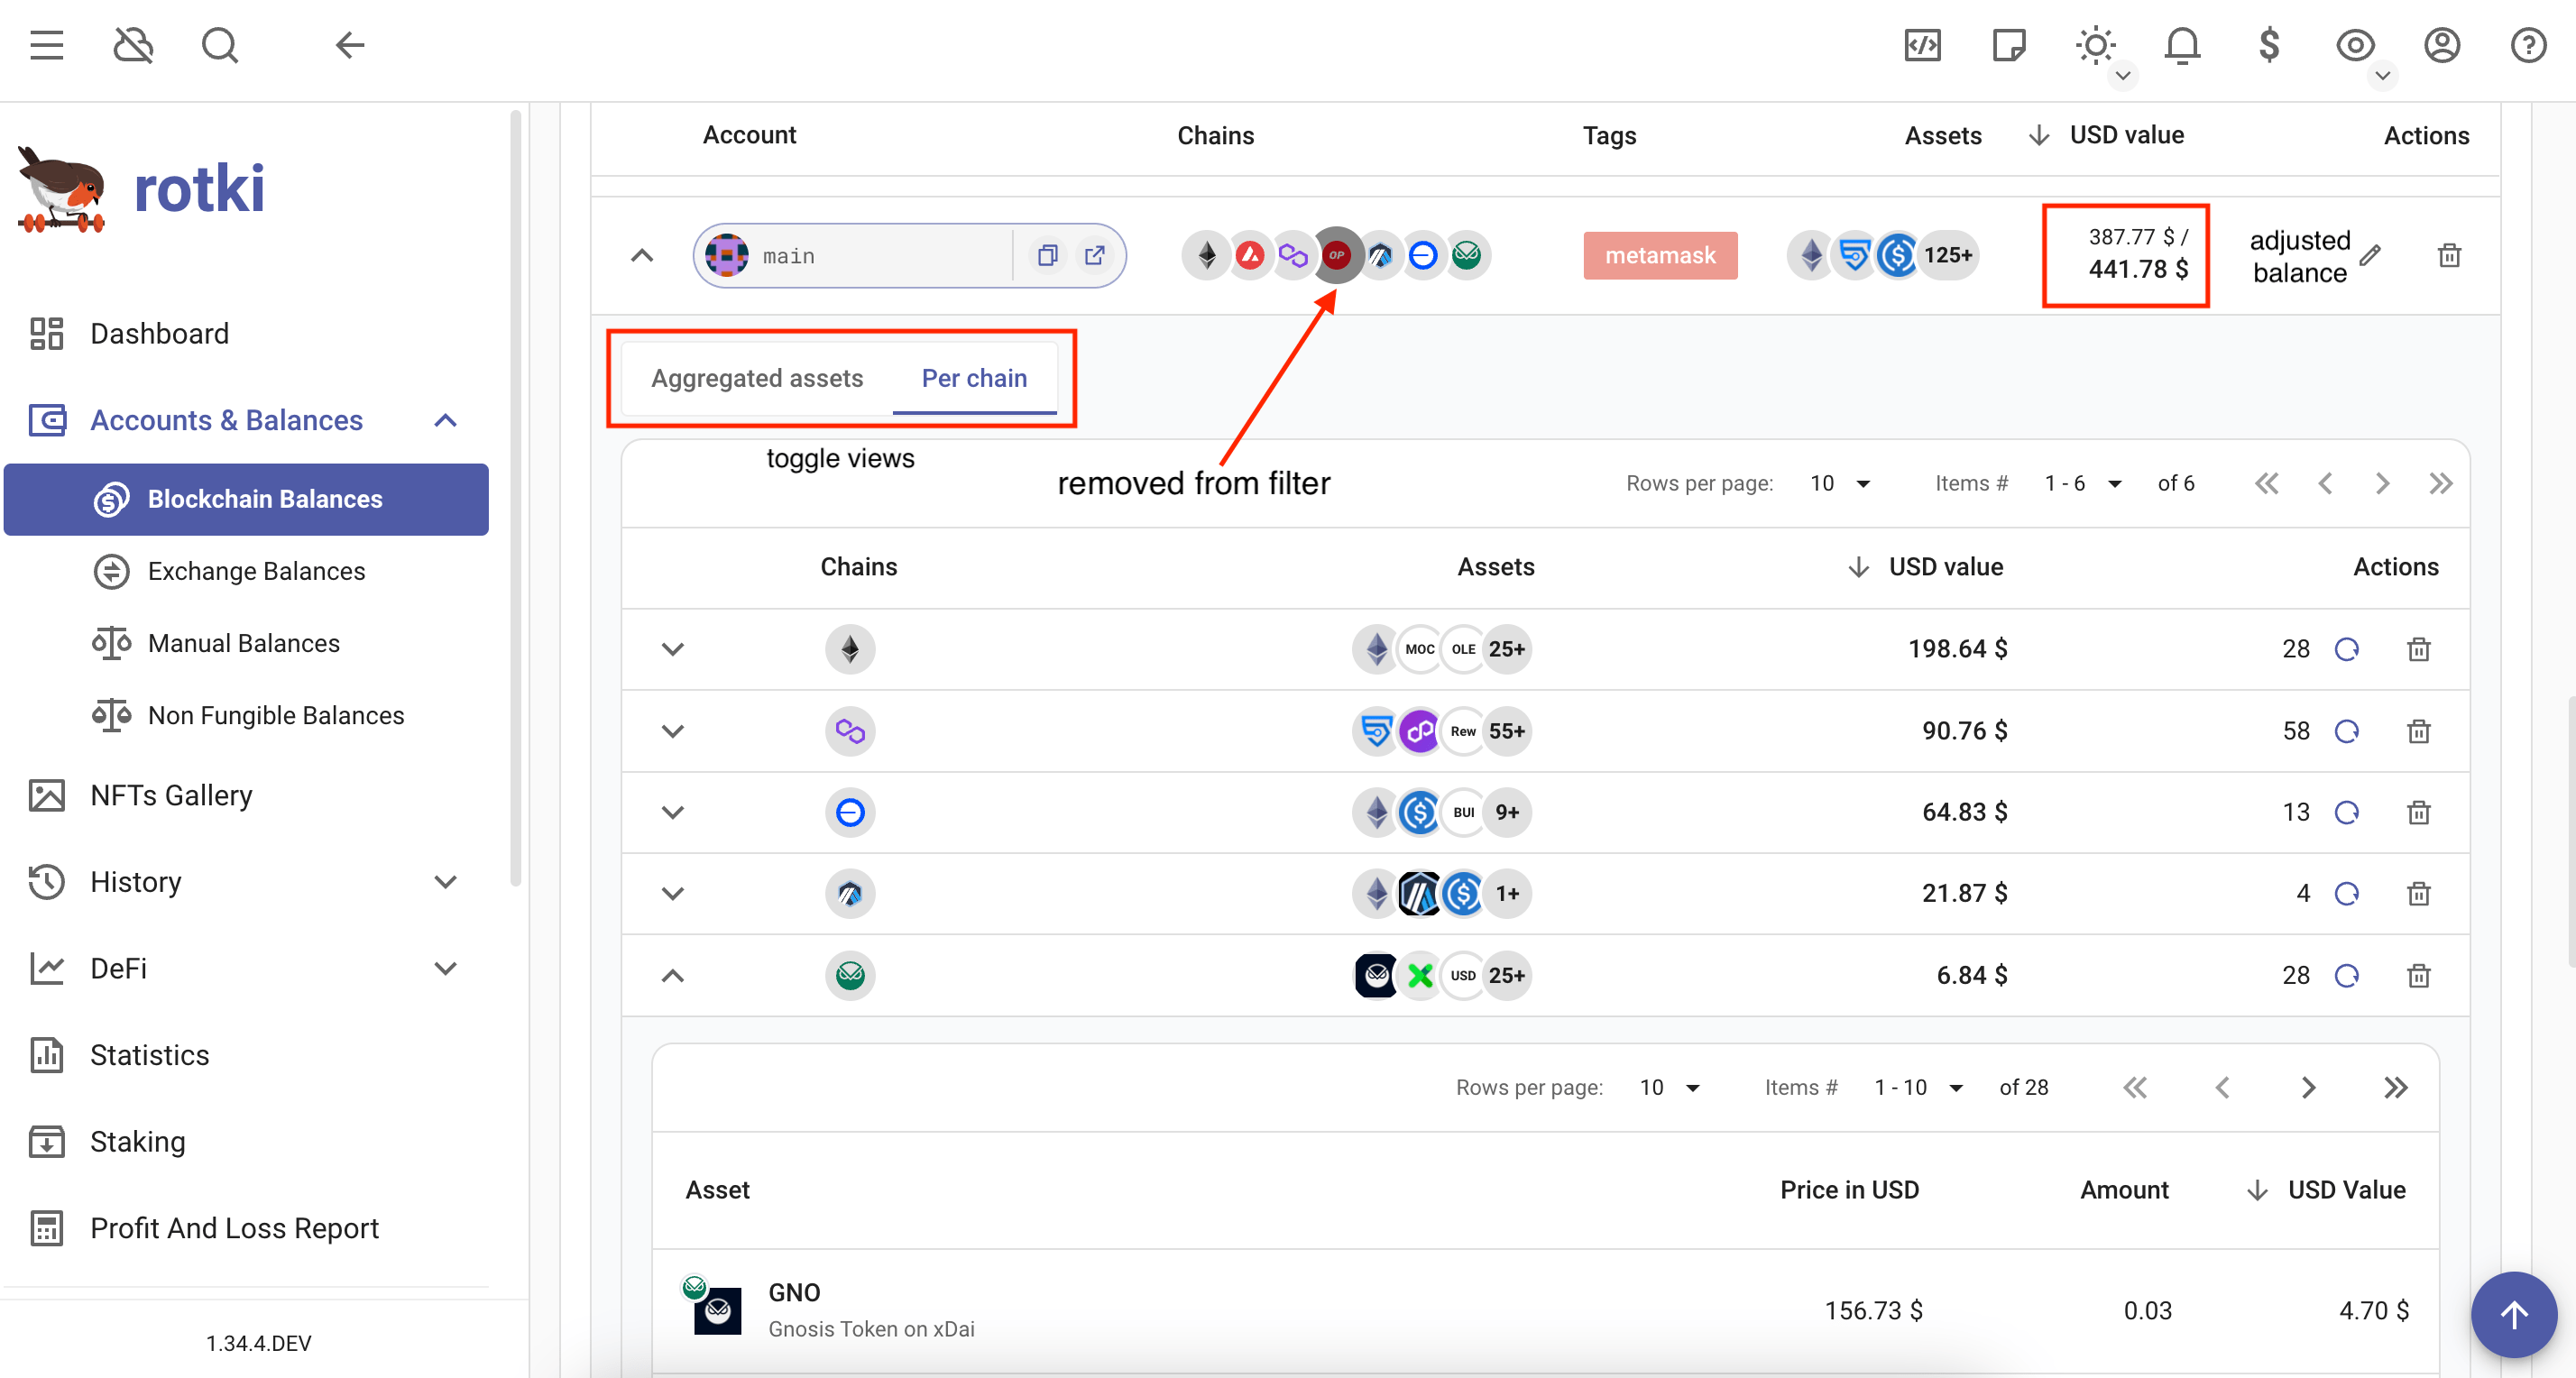
In the EVM Chains section, the chain selection allows you to filter accounts based on specific blockchain networks. This functionality works as a filter, meaning you can click on any chain, like Ethereum, Gnosis, or Polygon, and view only the accounts that are associated with those chains. You can even filter by multiple chains simultaneously.
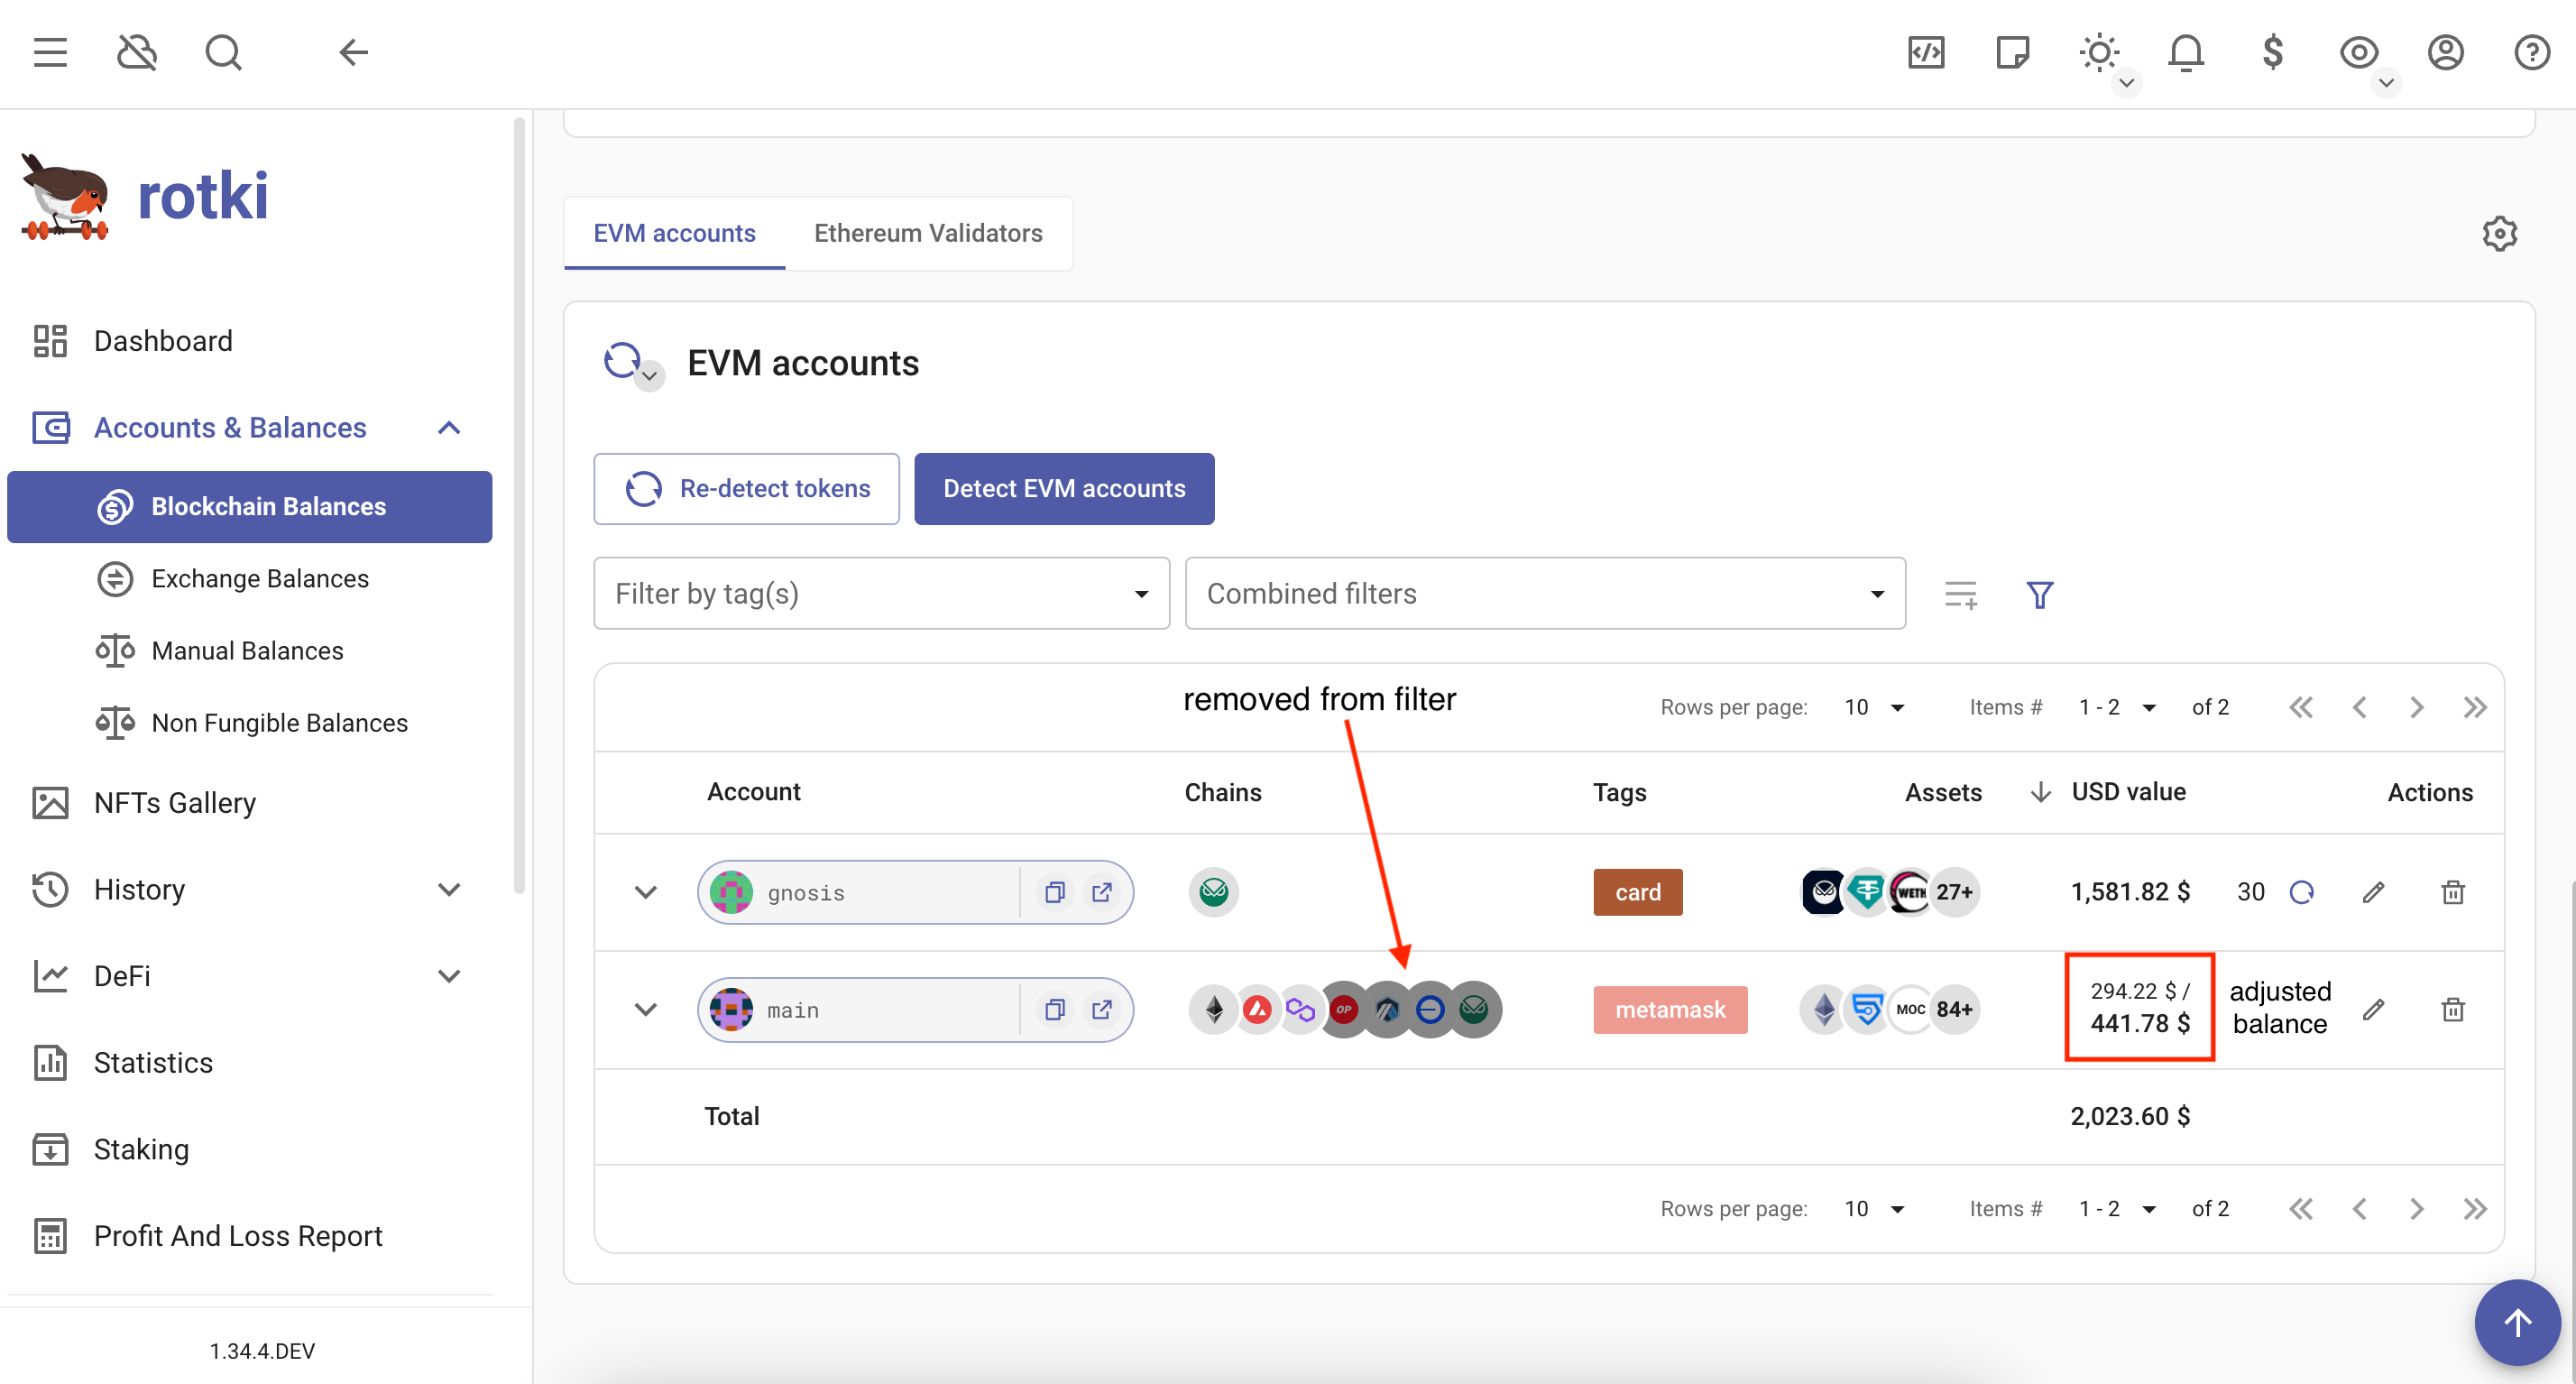
Additionally, there is an option to toggle between viewing the aggregated assets across all chains or displaying the assets per individual chain. This provides flexibility, allowing you to either get a total balance view from all chains at once or focus on specific chain assets.
ENS names resolution
rotki automatically resolves ENS name and ENS avatar for every EVM address that has ENS name set in ethereum mainnet. If there is a primary ENS name specified for an address, this name will be shown instead of a raw blockchain address across the app. You can find the blockchain address by hovering the mouse over the ENS name. If an ENS avatar is set, it will be shown instead of the address blockie.
Token detection
For EVM accounts, it is possible to trigger the process of detecting tokens before refreshing the balances. There are several ways to do that:
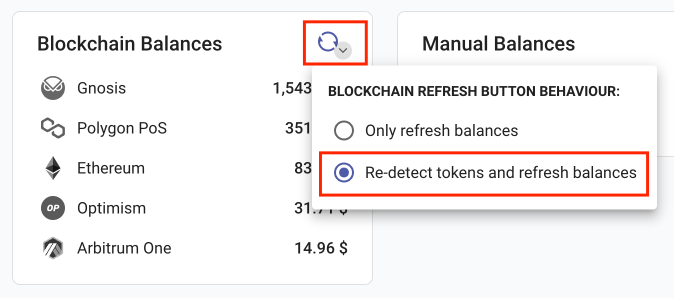
- To re-detect tokens for all EVM accounts in all chains, go to the dashboard and toggle the arrow here. You can change the default behavior of the refresh button to
Re-detect tokens and refresh balancesand then click the refresh button.
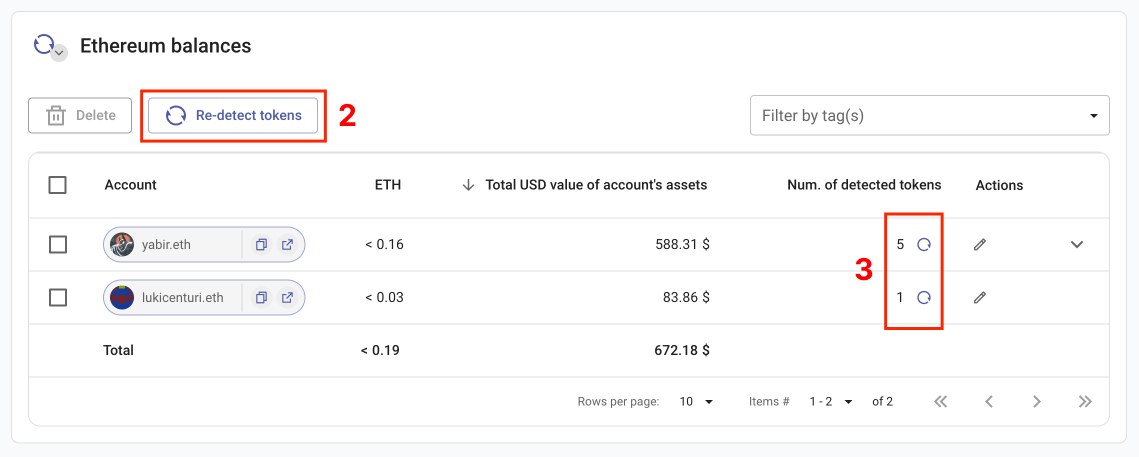
To re-detect tokens for all addresses of one EVM chain, click
Re-detect tokensin the EVM accounts section.To re-detect tokens for only one account, click the refresh button in the corresponding row.
Import and Export Blockchain Accounts (CSV)
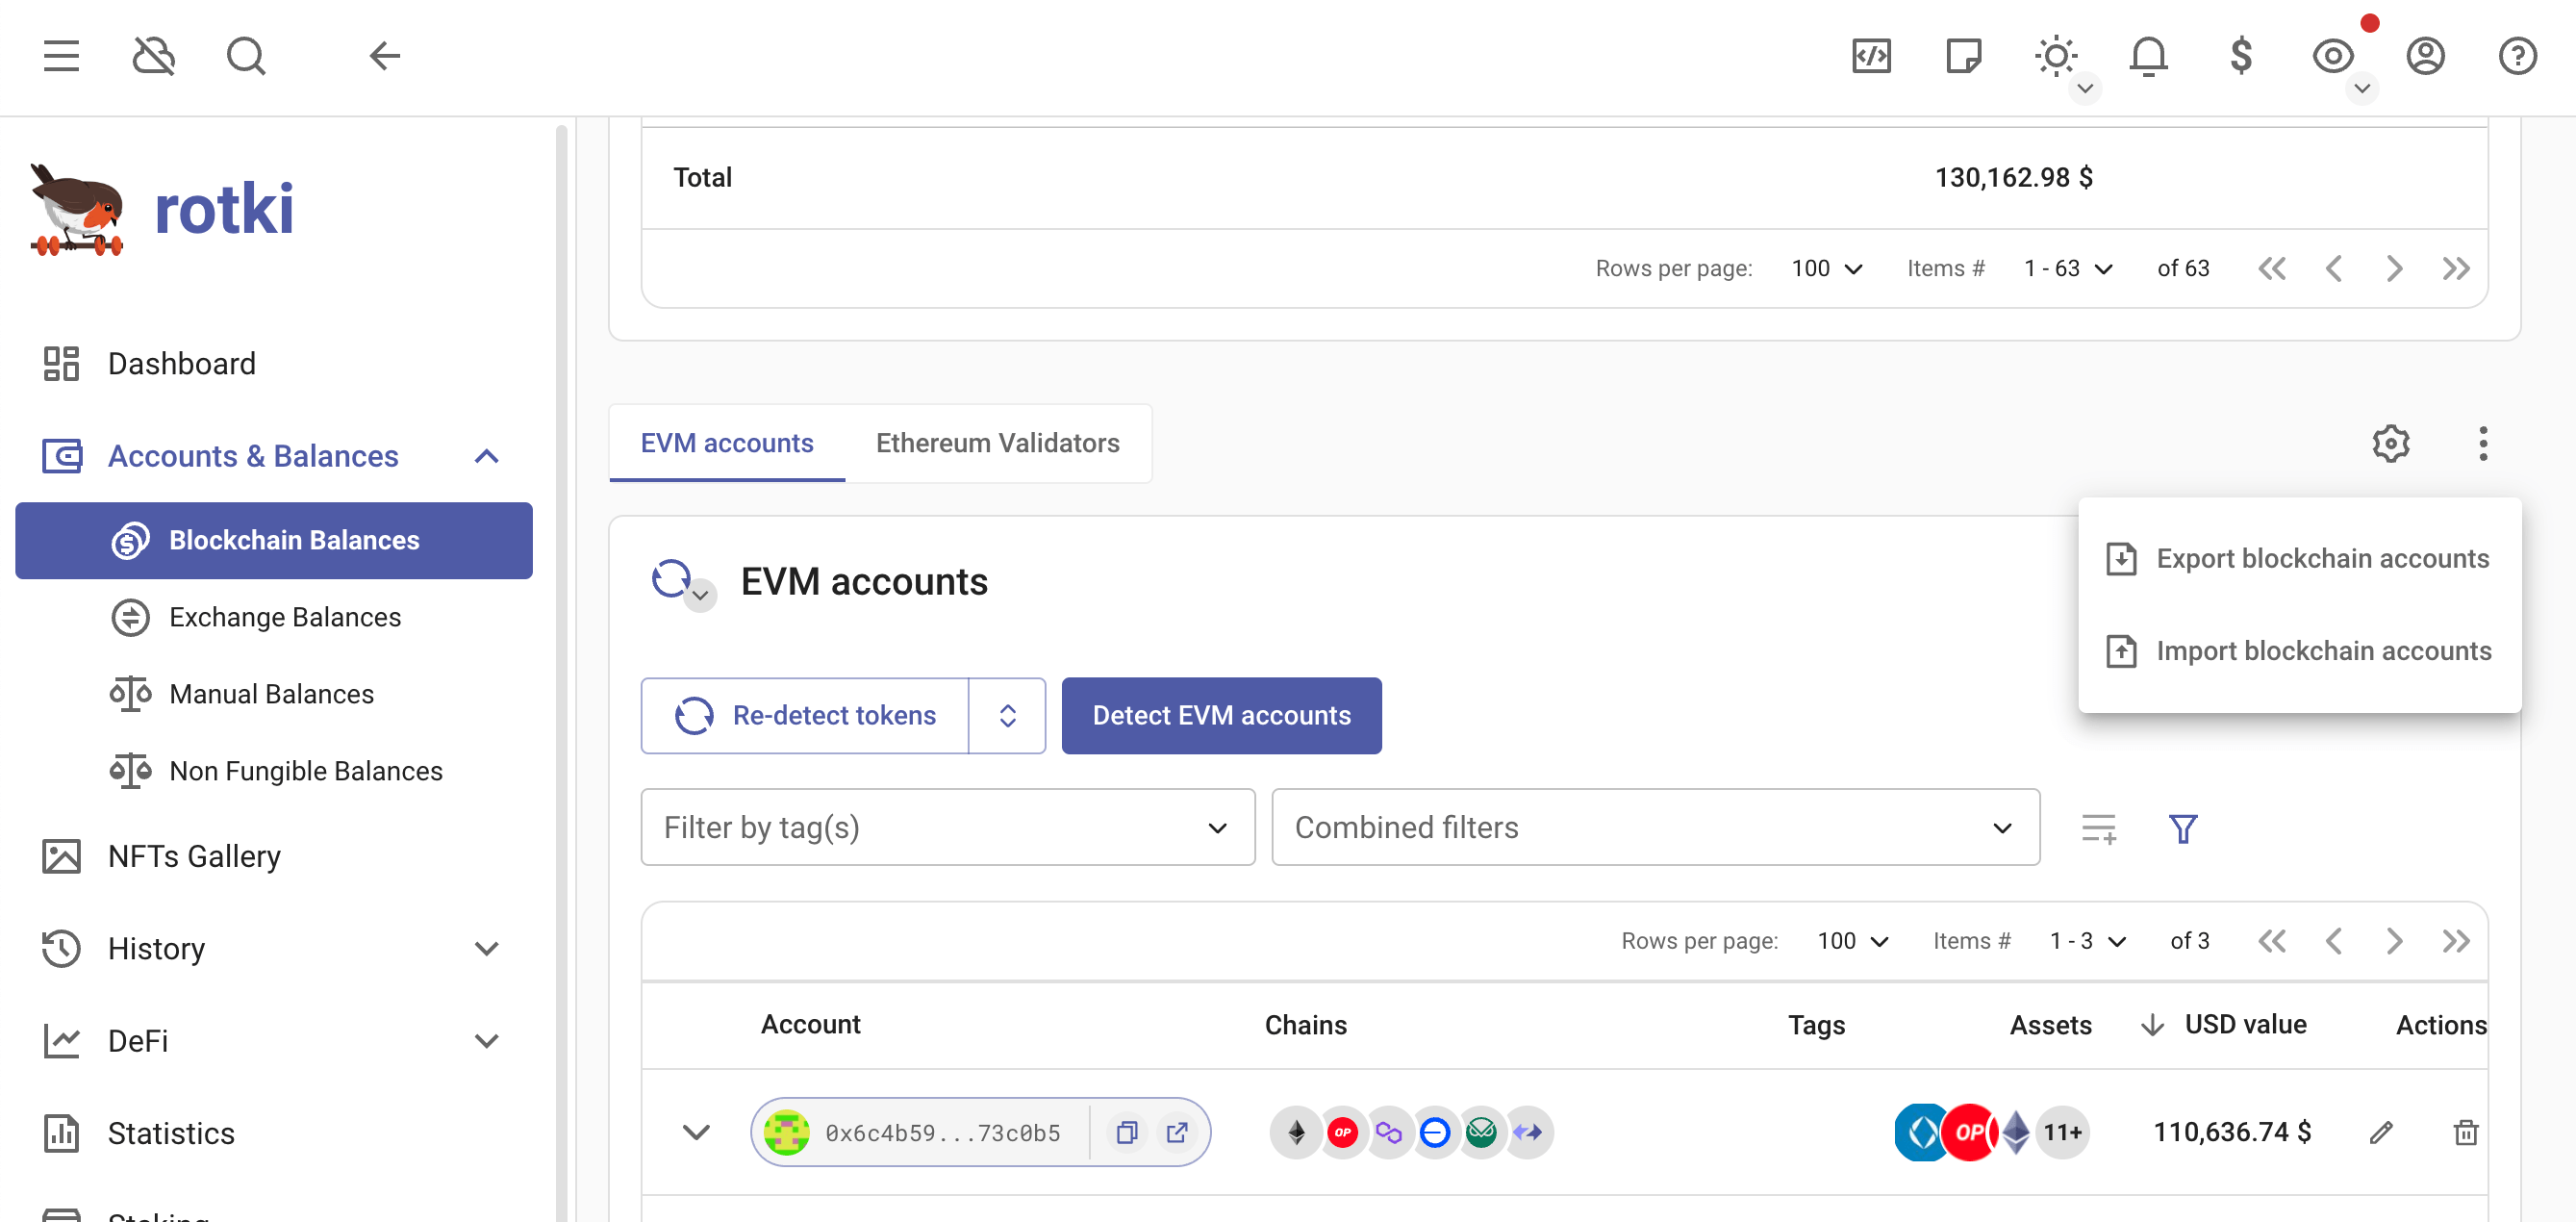
You can export your blockchain accounts to CSV and then import them again into another rotki account (if you need to do it for your tax accountant, etc.). Also, if you have many accounts that you want to add to rotki, you can create your CSV and import it into rotki.
You can do it in from any submenu from the menu Accounts by clicking the three-dot menu.
Blockchain Accounts CSV
[Download CSV Example]| address | address extras | chain | label | tags |
|---|---|---|---|---|
| 0x99A91871b93E13F53D8209529B5E390664bf25d8 | evm | eth with validators | eth-1;eth-with-validators | |
| 0x9DBE4Eb4A0a41955E1DC733E322f84295a0aa5c0 | evm | hahaha | evm-tag | |
| 0xc37b40ABdB939635068d3c5f13E7faF686F03B65 | evm | |||
| bc1qdf3av8da4up78shctfual6j6cv3kyvcw6qk3fz | btc | bitcoin-1 | bitcoin-1 | |
| qz5hccuhr036drq7m3mah3qf5x3f5phv05v5rtu5z2 | bch | bitcoin-cash-1 | bitcoin-cash-1 | |
| EbEjgkw4Z2jFtaDad7zj59LrfmyuznXJzCmQh2qUfMvjiUj | ksm | kusama-1 | kusama-1 | |
| 14rw69gBpjYwdiw5MzvsZCSYVnHqubpUSHC5QPNBY5MPAoRi | dot | polkadot-1 | polkadot-1 | |
| xpub6CcGTthbwnbxsMRuEF3XoYdekGtnGTsbiZ4ZKeqMC1UuqPYqh2xQj9hbEQj8AB9EuGeFHz4o3hWayZm5ahr5fyV2SNfNyA6htsZngM1DFBz | btc | xpub-1 | xpub-1 | |
| 0x80858247aa14f2c23e9a83b65d2a3e3de22f16ddaaf3fad0fee52601d3f67f71ccb72b196a4789a9d0aa057721745996 | eth2 | |||
| 0x918583458bae9b00cfb9d78497d58f9678cf91755a08682410756909de021666208ecf84e97ac5abddbf5f17af5fb11d | ownershipPercentage=50.00 | eth2 | ||
| 0xab423fb58c3498a8014bcc115be96bea77c99004fb59d3580d75fff0054e113d126ee6dd65faa027732f7cf38fdb4dd2 | ownershipPercentage=22.00 | eth2 | ||
| 0xa49152b5babd0130d9e5e3480eb9d17dfad5c090e6a7b6849e14b6baba0d47444fdd454303bfd202b6ae895654f678c0 | ownershipPercentage=33.00 | eth2 |
- The
addressfield is required. For an xpub, input the xpub address. For a validator, input the publicKey. - The
address extrasfield is optional. You can specifyownershipPercentage=xxfor validators andderivationPath=xxfor xpubs. - The
chainfield is required. You can find supported chain IDs in the supported blockchain section. Useevmto add to all EVM chains. - The
labelfield is optional. - The
tagsfield is optional. Multiple tags should be separated by semicolons (;).
Blockchain aggregated balances
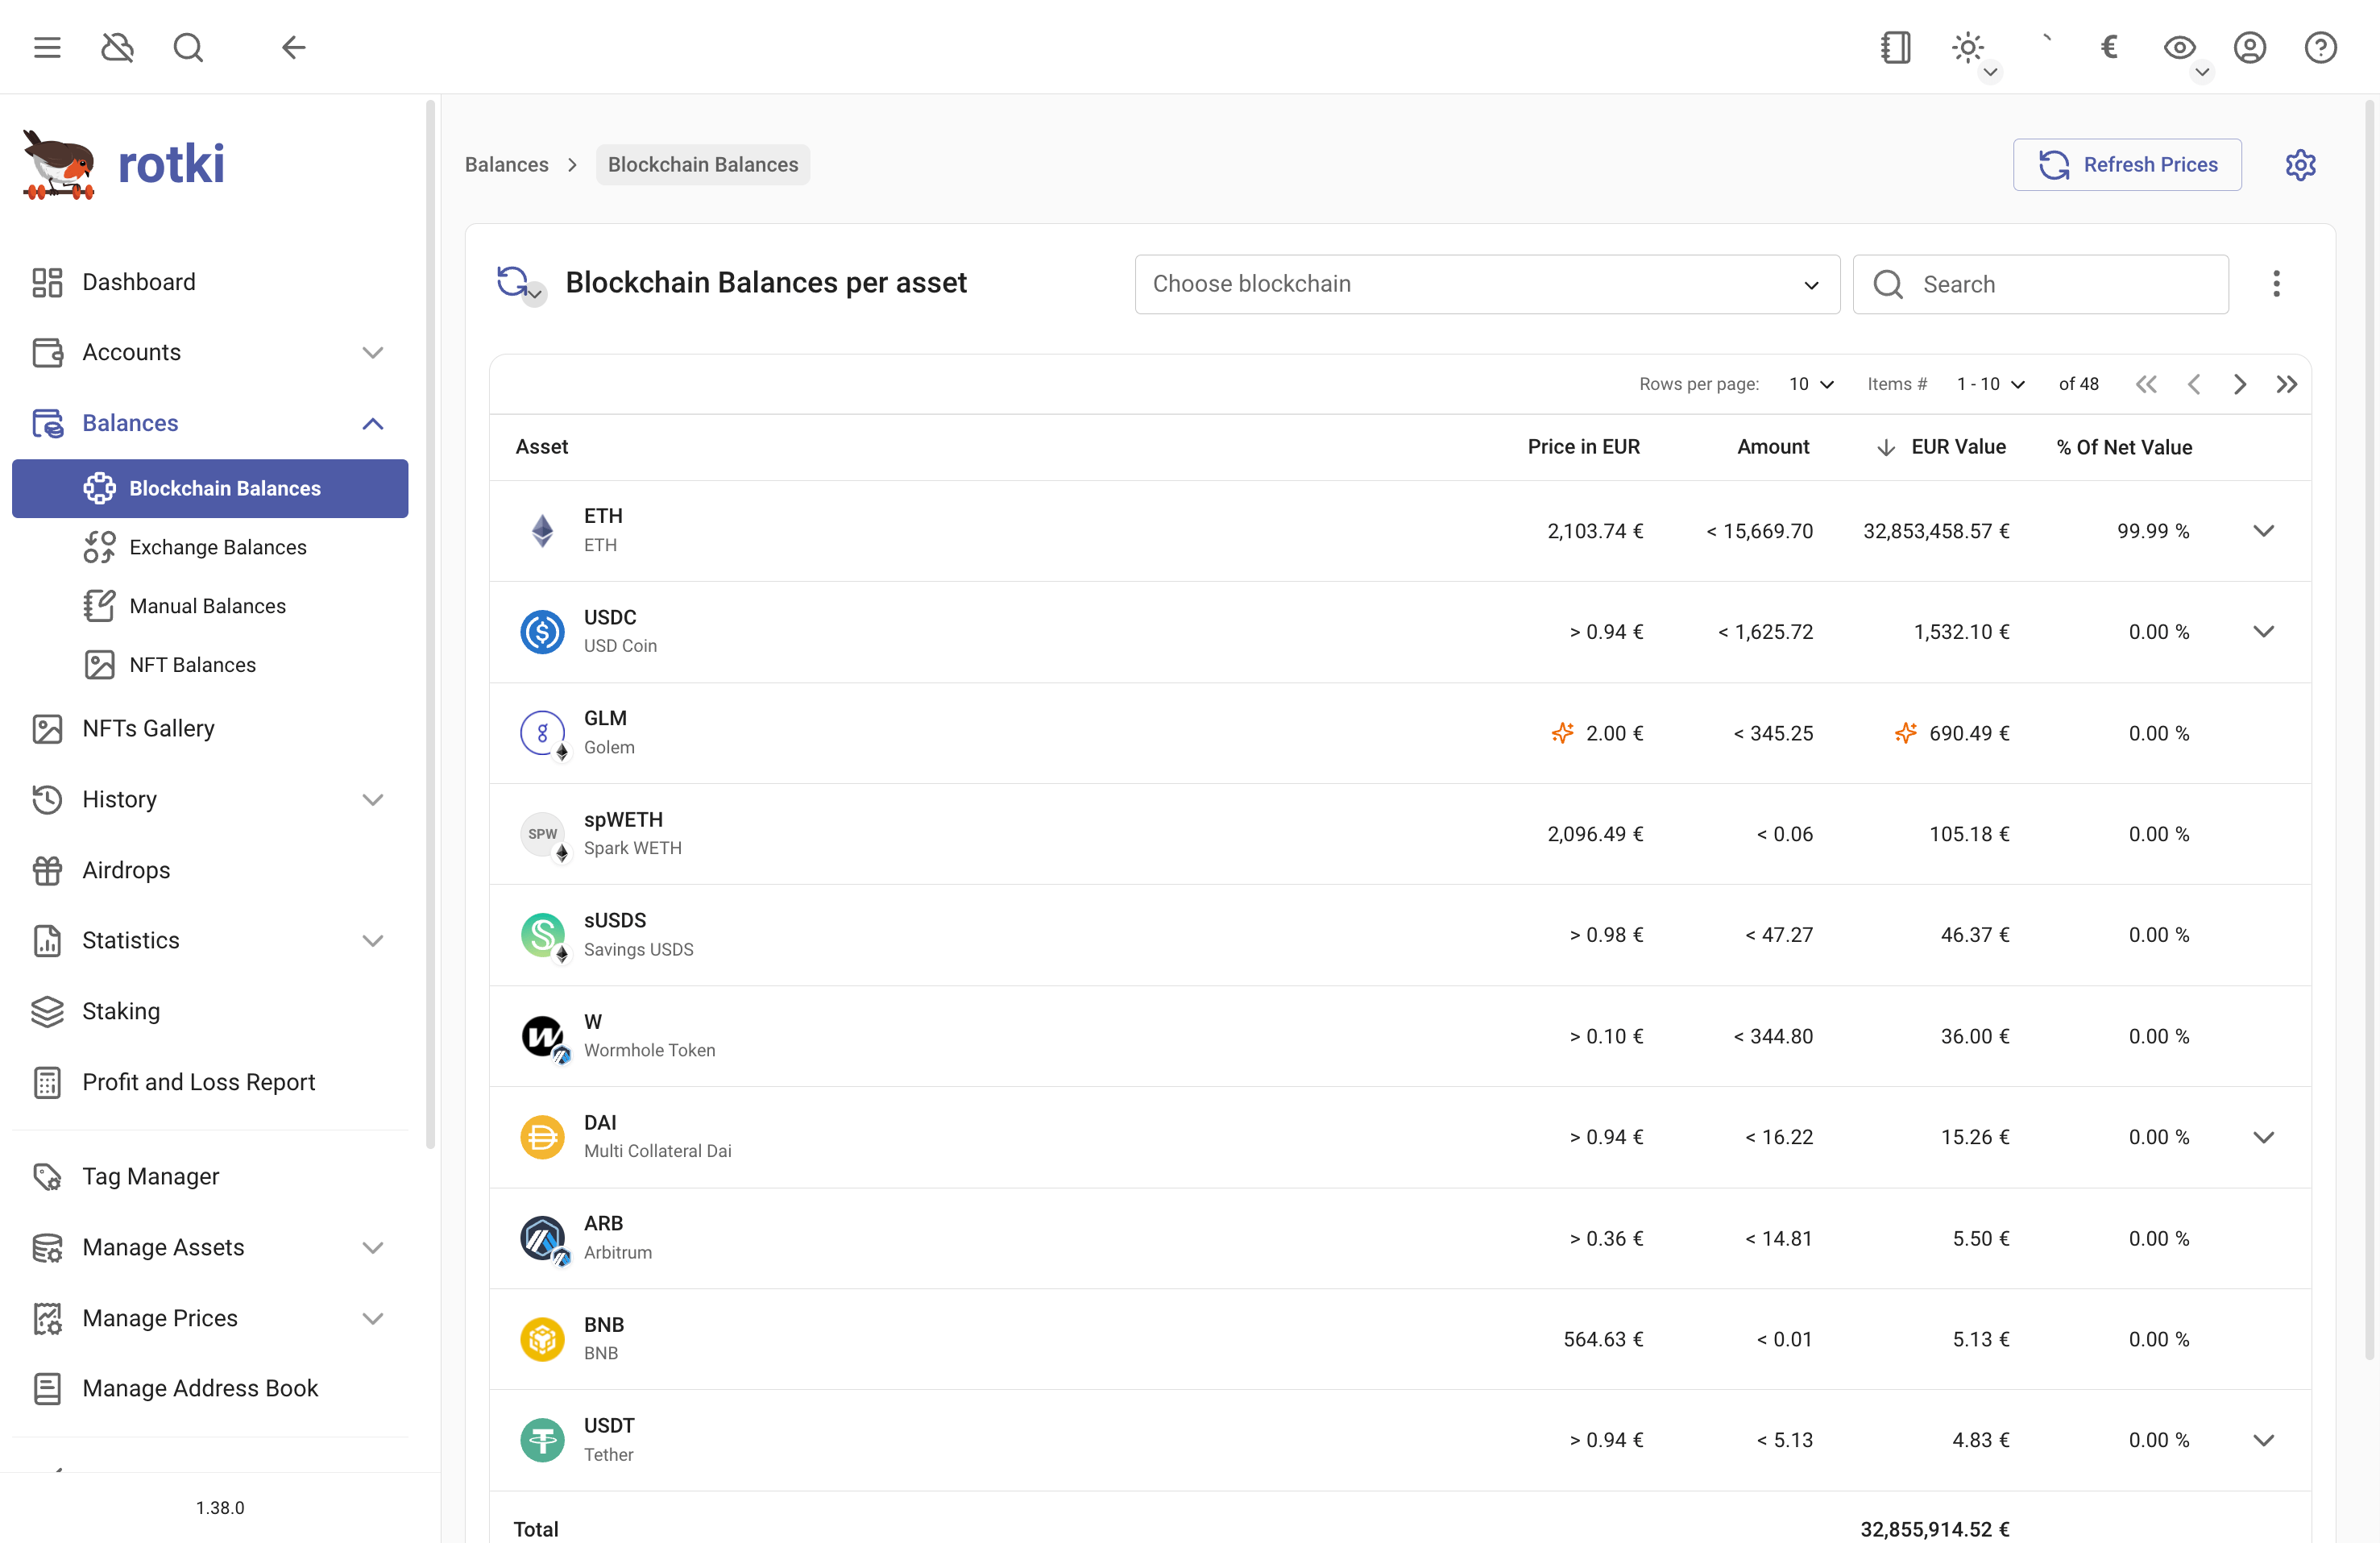
You can see the list of aggregated assets from Blockchain Accounts from menu Balances > Blockchain Balances. You can also see the breakdown of the assets, which locations they belong to, whether they are in the wallet, or being put into some protocol.
Loopring balances
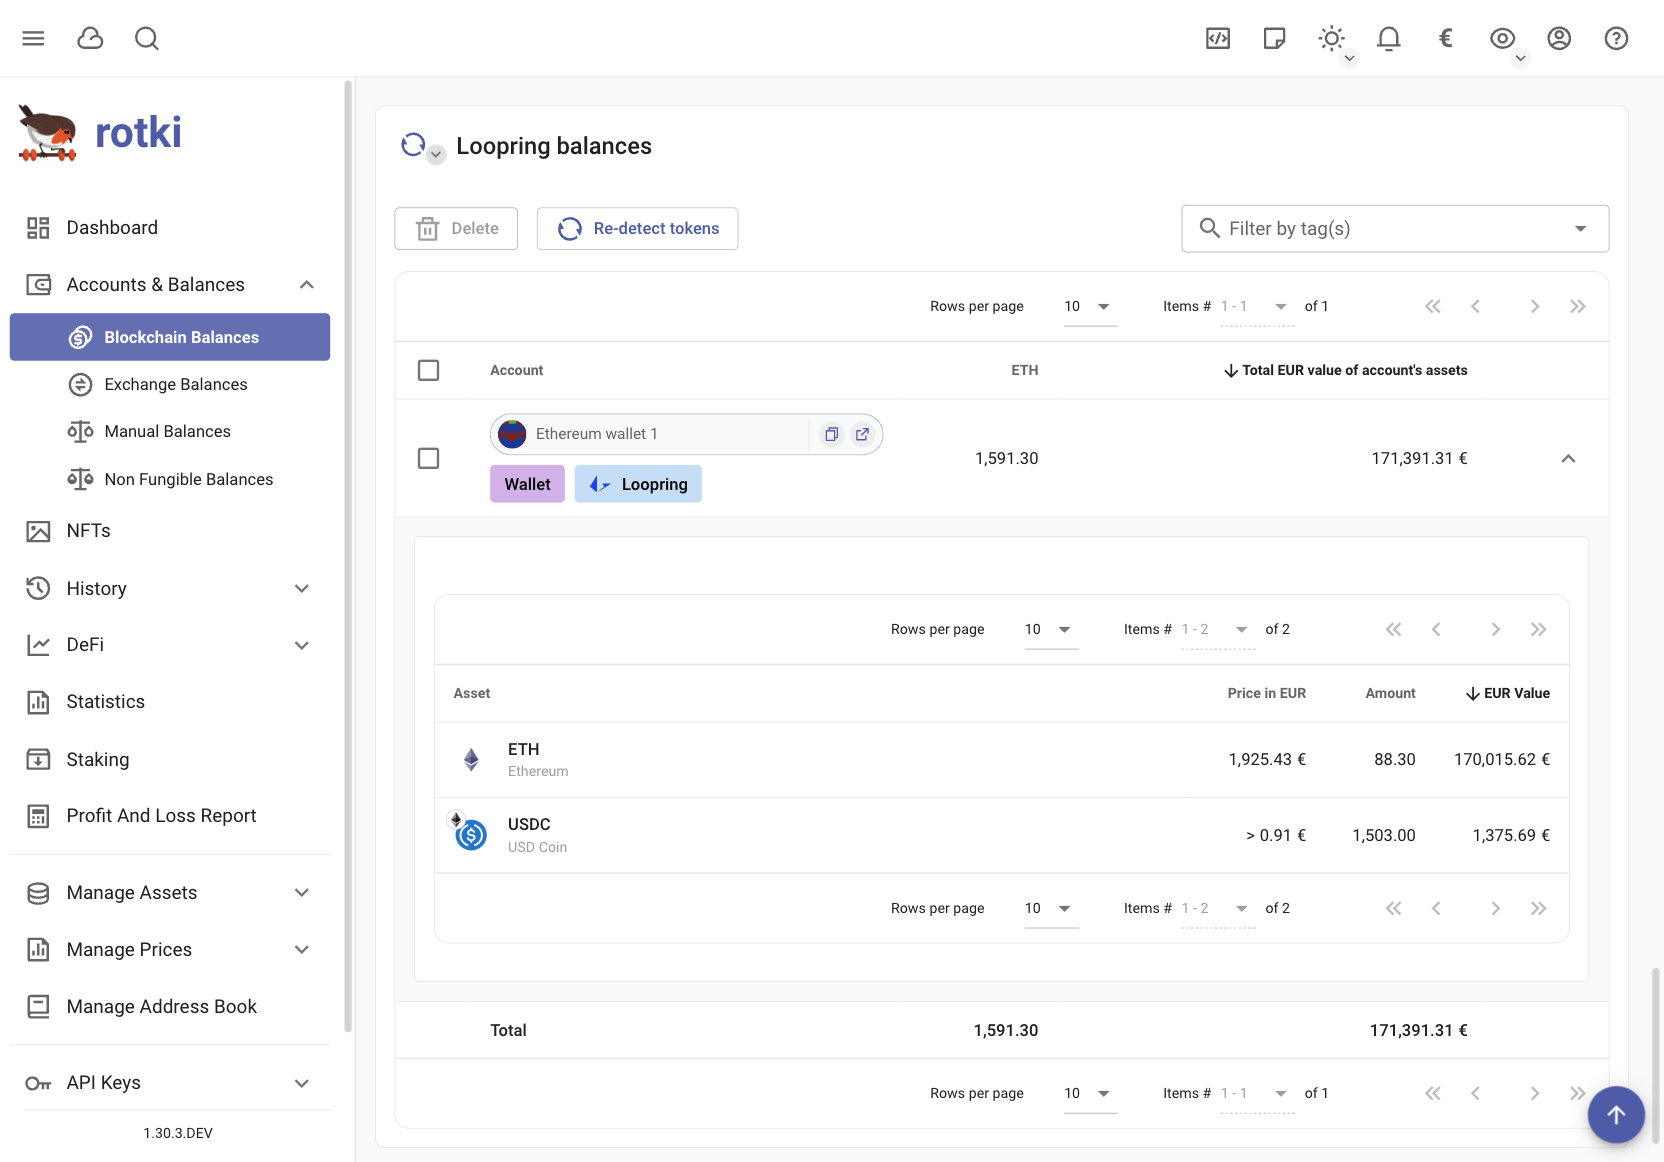
From the balances section you can quickly get an overview of the accounts having balances in Loopring and what assets these accounts hold.
Exchange Balances
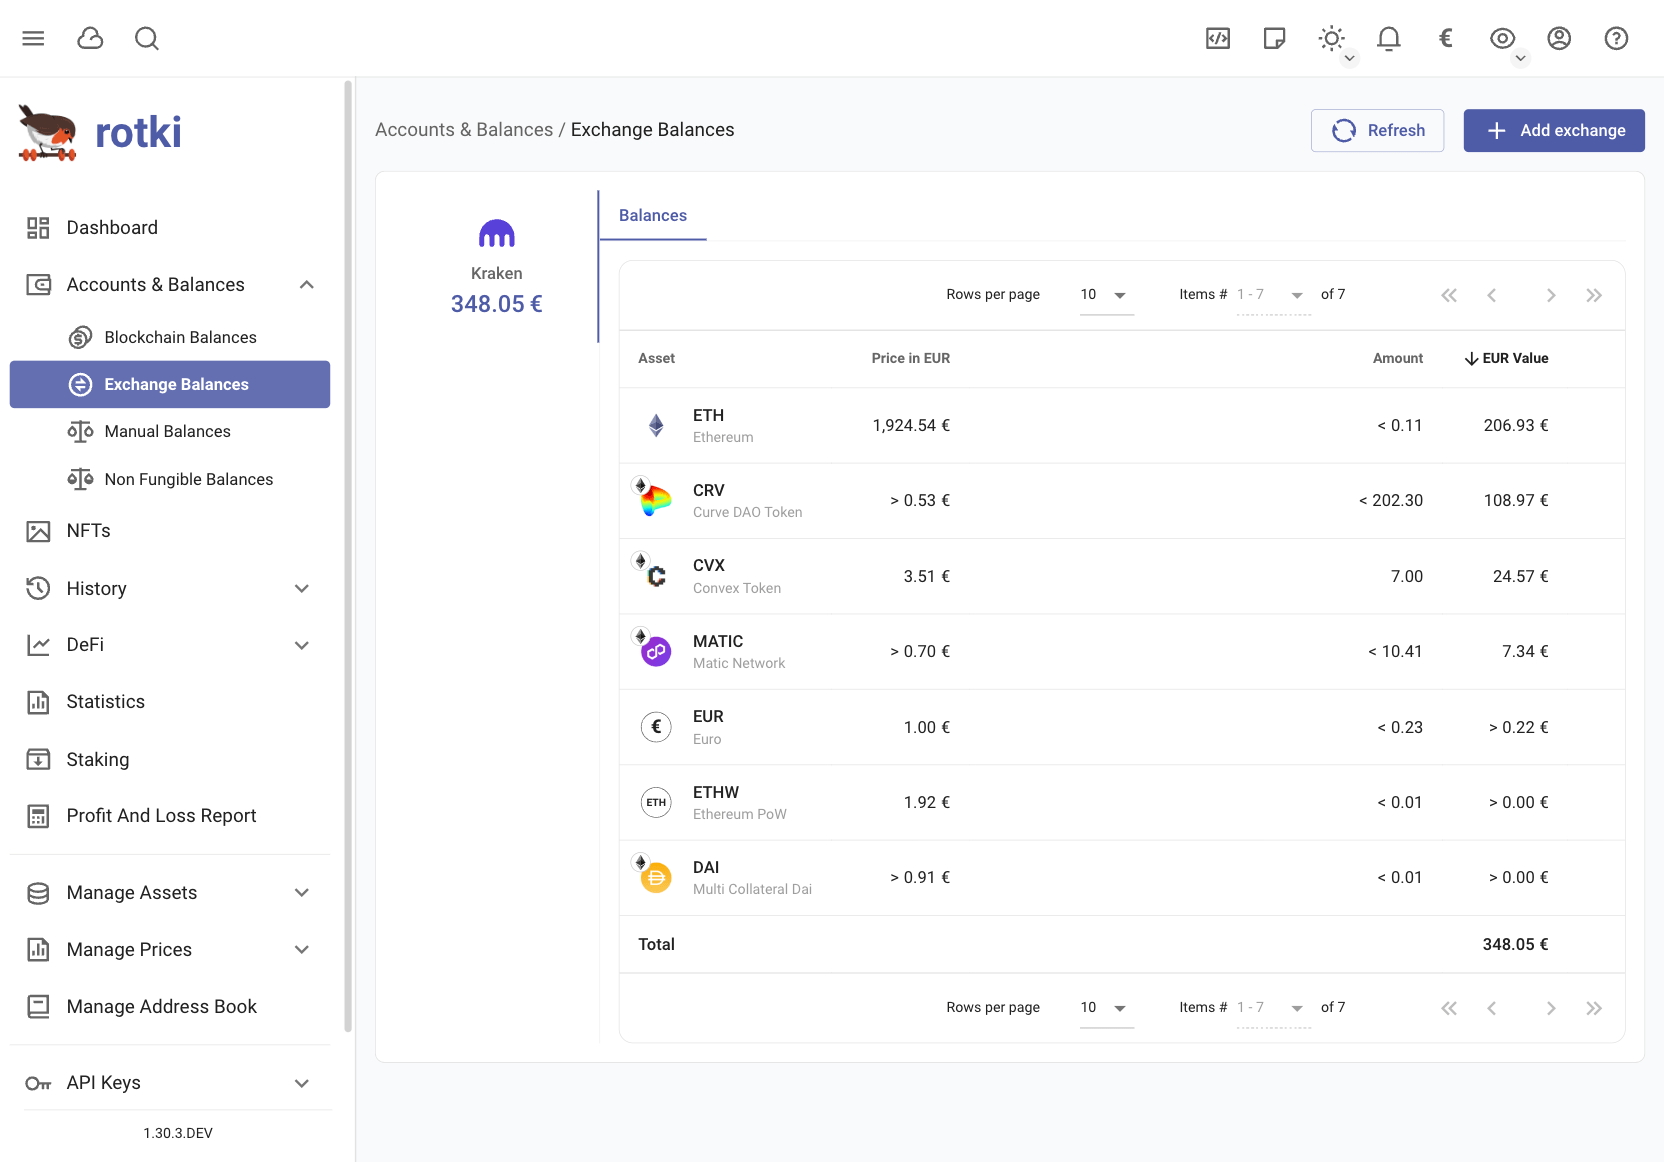
You can check all of the asset balances that you have in each connected exchange in the Exchange Balances sub-page. Clicking the Add exchange button takes you to the API Keys page where you can manage your exchange connections (see Exchanges API Keys).
Manual Balances
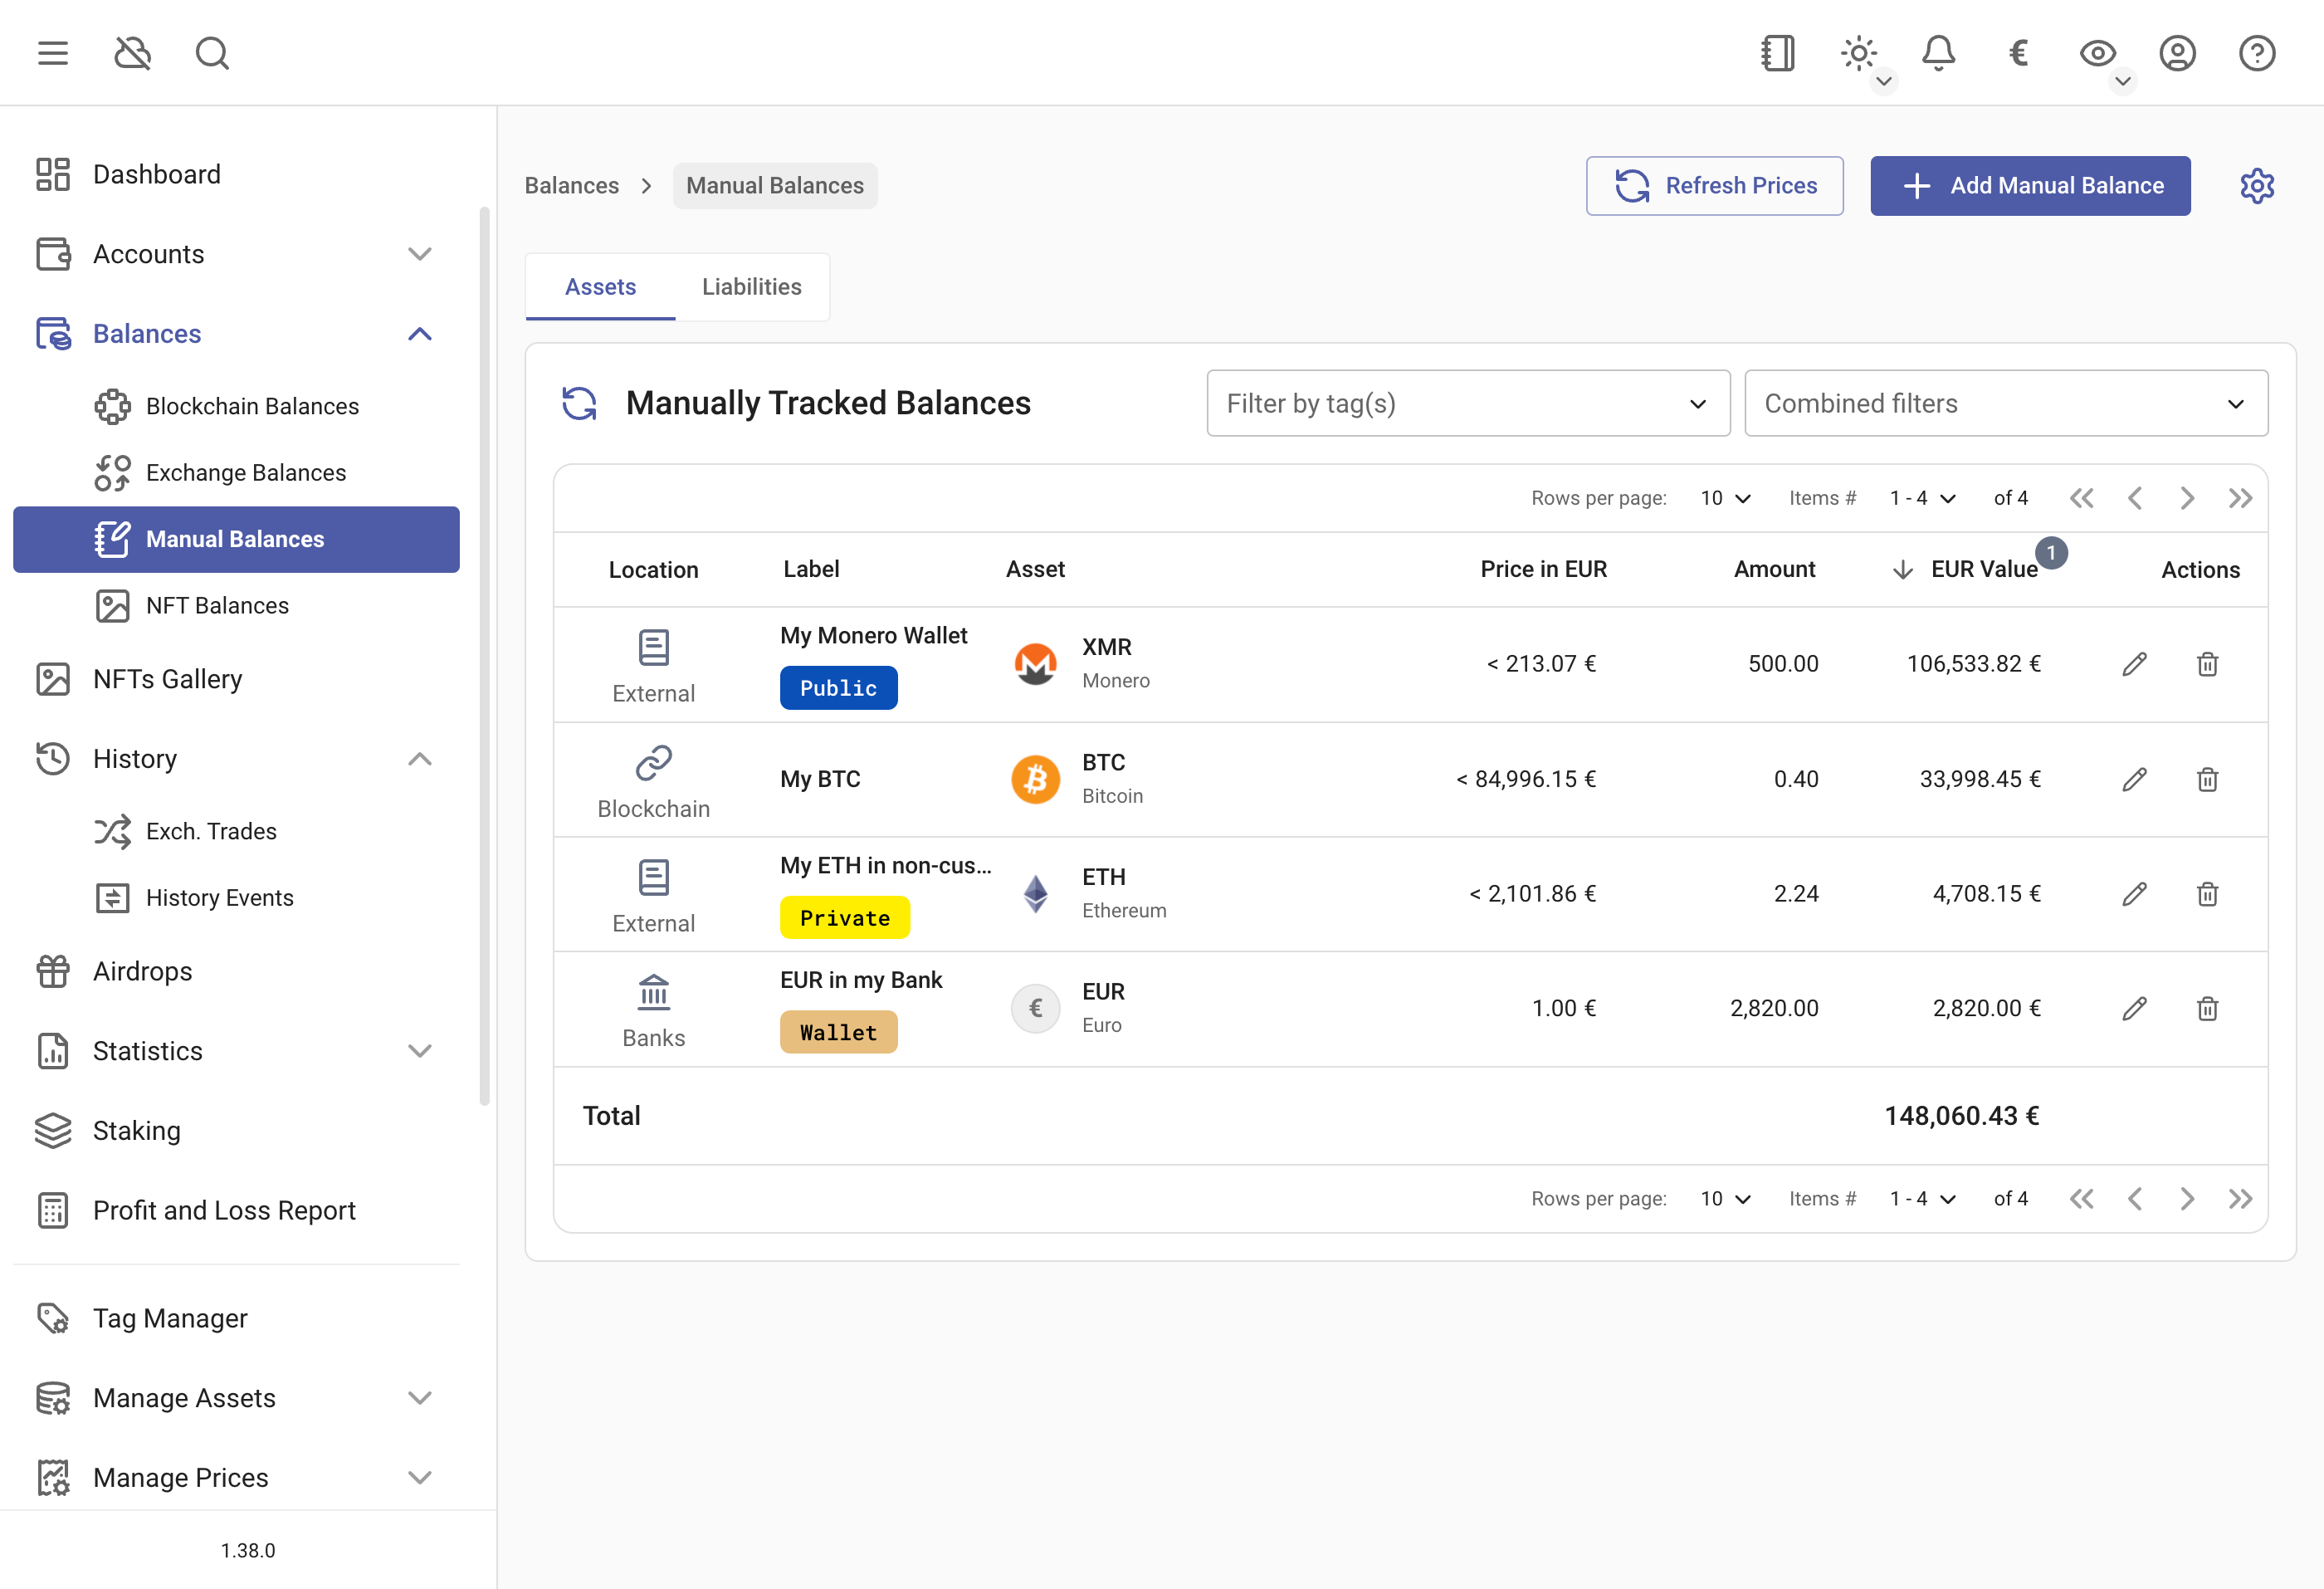
You can add any type of asset to rotki, that may not officially supported yet. This includes things like:
- Real estate
- Stocks
- Assets from unsupported blockchains or exchanges
To add or edit a manual balance:
- Go to the Manual Balances page
- Click
Add Manual Balance(top right) - Add a unique label
- Select your asset from the dropdown
- Add any tags you want
- Enter the amount and location
You can also filter the manual balances by location, name or asset.
By pressing the edit button for the account you can also add tags to the blockchain account. If you want to create a new tag or edit an existing one you can open the tag manager and choose the name, description and colors of the tag.
NFTs
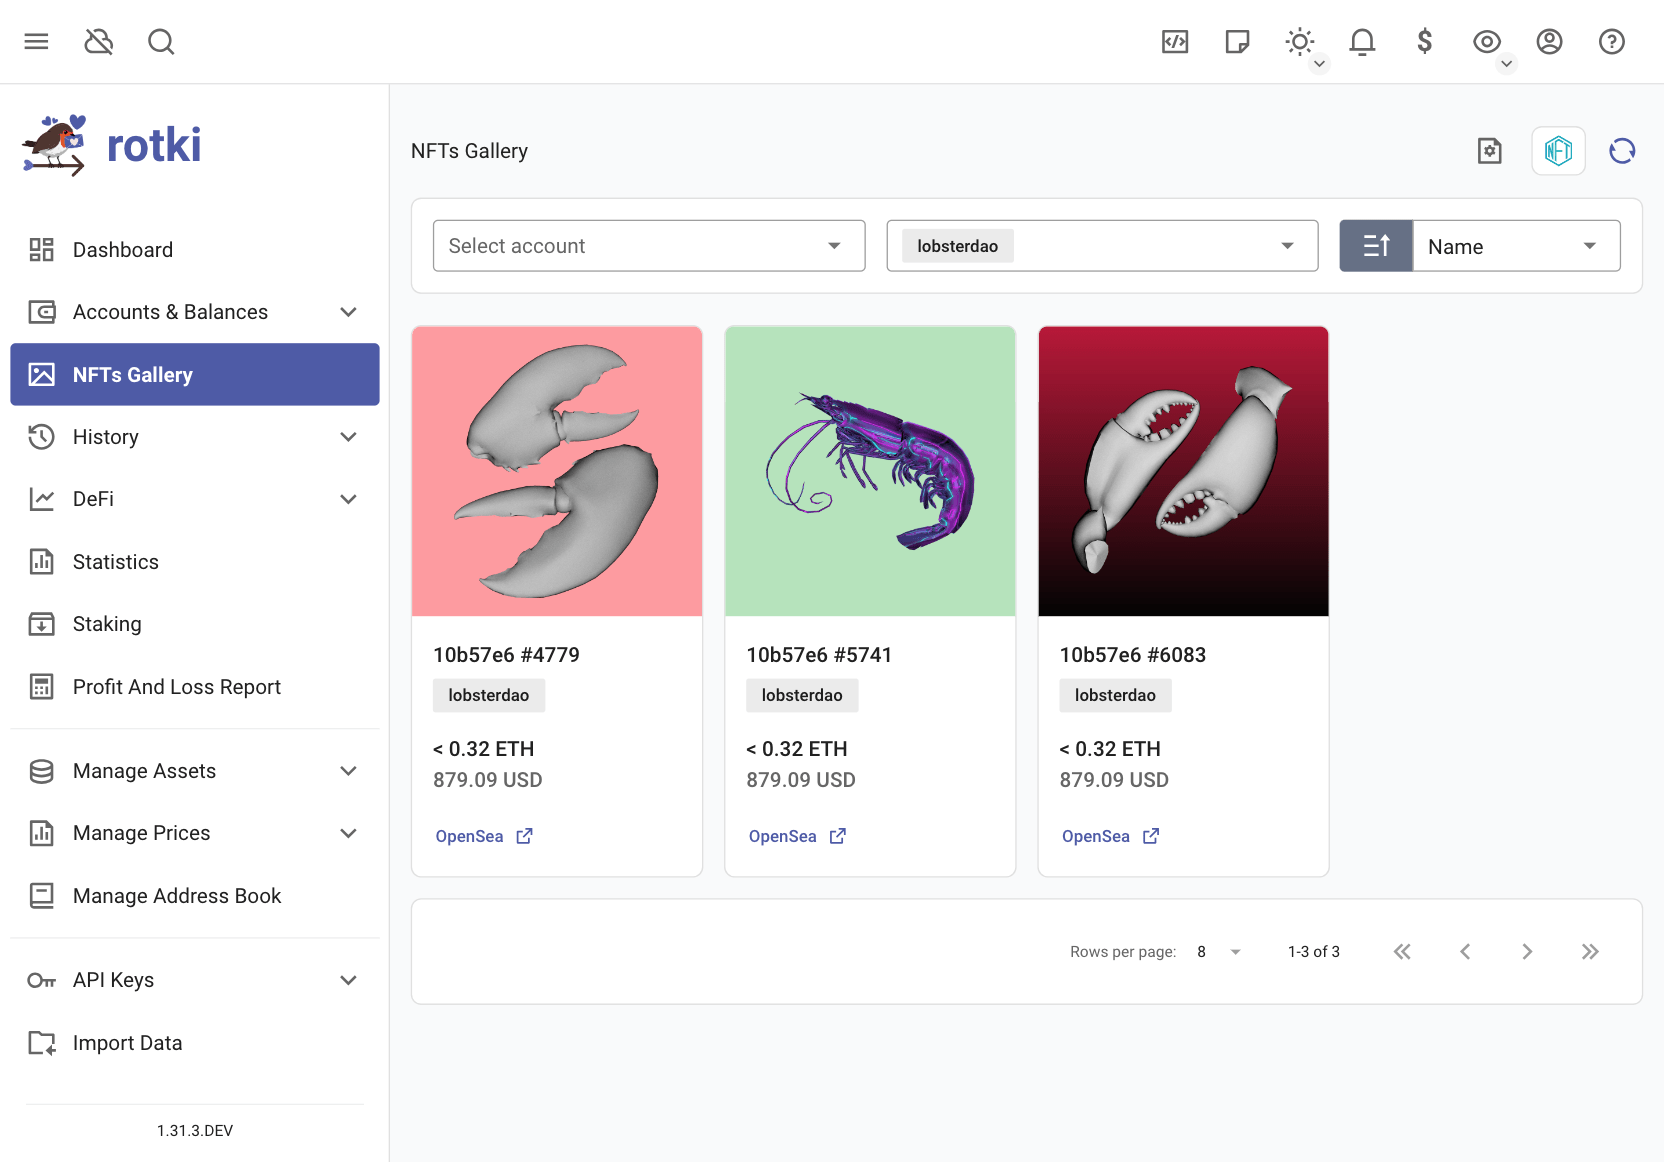
rotki provides an NFT gallery where you can view the NFTs owned by your accounts.
You have an overview of the total value of your NFTs in the application dashboard, on the NFTs table.
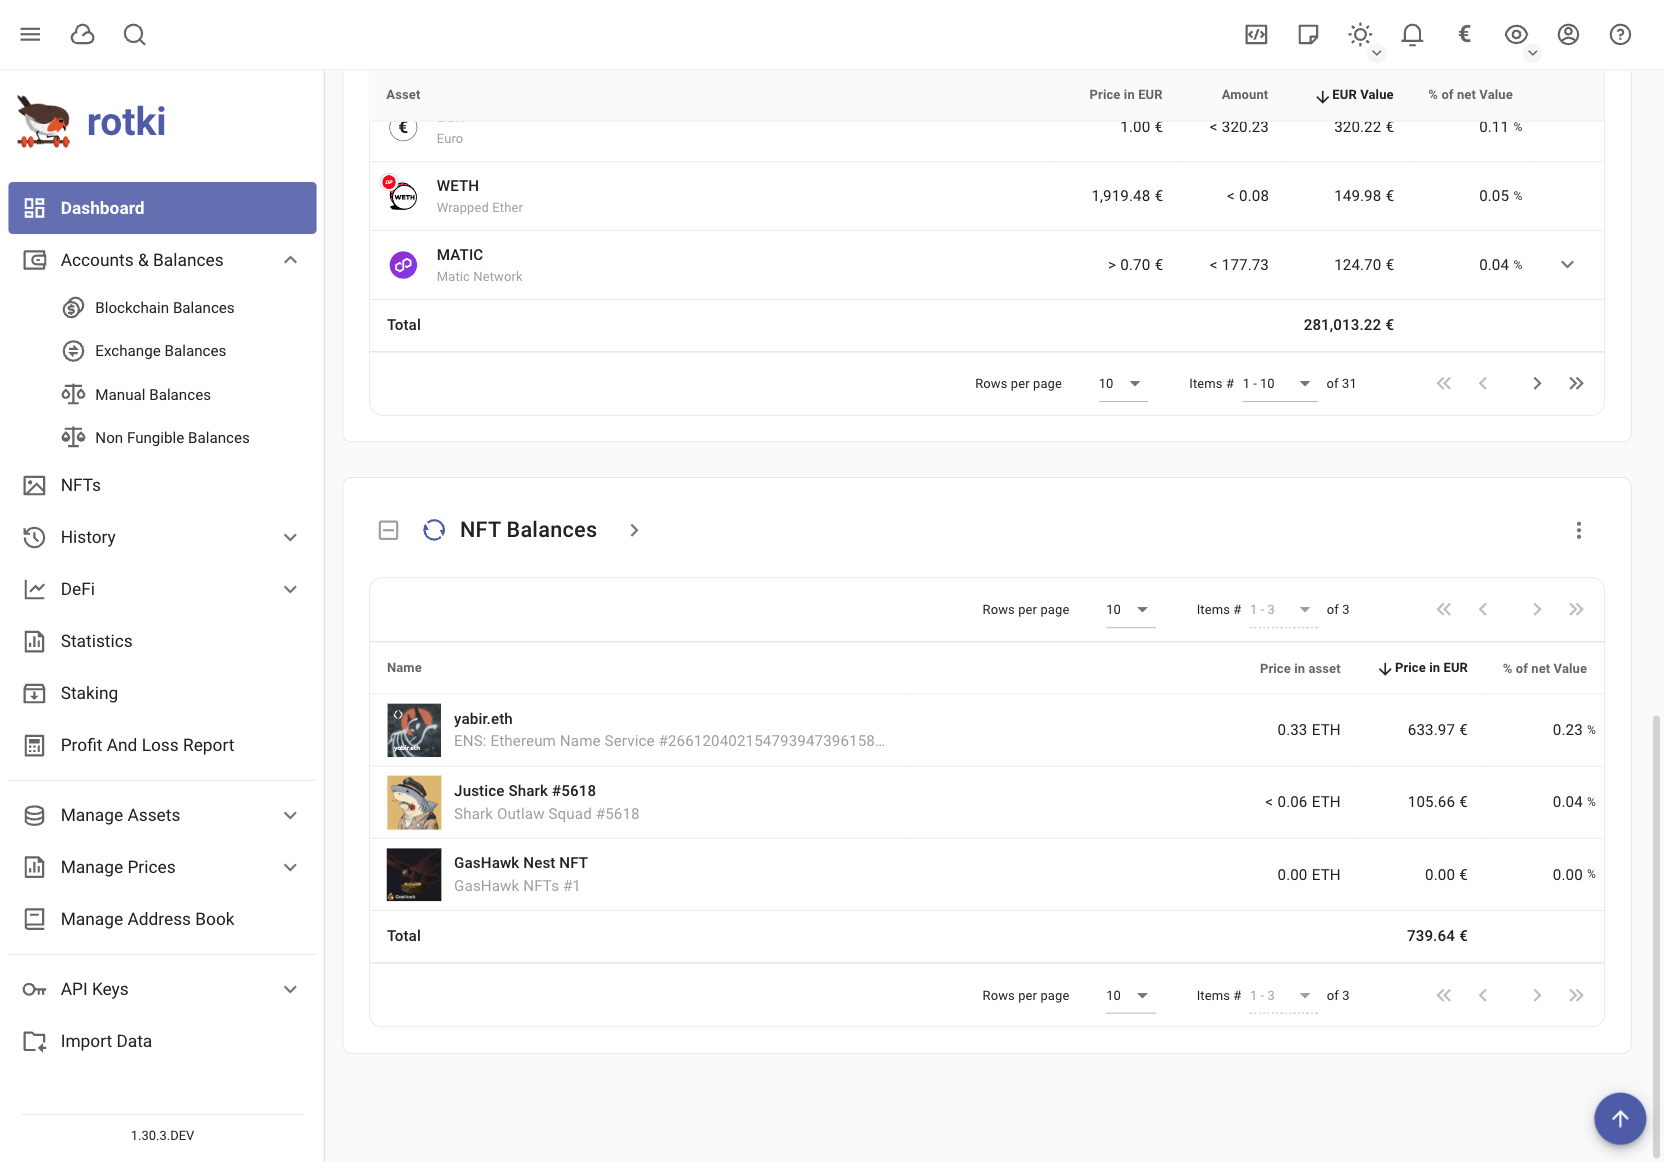
An estimation of the value of the NFTs you own is counted into your total net worth. The estimation strategy is currently the maximum of either the floor price of the collection or the last sale of the NFT. If a manual price has been given this is always preferred.
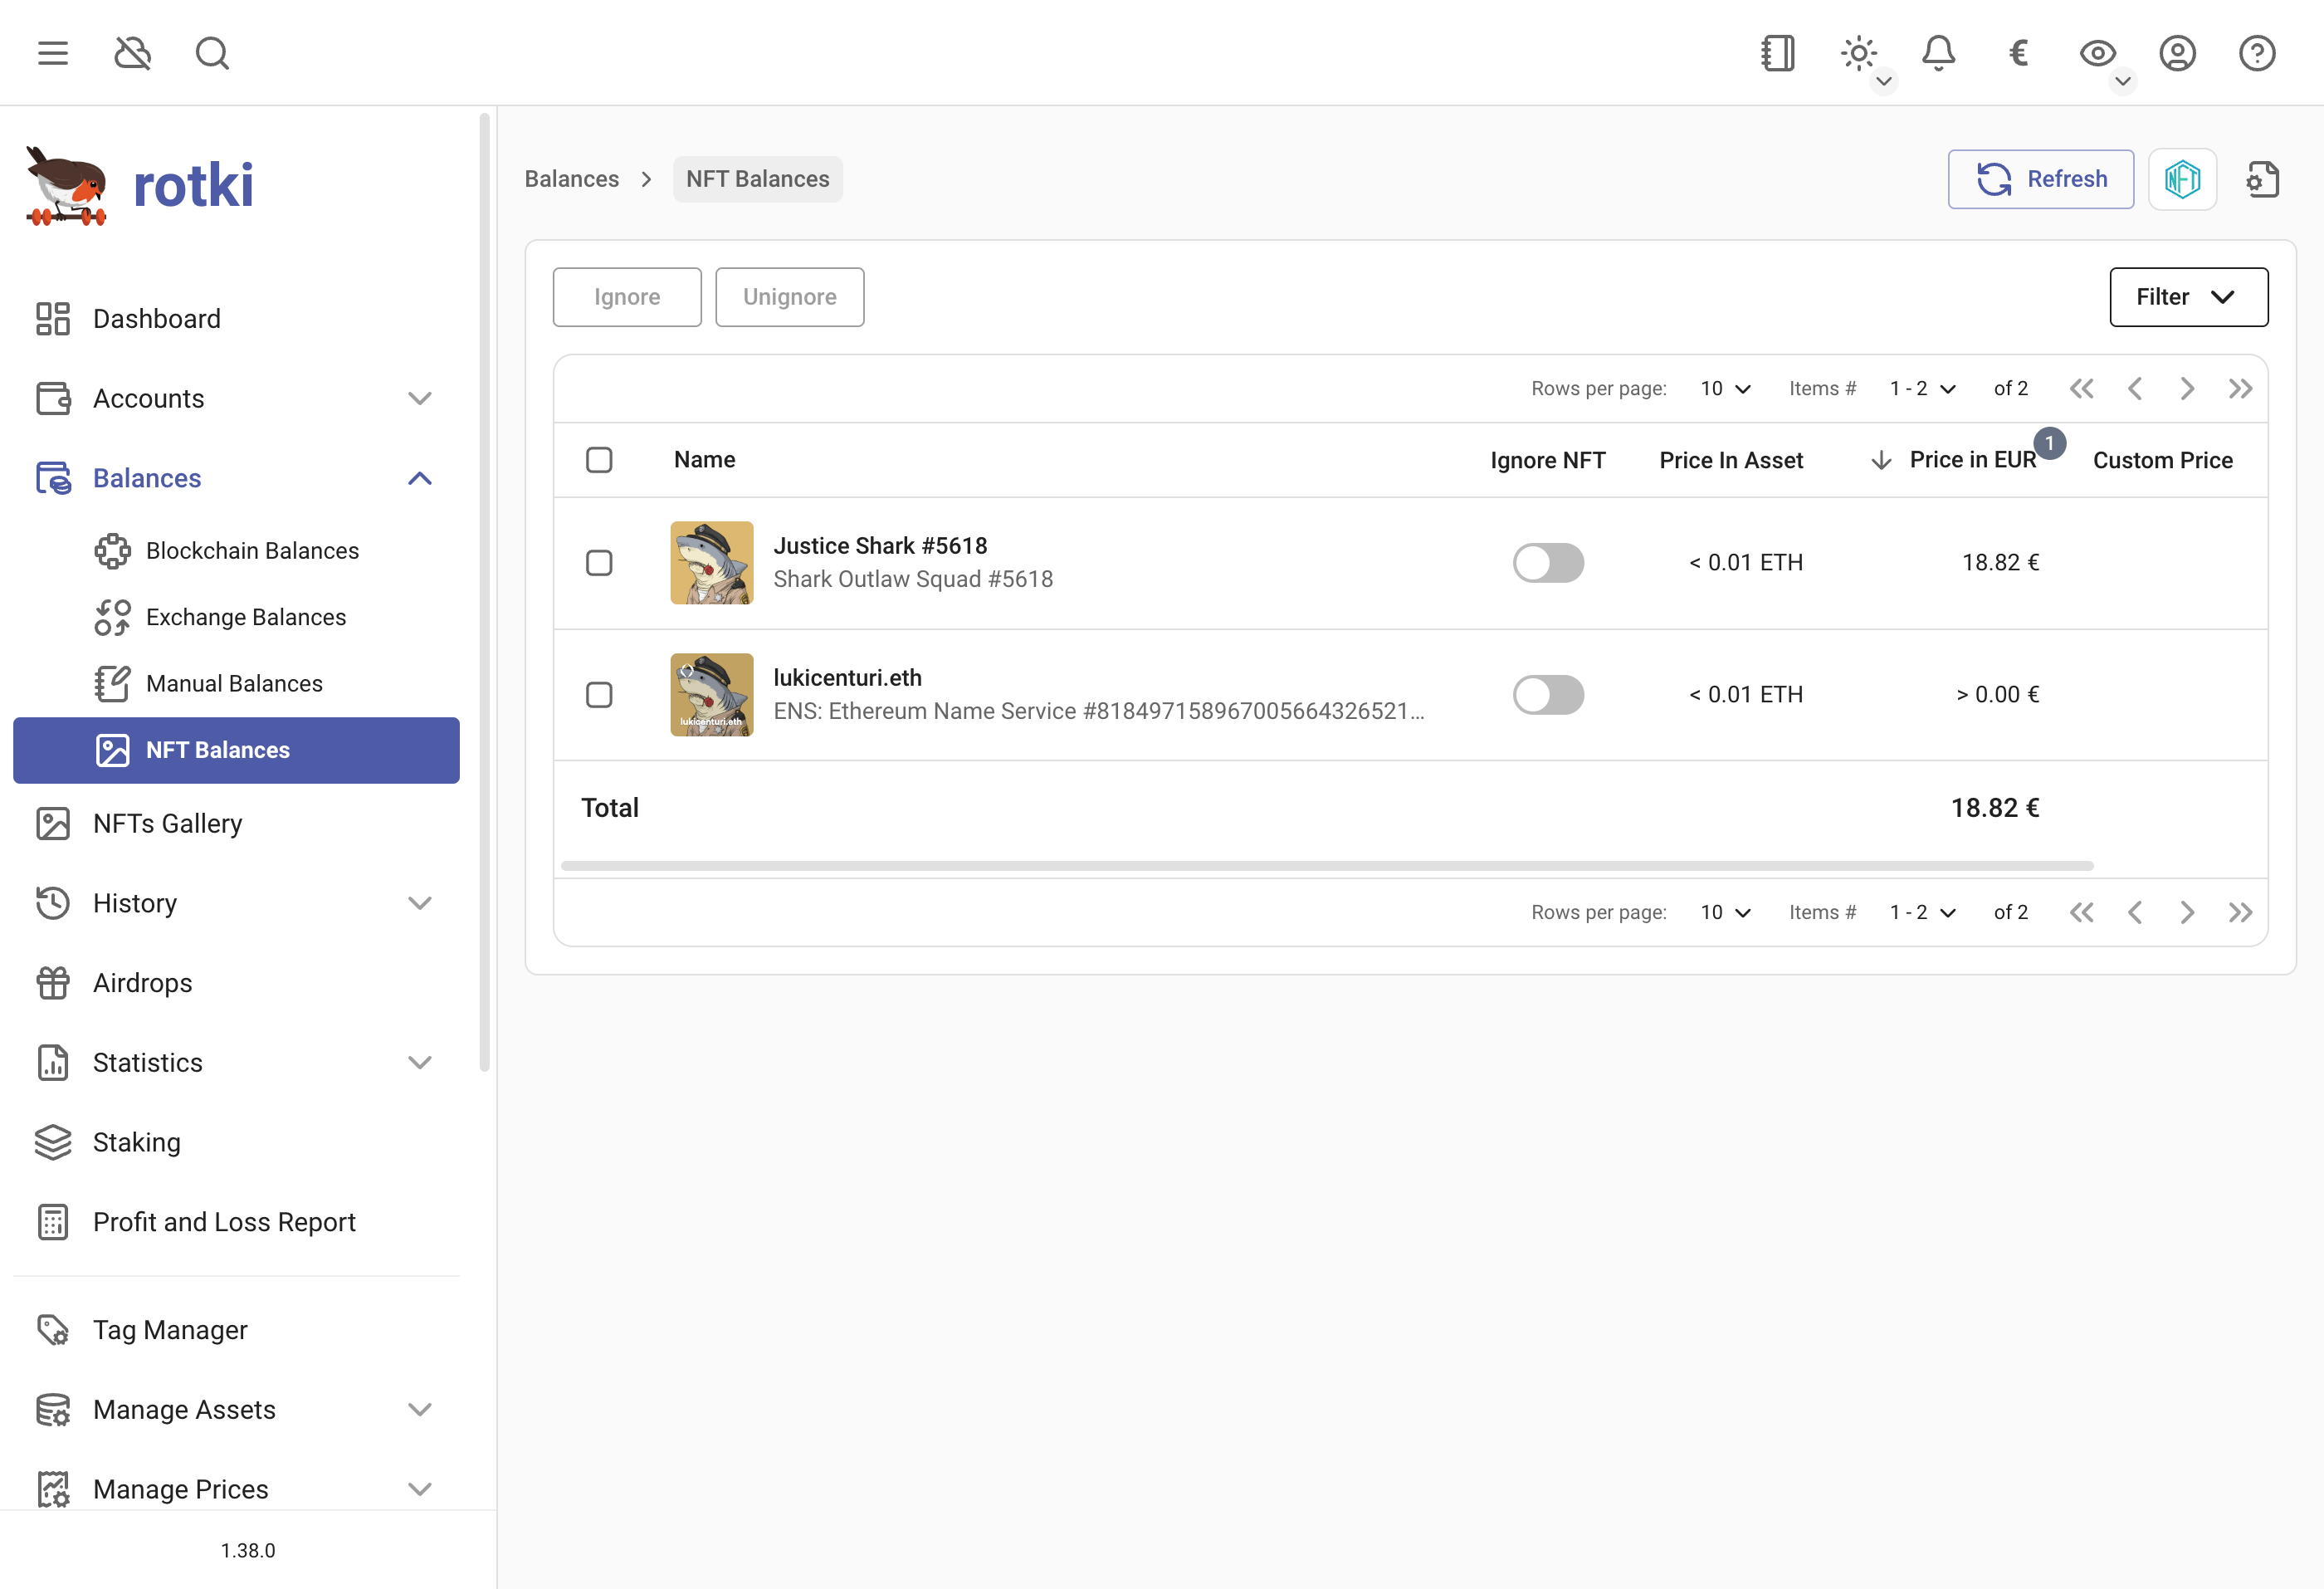
If a price cannot be found for an NFT asset or if you want to change the calculated price estimate you can easily set the price for an NFT asset manually. You can do this by either clicking on the > button in the NFTs table in the dashboard or by going to Blockchains & Accounts → NFT Balances. And then click on the pen icon for the NFT you are interested in.
For privacy concerns, it is possible to allow all or only a certain list of domains for images rendered, this can be done here by clicking on the icon highlighted below.
More details here Critical Privacy Vulnerability: Getting Exposed by MetaMask
The configuration menu:
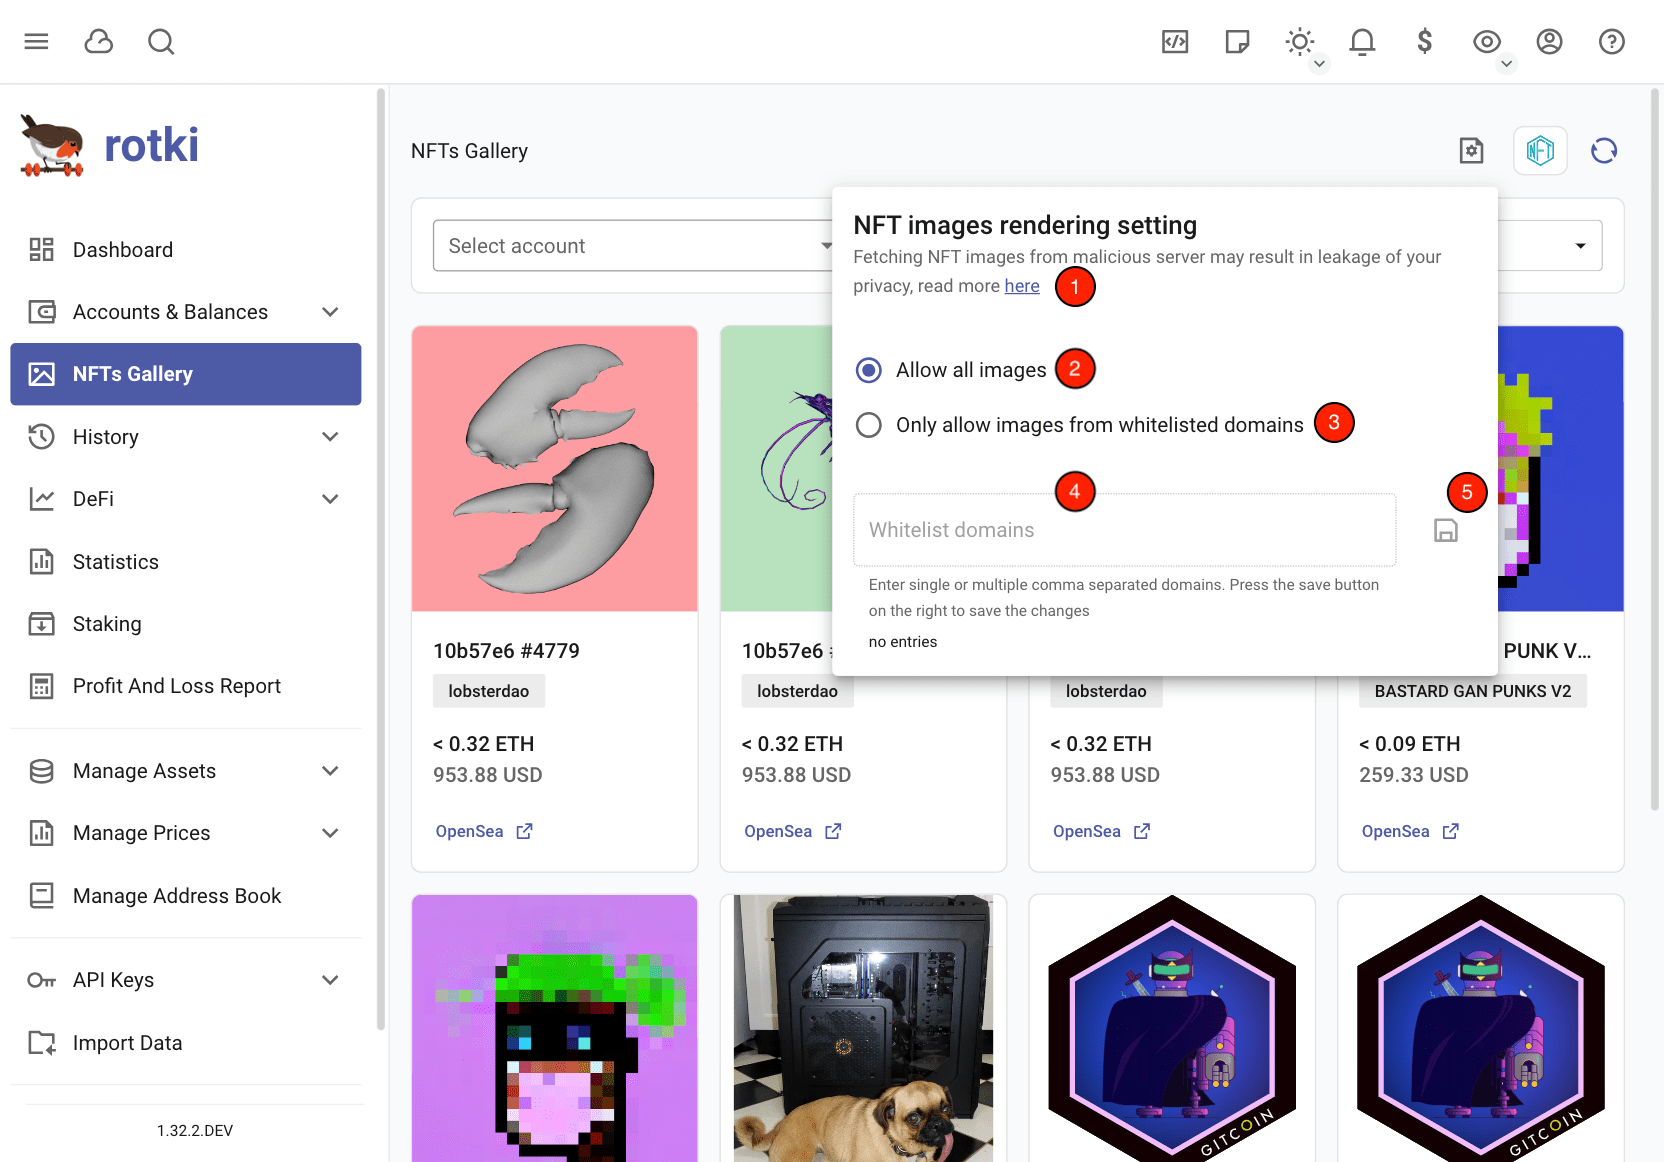
Highlight details:
- Link to blog post about image rendering and privacy.
- Option to allow all NFT images to be rendered.
- Option to allow only whitelisted domains.
- If only whitelist, input list of allowed domains.
- Save button.
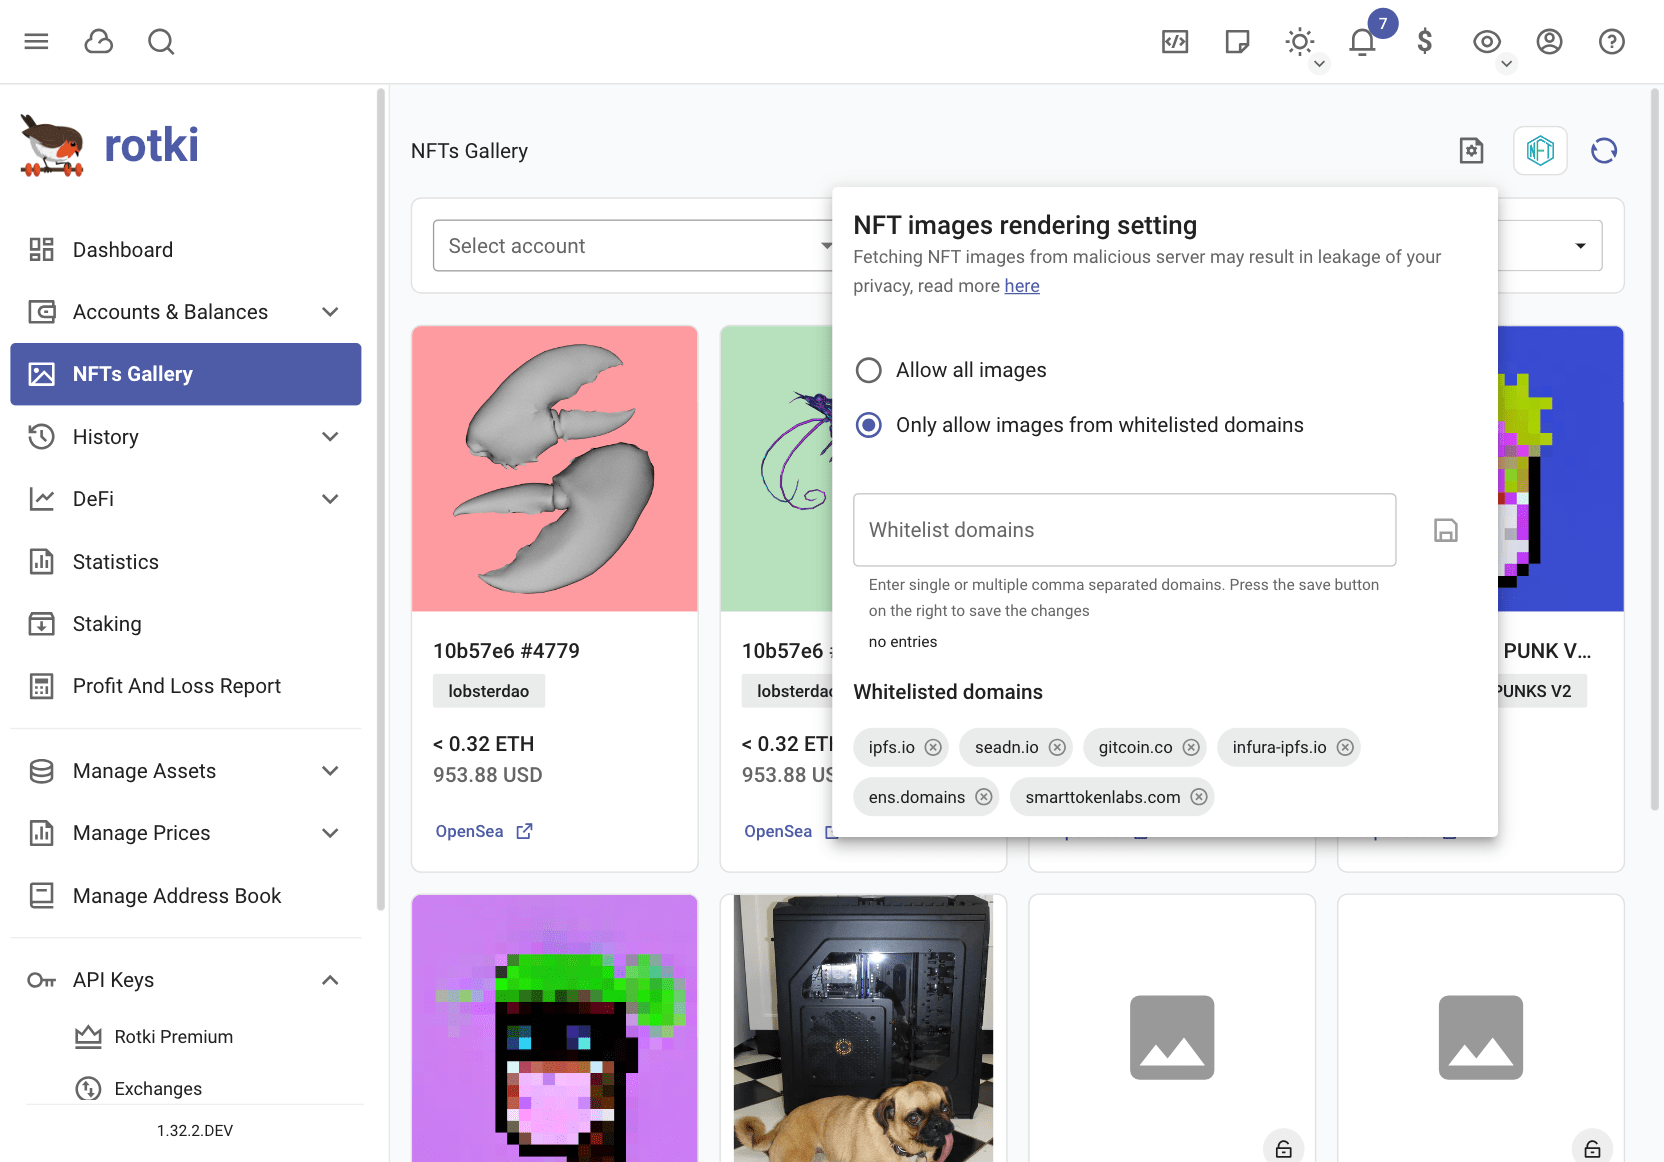
This will enable image rendering of only whitelisted NFT domains.
Filtering by tags
You can filter the tables by a combination of tags.
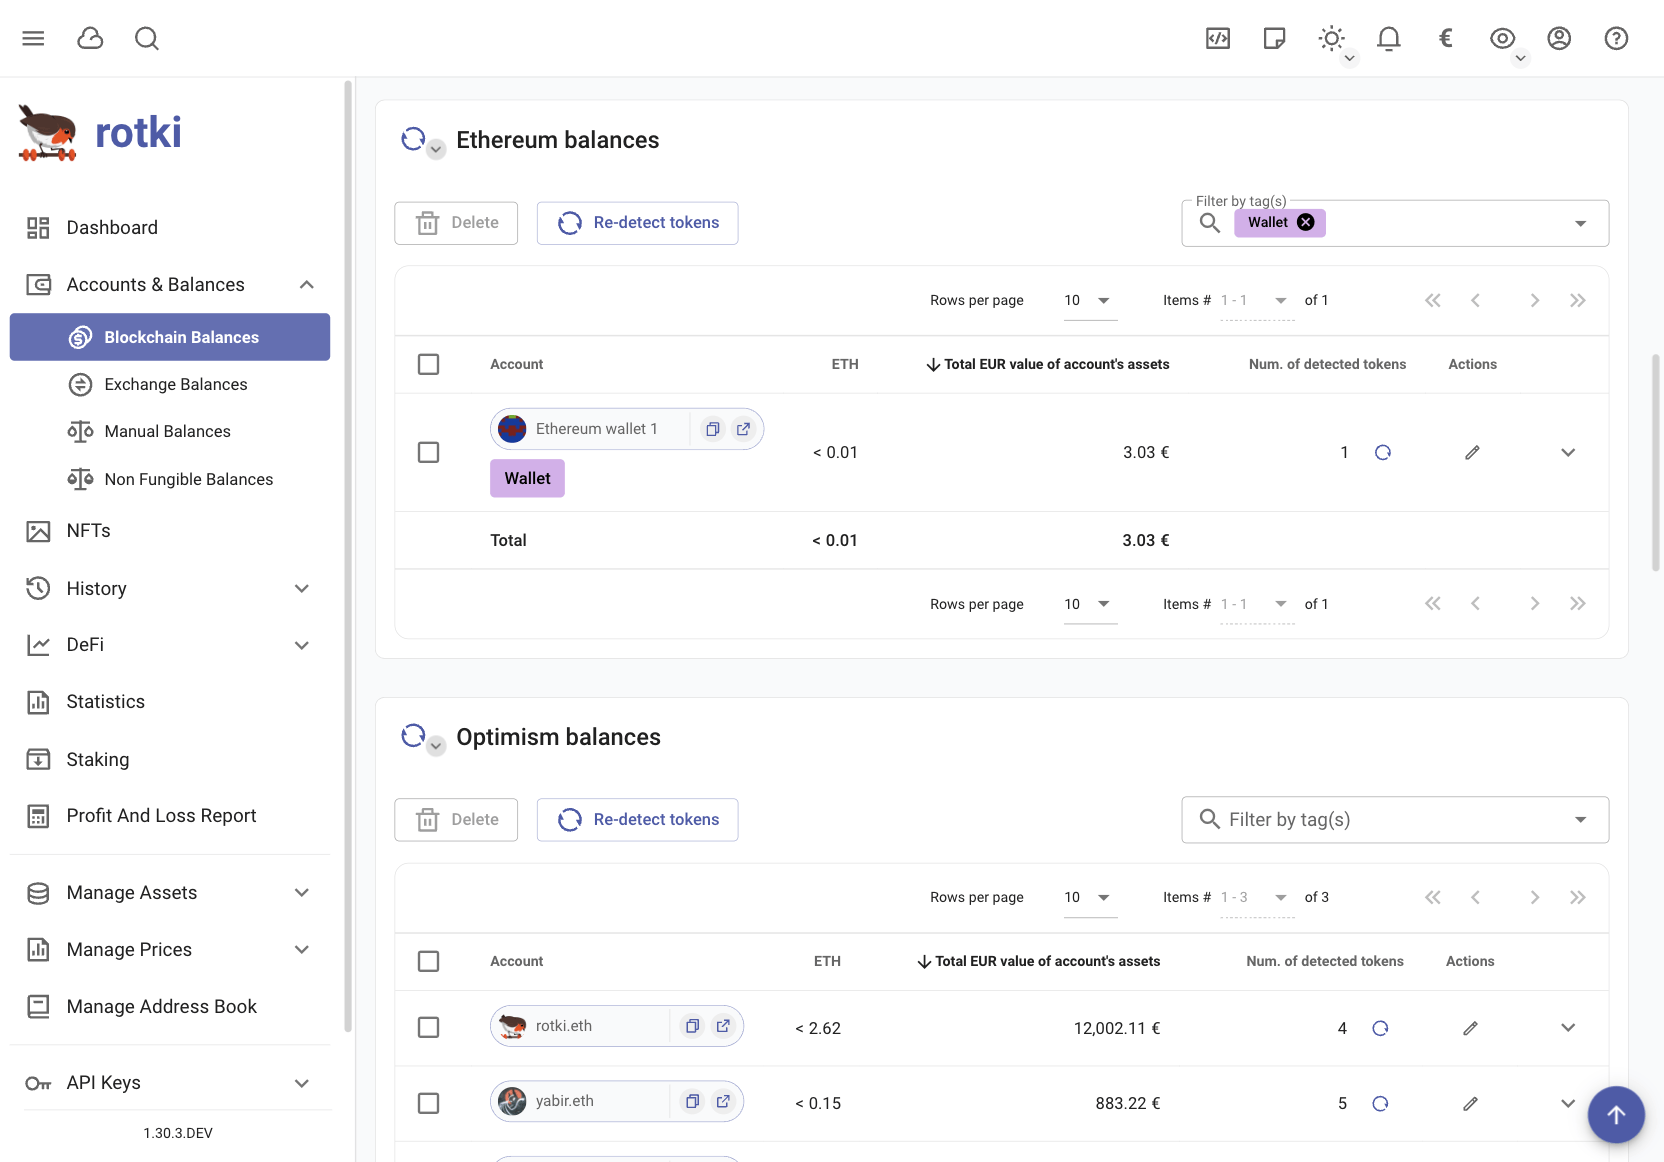
Simply add the tags you wish to filter by in the filter textbox above the tables.
Hide small balances
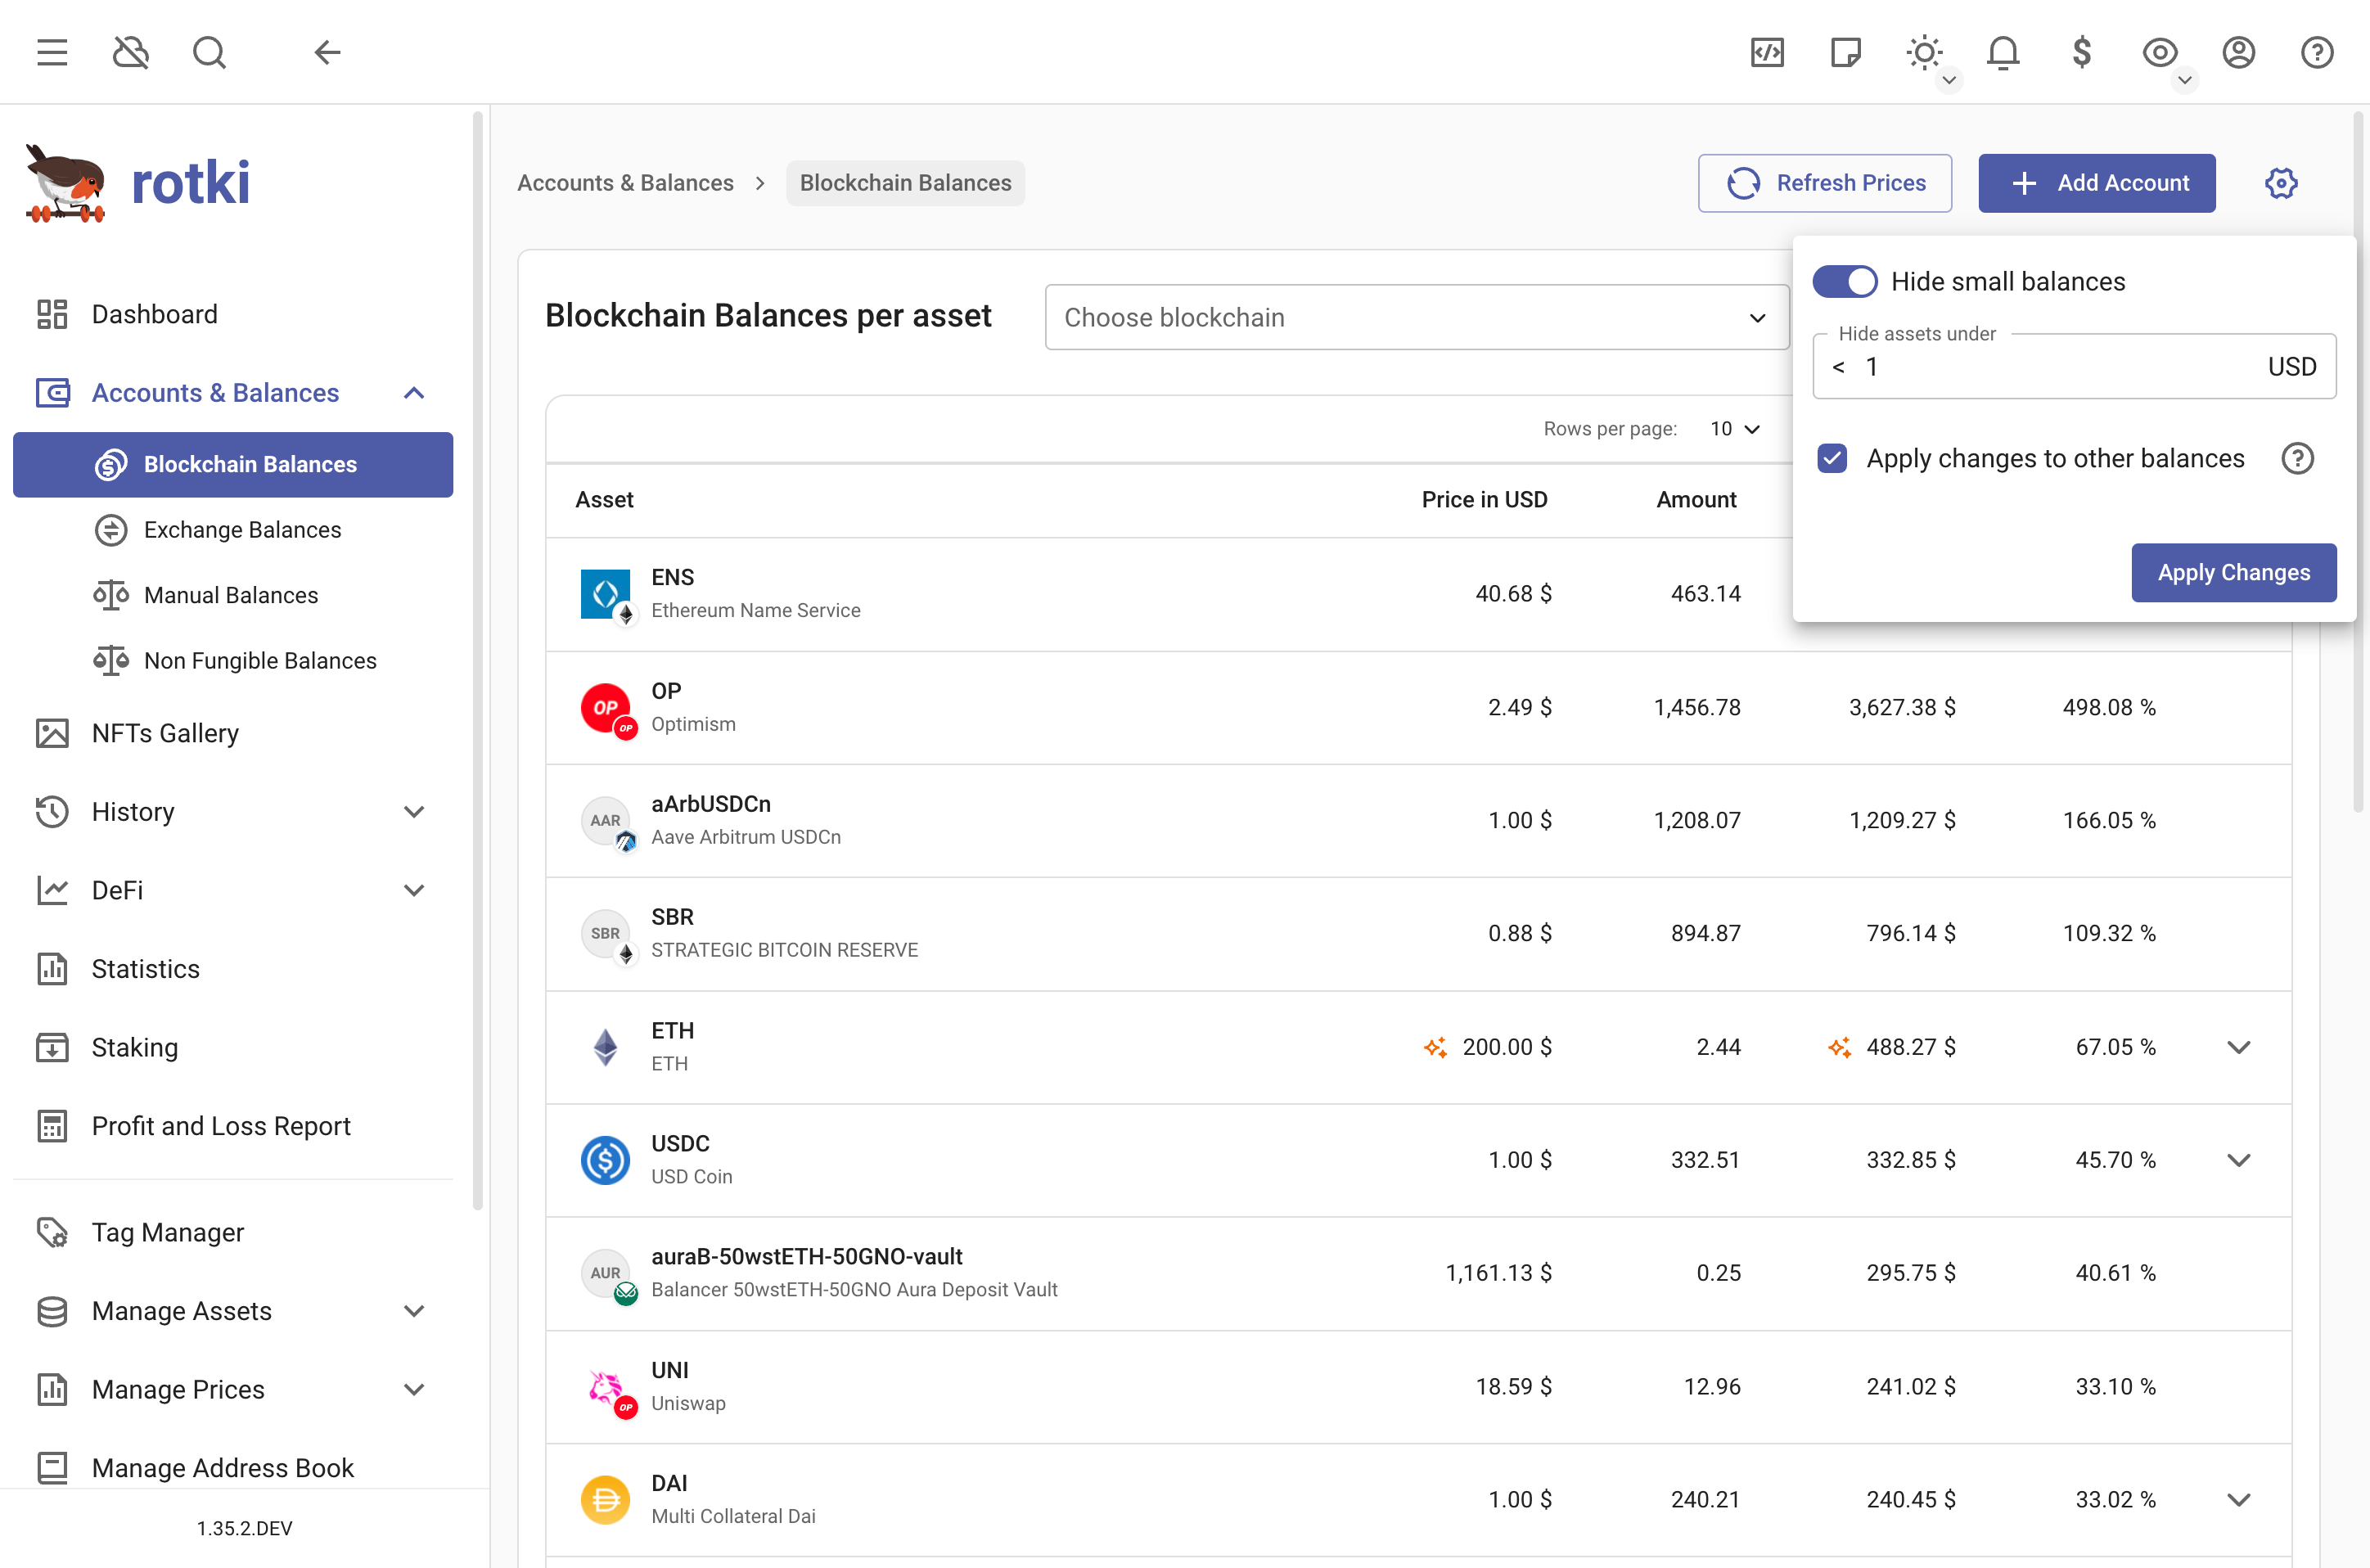
You can filter out small balances and set the threshold yourself.
By default, this setting will apply to all balance types (blockchain balances, exchange balances, and manual balances). You can uncheck the checkbox to apply the setting only to the current balances view.
NOTE
You need to press "Apply Changes" for the setting to take effect.
Airdrops
rotki can detect some airdrops for you
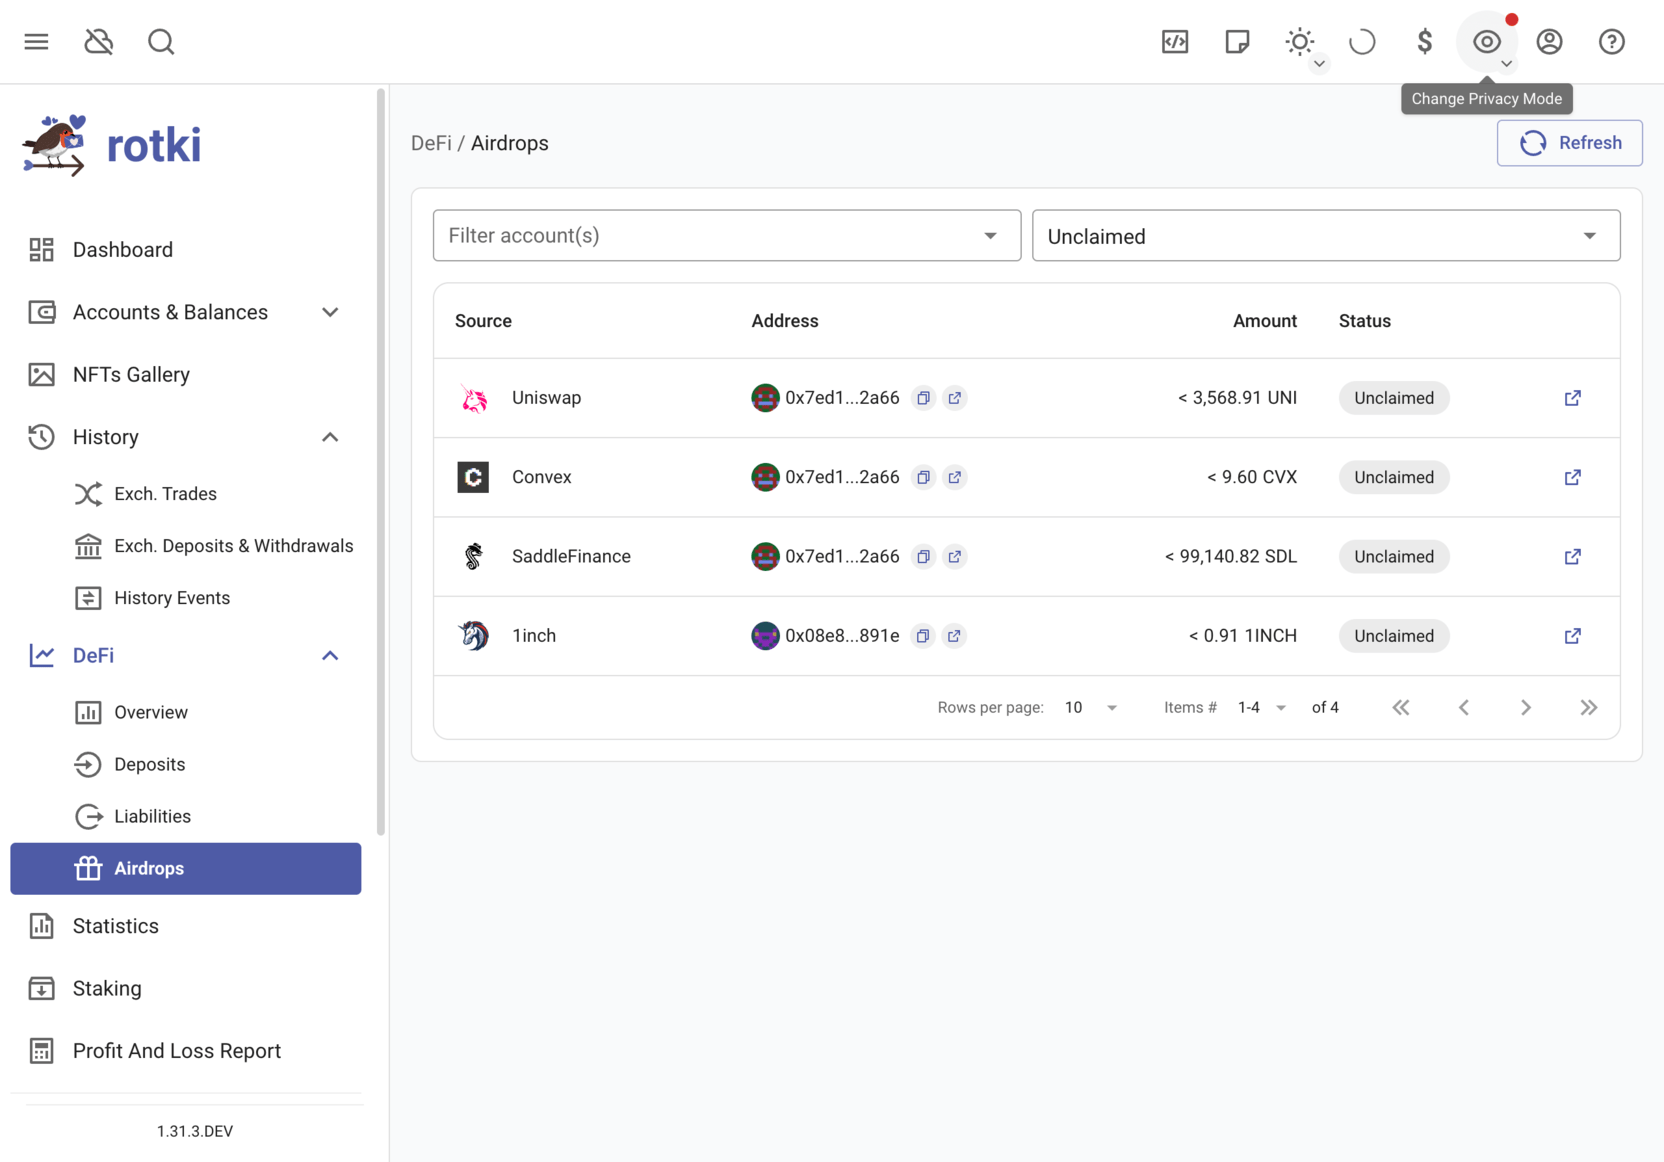
The list of currently supported airdrops is:
- Uniswap
- 1INCH
- Tornado
- Cornichon
- Grain
- Furocombo
- Lido
- Curve
- Convex
- Shapeshift
- ENS
- ParaSwap
- Saddle finance
- Cow
- Diva
- Shutter
- Starknet
- Optimism 4
- Degen 2
- Omni
- Eigen token
For some airdrops, you may see the status Unknown. This means rotki can't determine the status of the airdrop, whether it has been claimed or not. You need to check it yourself.
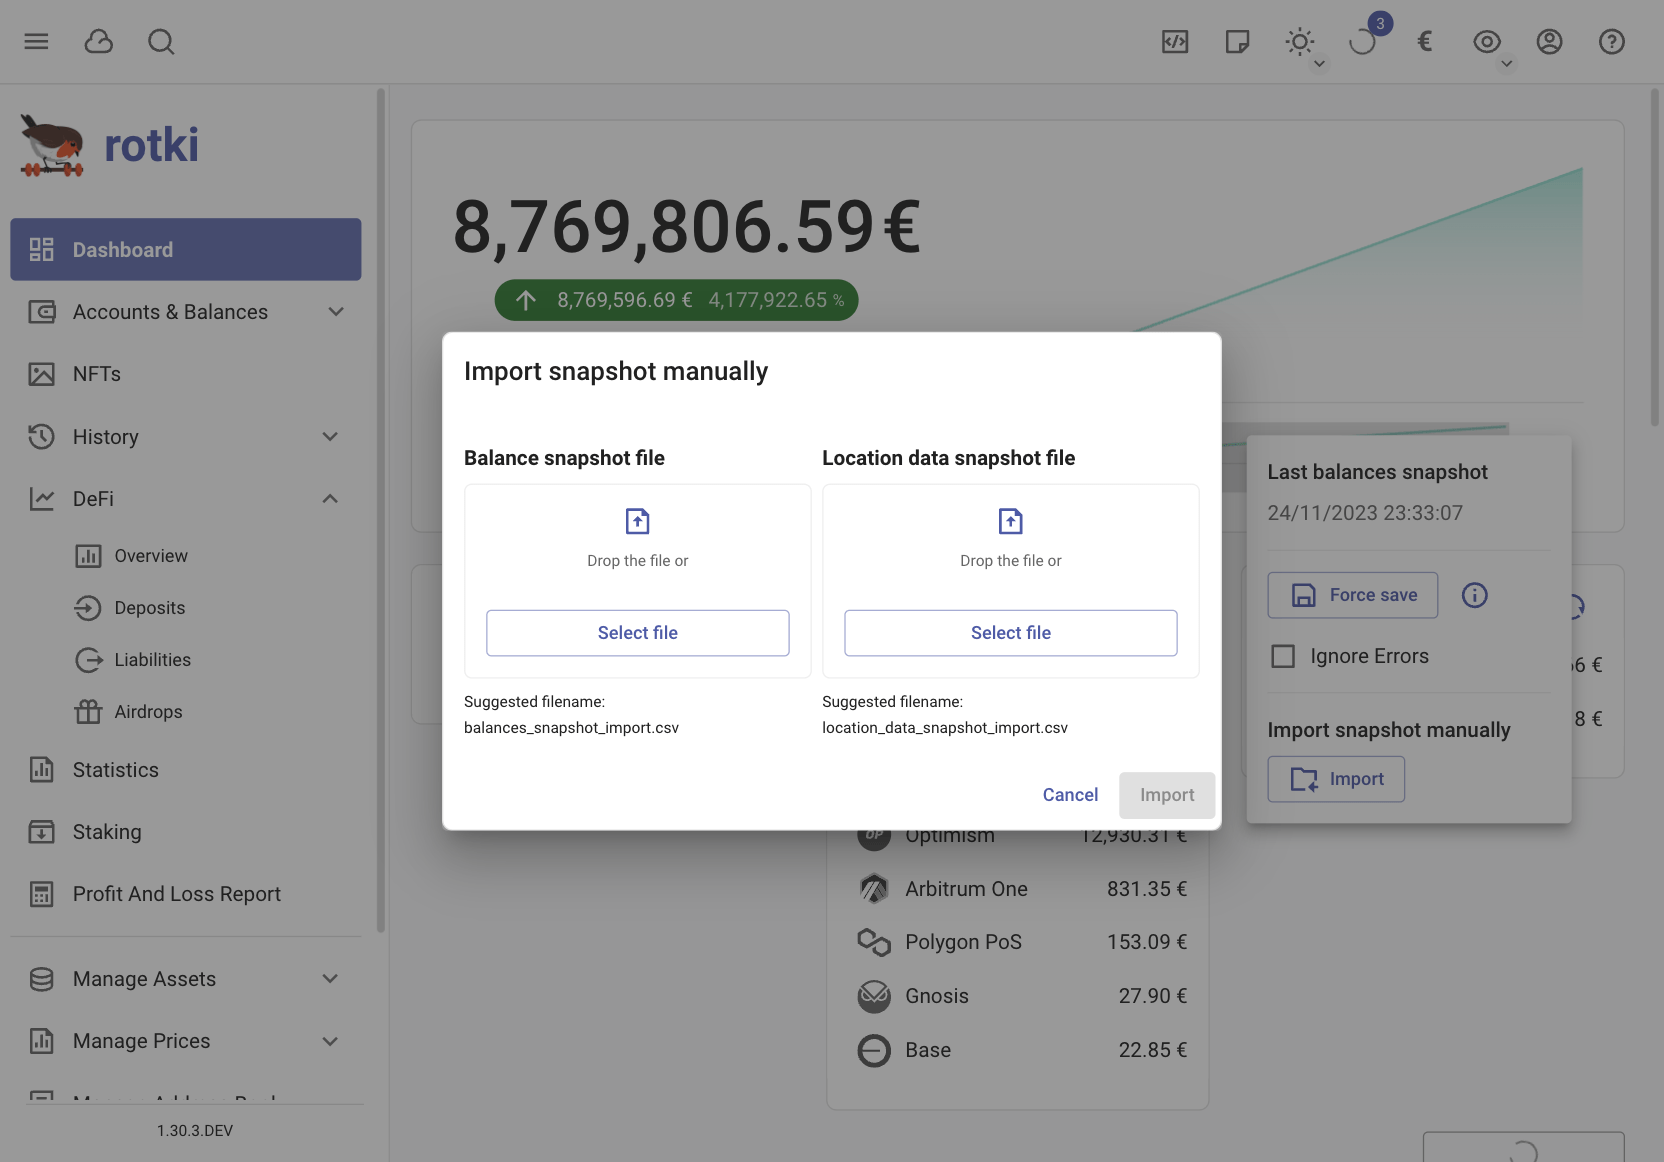
Balances Snapshots
The application automatically saves balance snapshots to your local database:
- Occurs at login
- Default interval: every 24 hours (configurable)
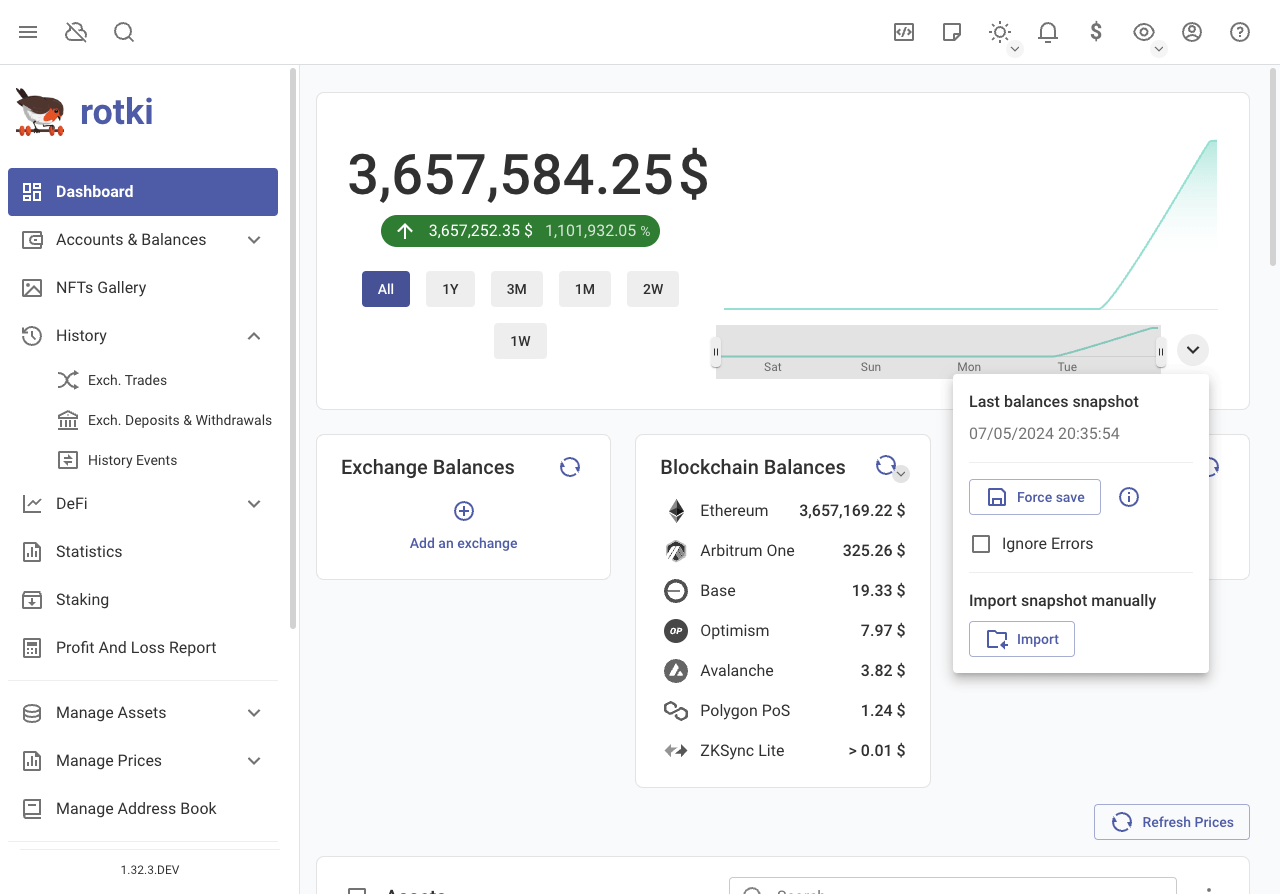
To manually create a snapshot:
- Click the
arrow downnear the graph - Select
Force Save
Error Handling
- Snapshots won't save if there are external source query errors
- To save despite errors, select
Ignore Errors
Modify a snapshot point
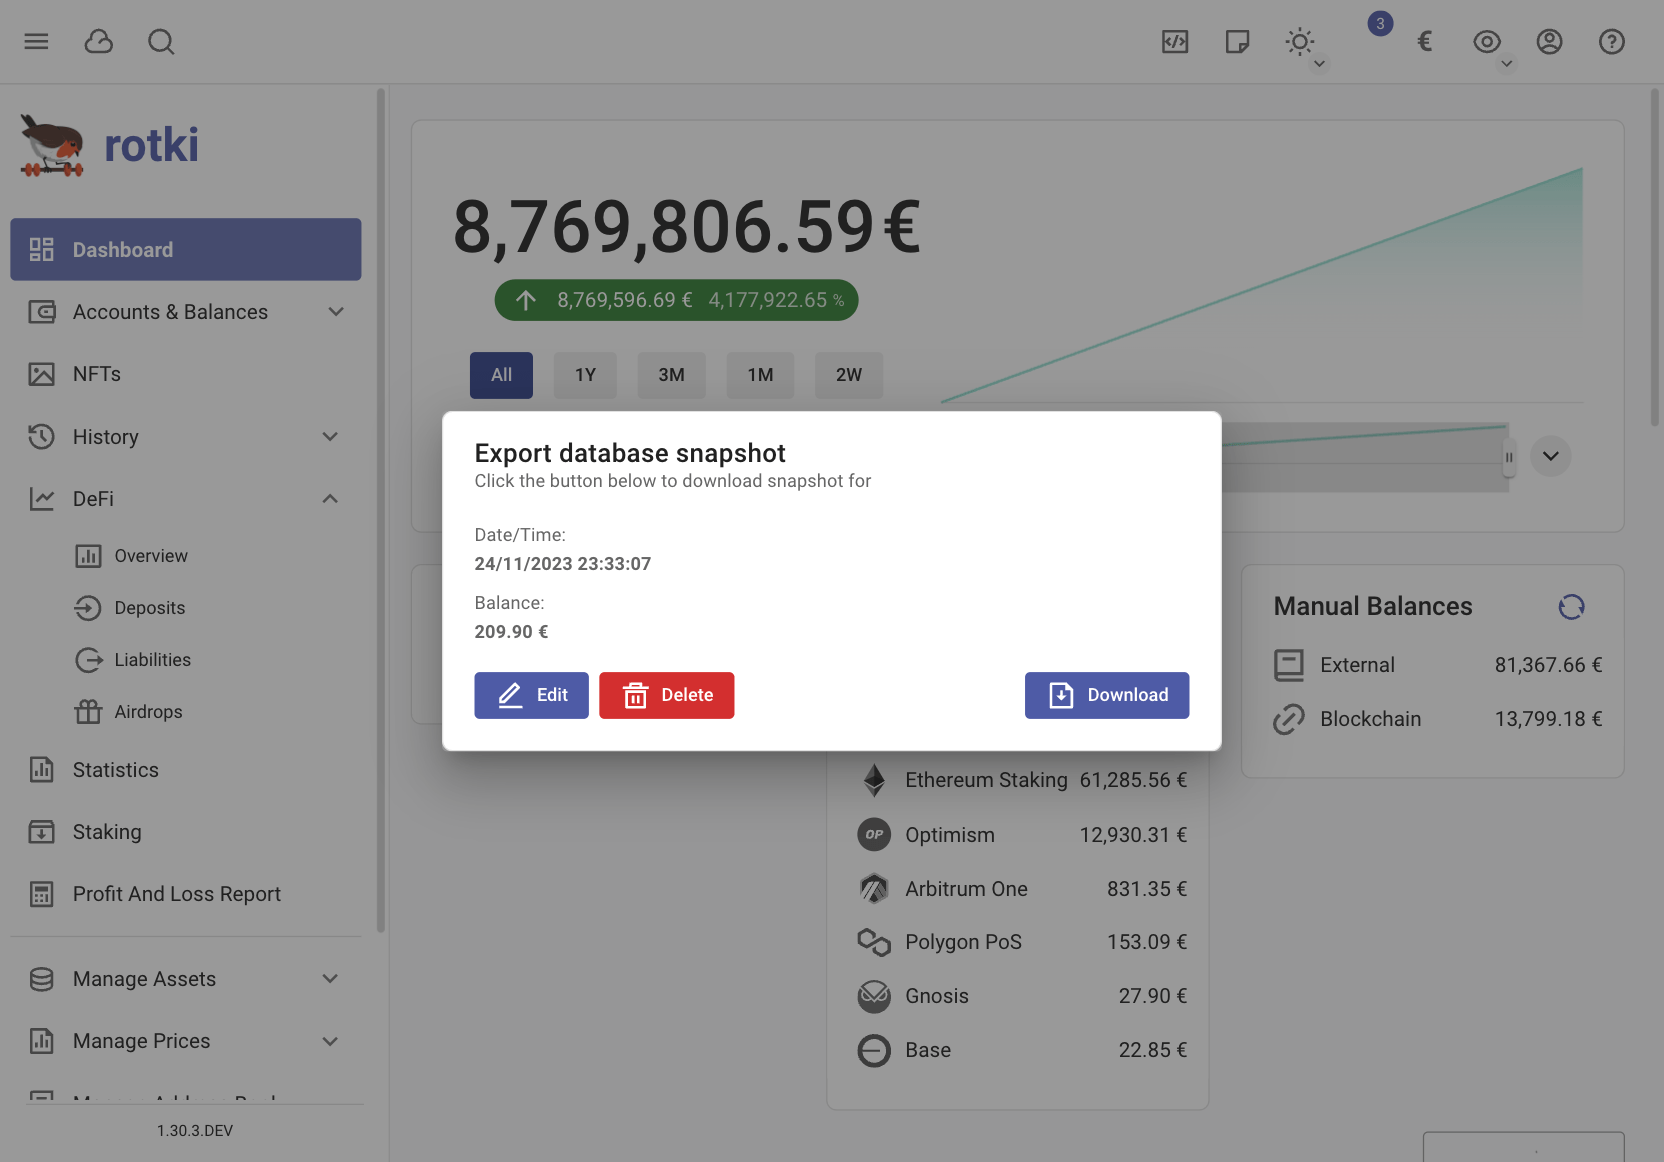
- Click on a snapshot point in the dashboard's net value graph
- From the menu you can:
- Edit snapshot data
- Remove the snapshot
- Download the snapshot
Edit Snapshots Value
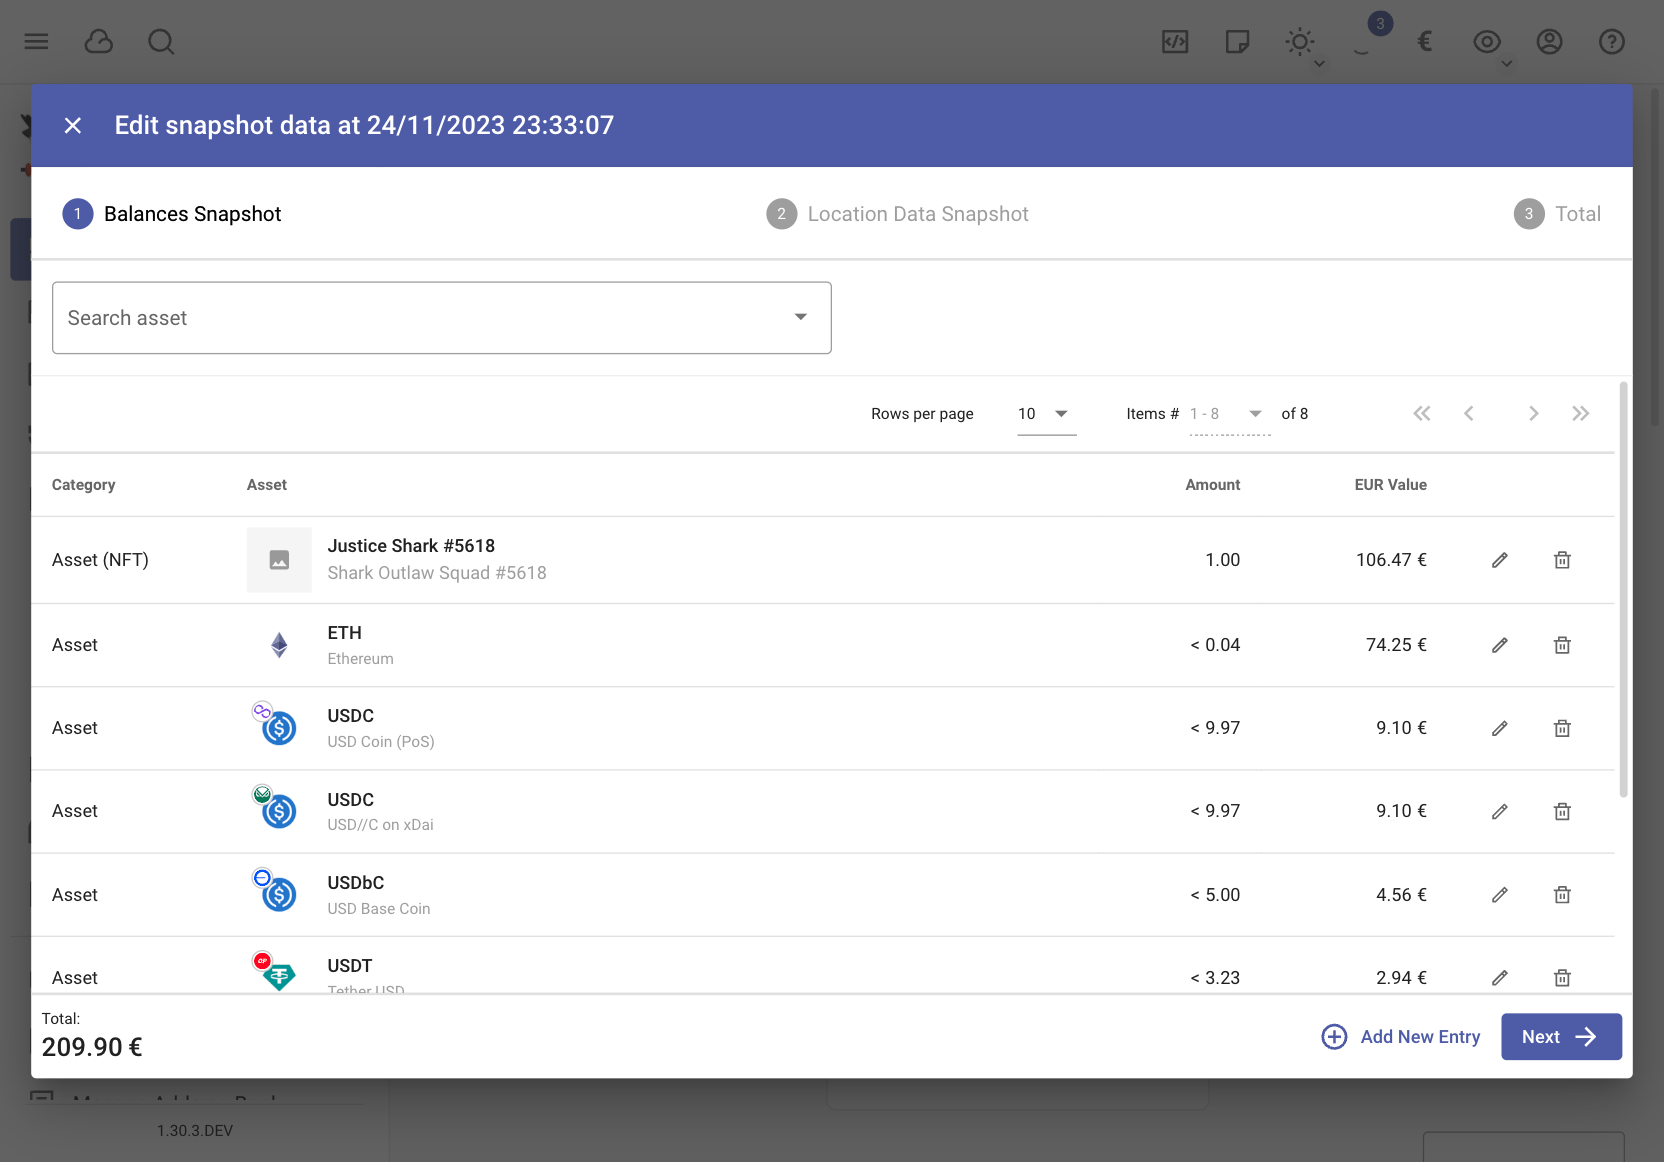
- Click a snapshot point
- Select edit
- Modify values for assets and locations as needed
Delete Snapshots
Click a snapshot point and select delete to remove saved information.
Download/Export Snapshots
When exporting, four files are generated:
- Two files for future data import
- Two human-readable files for accounting:
balances_snapshot: Asset balances at snapshot timelocation_data_snapshot: Value per location for each asset
Import Snapshot Back
To import previously exported snapshot data:
- Use files with
_importsuffix - Click the
Arrow downbutton near the chart - Select
Import
