Introduction
This guide explains how to use the rotki application.
First Time Sign-Up
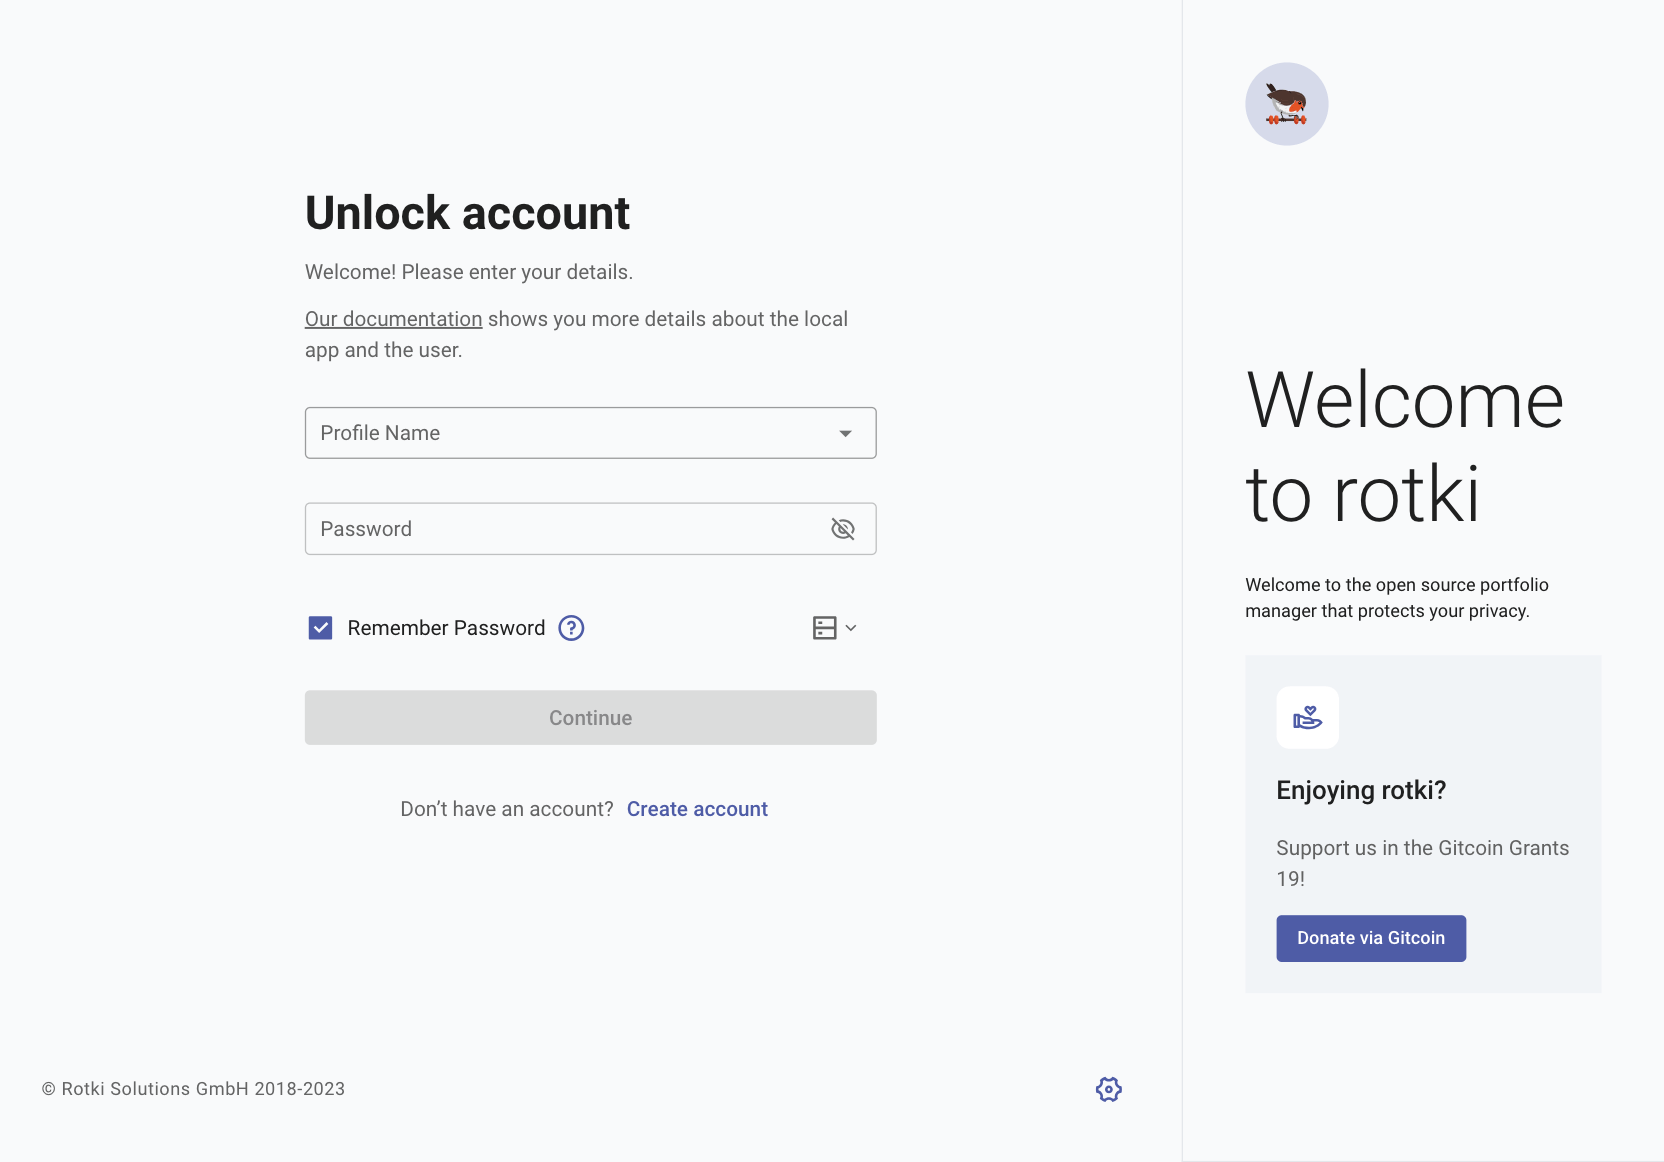
When you start rotki, you'll see a sign-in/signup prompt. rotki is a local app, so your account only exists on your local system. Your account on rotki.com is only for managing premium subscription payments.
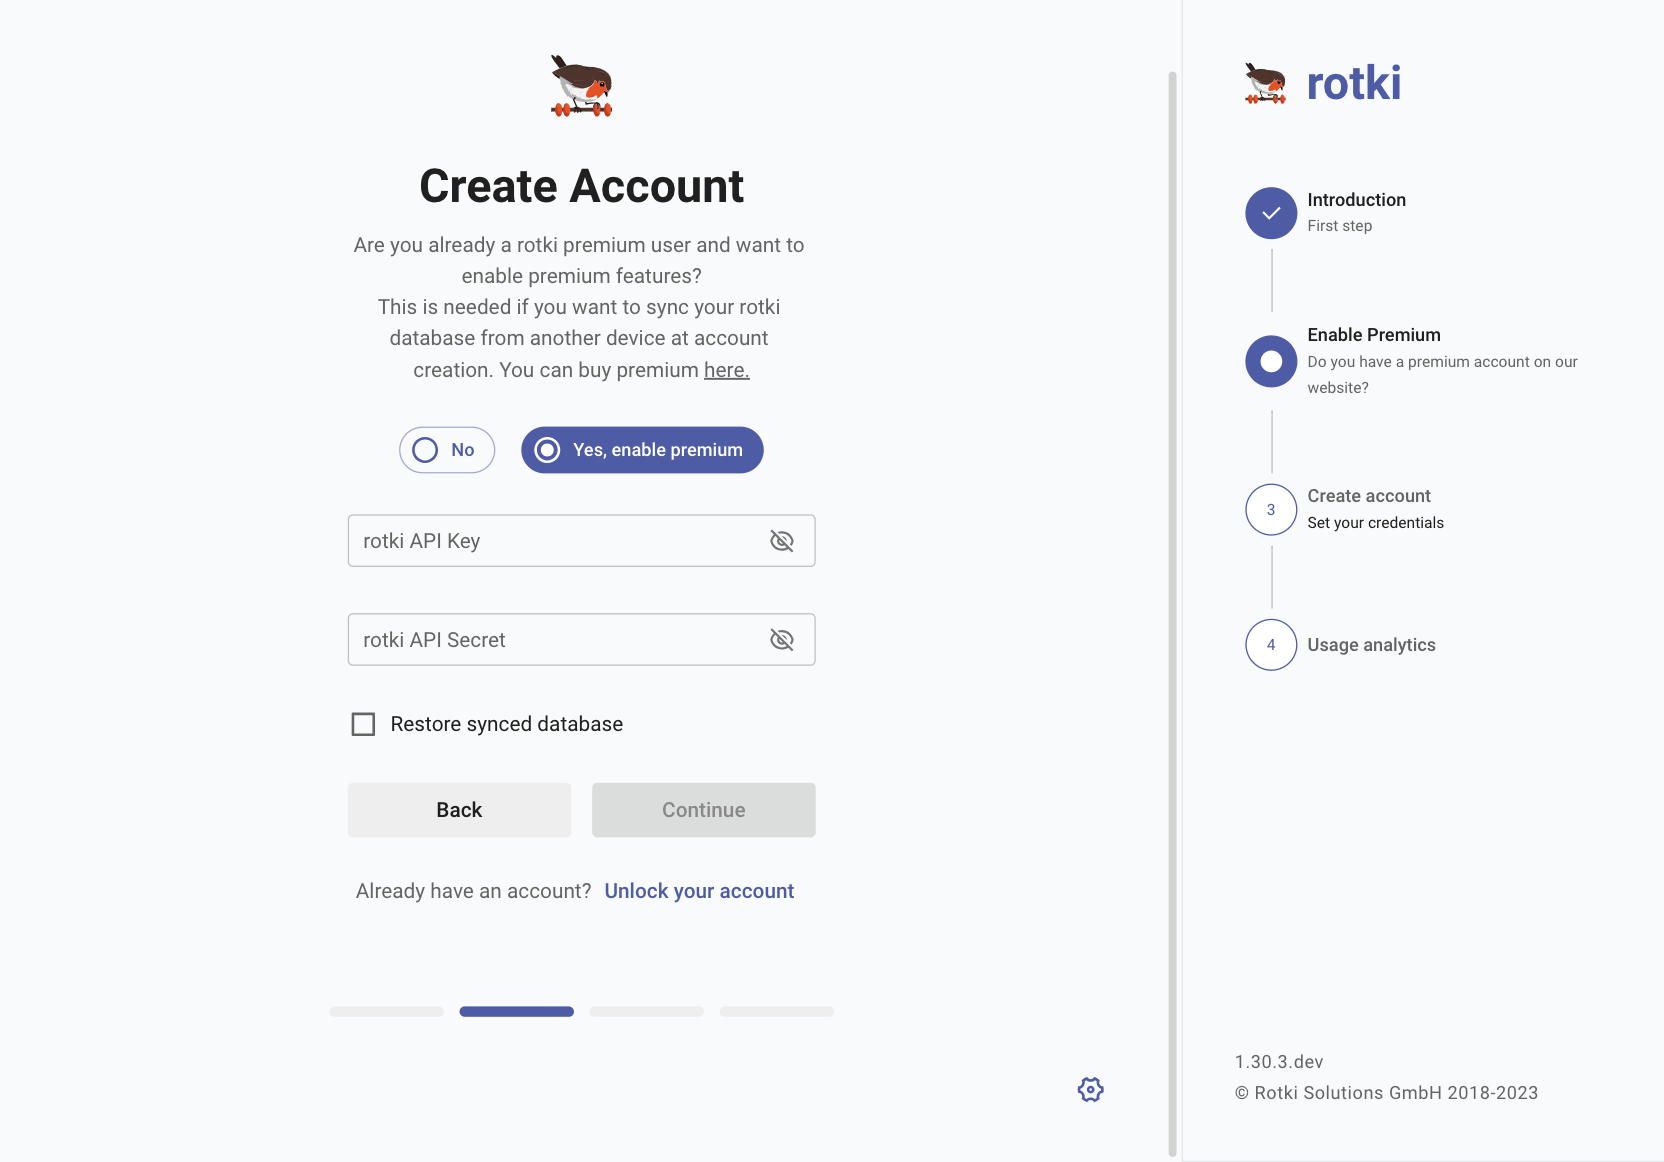
To create a local account, press Create Account. If you have a premium subscription, you can link this local account using API keys.
To restore an account with premium sync during account creation:
- Enable premium.
- Enable Restore synced database.
- Enter your API Key and Secret (found on your account page at rotki.com).
Then click Continue.
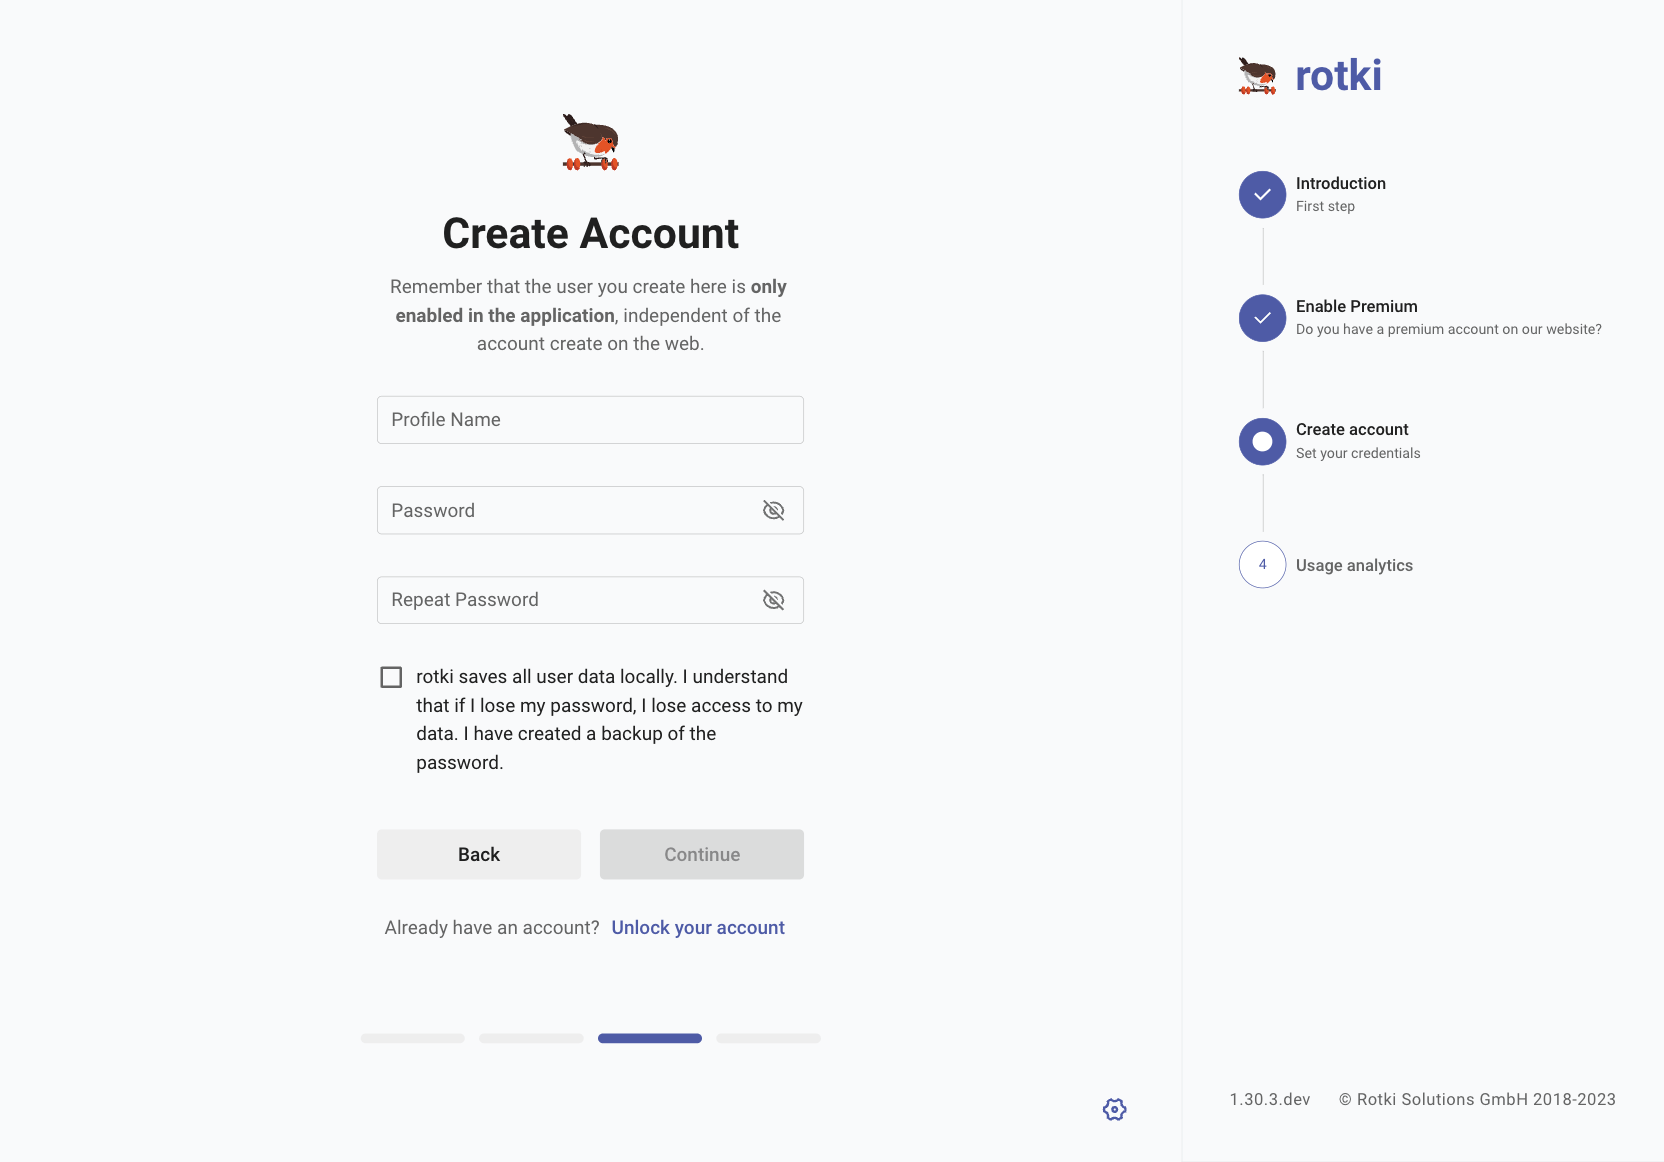
Next, provide a profile name and a password:
- Profile Name: An identifier for your local database. It doesn’t need to match any previous username or your premium subscription username on rotki.com.
- Password: Do not forget this password. It encrypts all your local files.
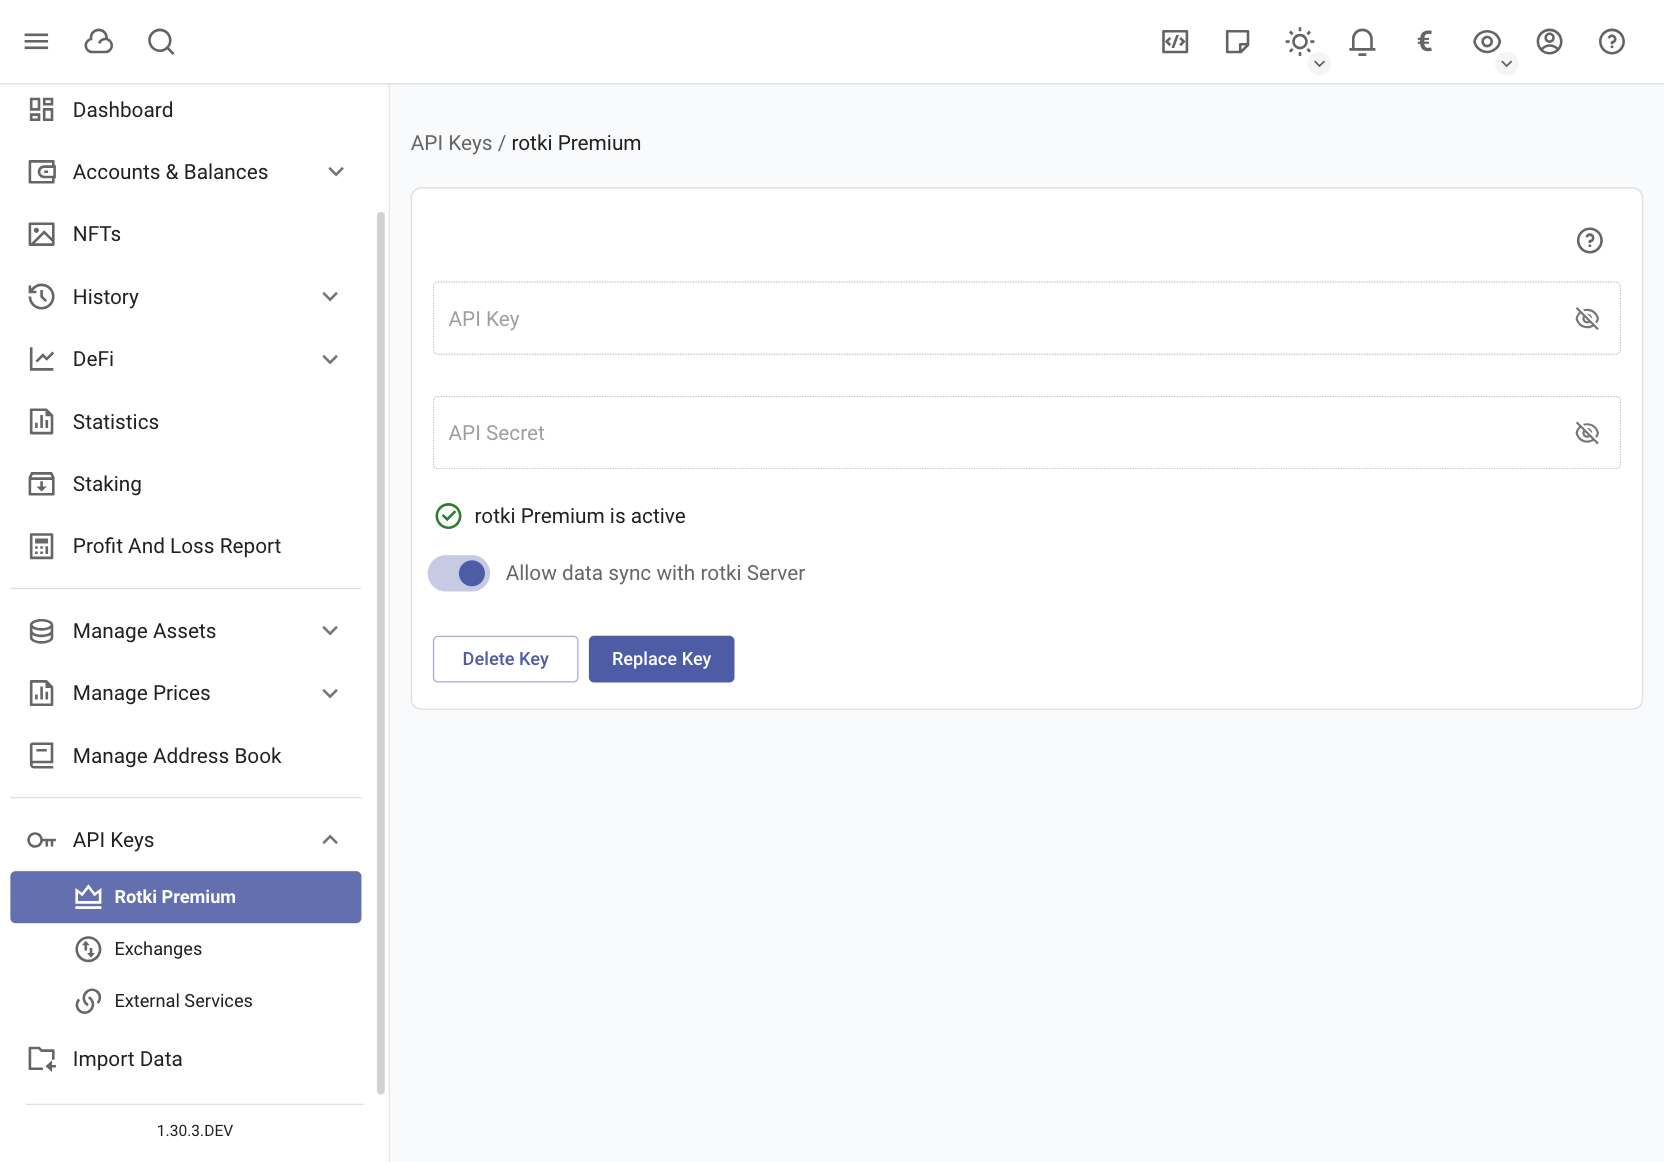
For a new account, you can add the premium API key and secret during setup or later using Setup rotki premium.
Restore a Backed-Up Database (Premium Users Only)
Overview
If you need to move your rotki database to a new device (e.g., if your old one was destroyed), you can manually do this as long as you have backups. As a premium user, you can also restore the encrypted database backed up on the rotki.com server.
Steps to Restore
- Follow Instructions: Refer to the instructions in the previous section.
- API Key/Secret: Add your API key/secret.
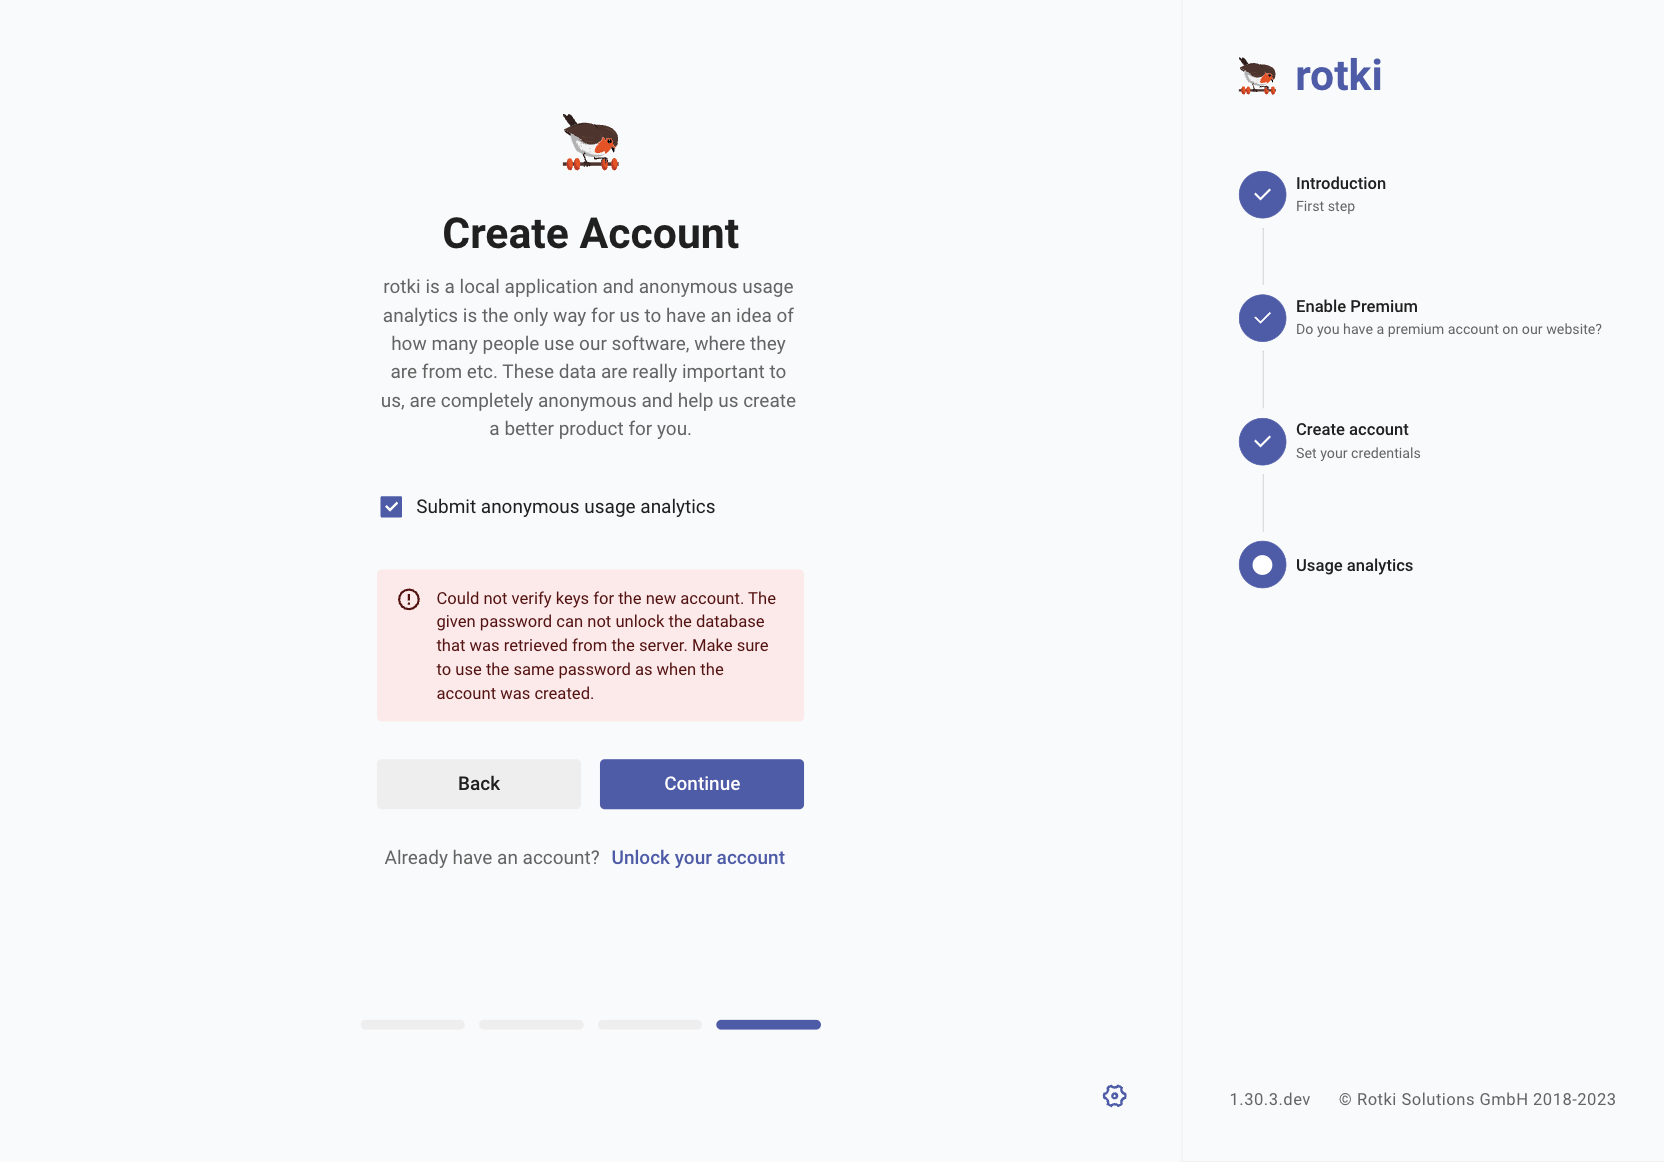
- Password: Use the same password as your local user database. Do not use your rotki.com account password.
Note: If the password is not the same, the database won't open.
Sync Data
Refer to the Sync data with rotki server section to understand how the premium subscription works with multiple accounts/devices and how to sync your data with the rotki server. Syncing is disabled by default.
Important Considerations
- User Database vs. Global Database: Syncing only involves the user database, not the global database.
- Global Database: Contains all assets data, global address book for names, and historical prices. Premium syncing does not store your global database, so it is essential to manually move this database as well. You can see the guide of how to accomplish it here.
Alternatively, you can use the Exporting and importing user asset function instead of moving the entire global database.
Use an Account from a Different Installation
Moving Data
To move your data to another system or restore it:
- Identify the rotki data directory on both the source and destination systems.
- Move the entire data directory from the source system to the destination system.
- Ensure both systems use the same version of rotki.
Sign-In
To sign in with your local rotki account, enter your profile name and password at the sign-in prompt.
NOTE
This is not the same as the online account you create at rotki.com for a premium subscription.
Set Up rotki Premium
If you decide to purchase rotki Premium later, you can set it up here
Sync Data with rotki Server
Enable Data Sync
To back up your data on the rotki Server:
- Turn on "Allow data sync with rotki Server". This allows you to restore your data on any account/device using the same API key/secret and account password.
Multiple Accounts/Devices
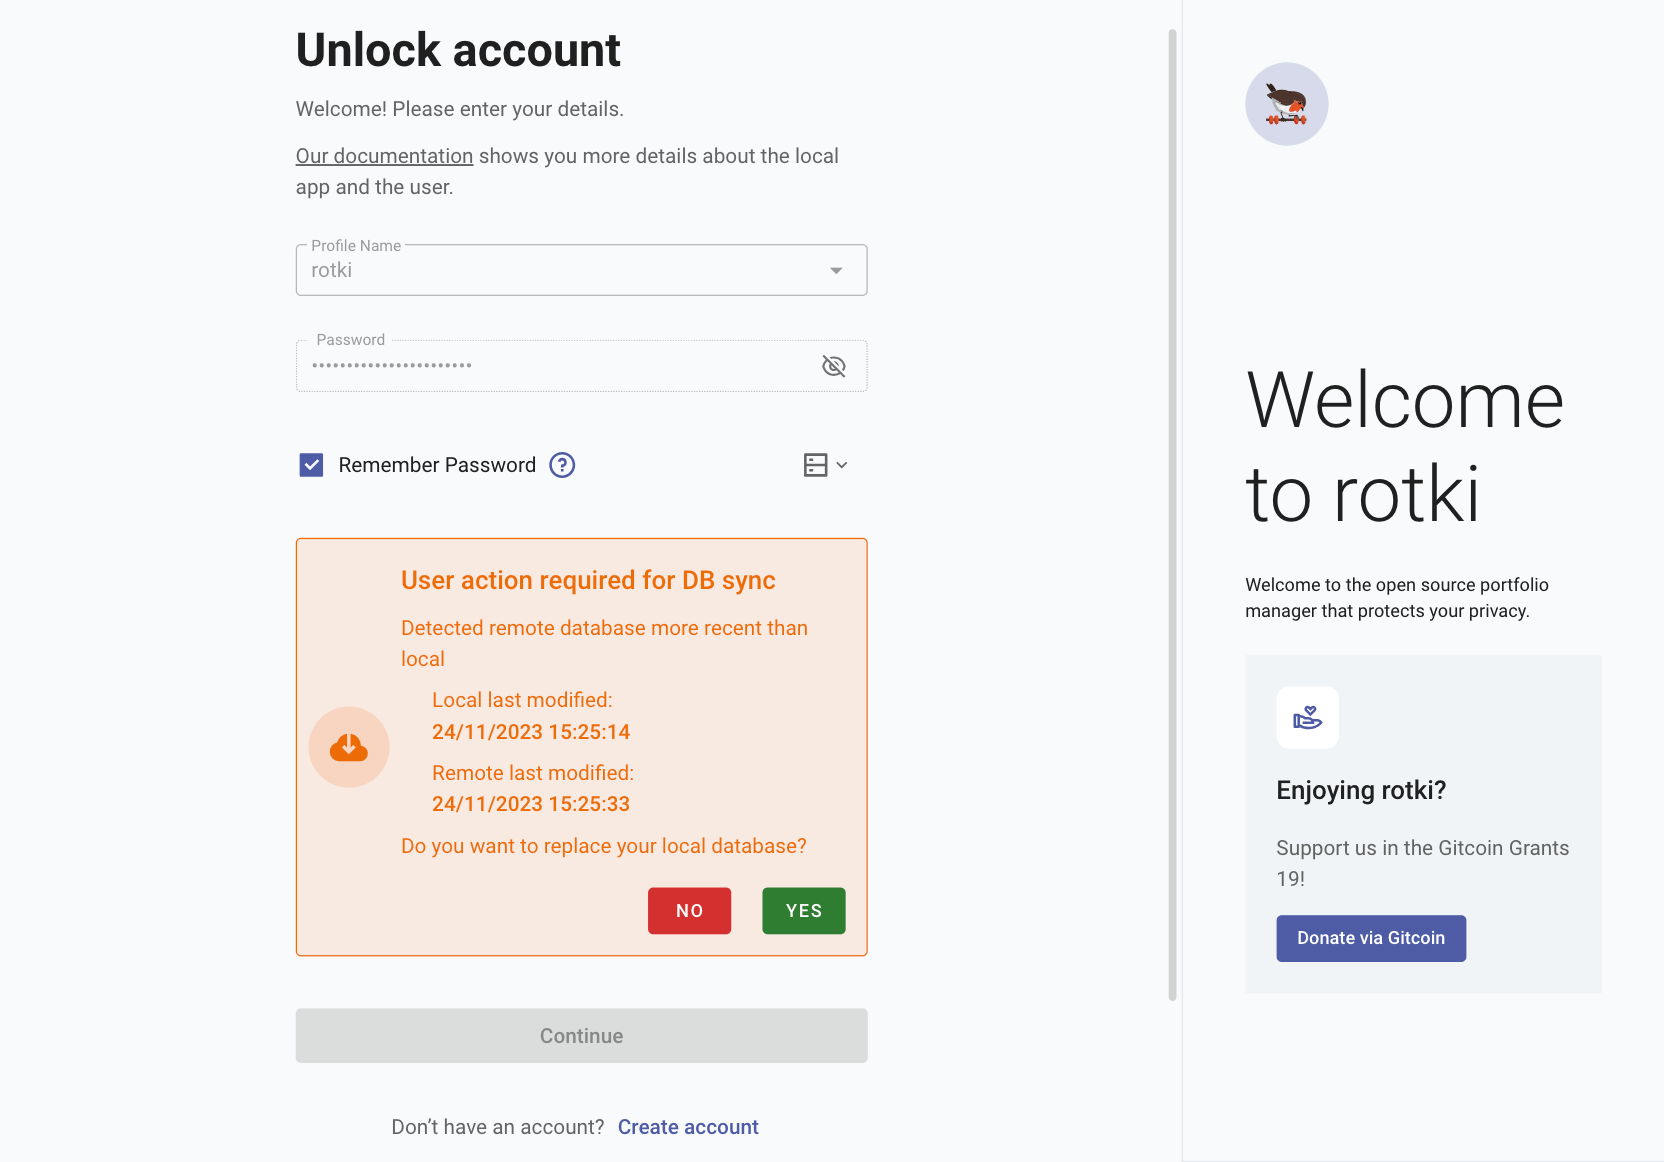
If you use multiple accounts/devices, the one with the most recent login will upload the latest data to the rotki Server. Using the same account from another device may prompt you to replace your local database with the remote one.
WARNING
Do not run rotki on multiple accounts/devices at the same time, as this opens up the risk of several issues relating to data consistency.
Manually Move Global Database
You can also manually move the global database containing assets from one system to another:
- Locate the rotki data directory on the source system.
- The global database is located at
/global/global.dbunder the data directory above. Move it to the equivalent location on the new system.
Manual Sync
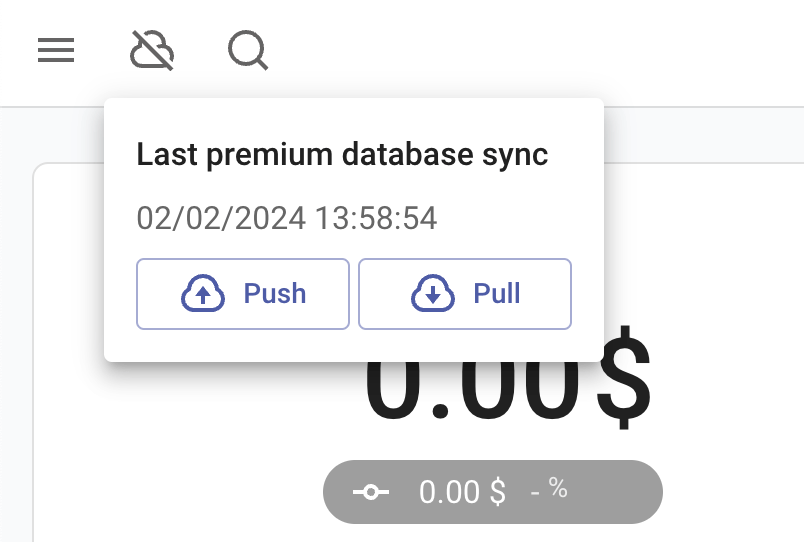
You can manually sync your database by clicking the "cloud" icon in the toolbar.
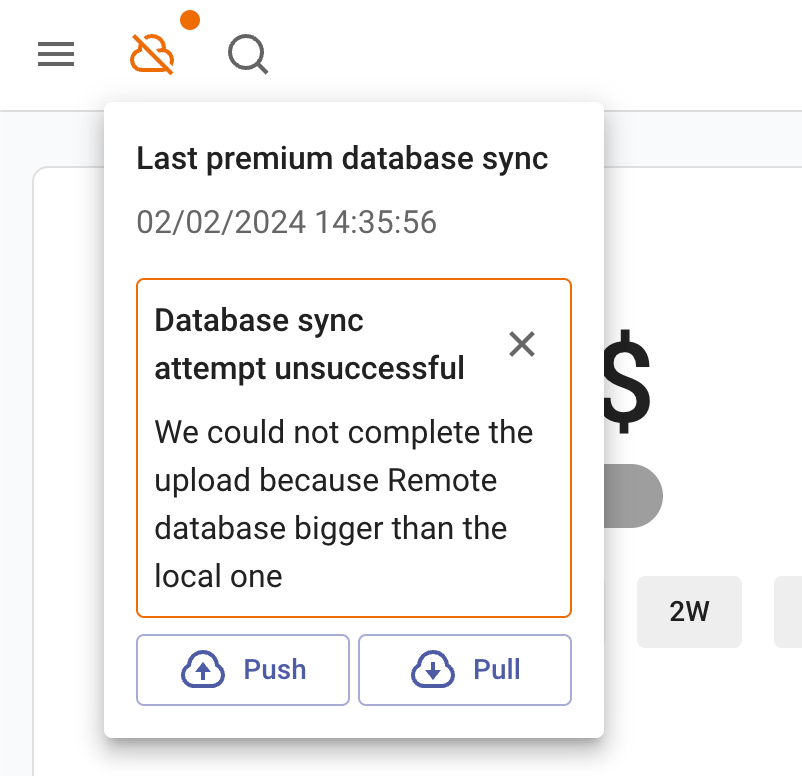
If automatic sync fails, a message will appear. For messages like "Remote database larger than the local one," you can perform a "force push" by clicking the button.
Upgrading rotki After a Long Time
Upgrade Steps
If you haven't used rotki for more than a year and a half and want to keep your data, follow these steps:
- Download rotki 1.25.2: Get it here.
- Install and Log In: Install rotki 1.25.2 and log into your account. This will update your database to version 34.
- Download the Latest Version: Get the latest version here.
- Install and Open: Install the latest version and open your updated database.
Supported Database Versions
- rotki 1.25.2 and Earlier: Supports database versions 1 to 34.
- rotki 1.26.x and Later: Supports database version 26 and above.